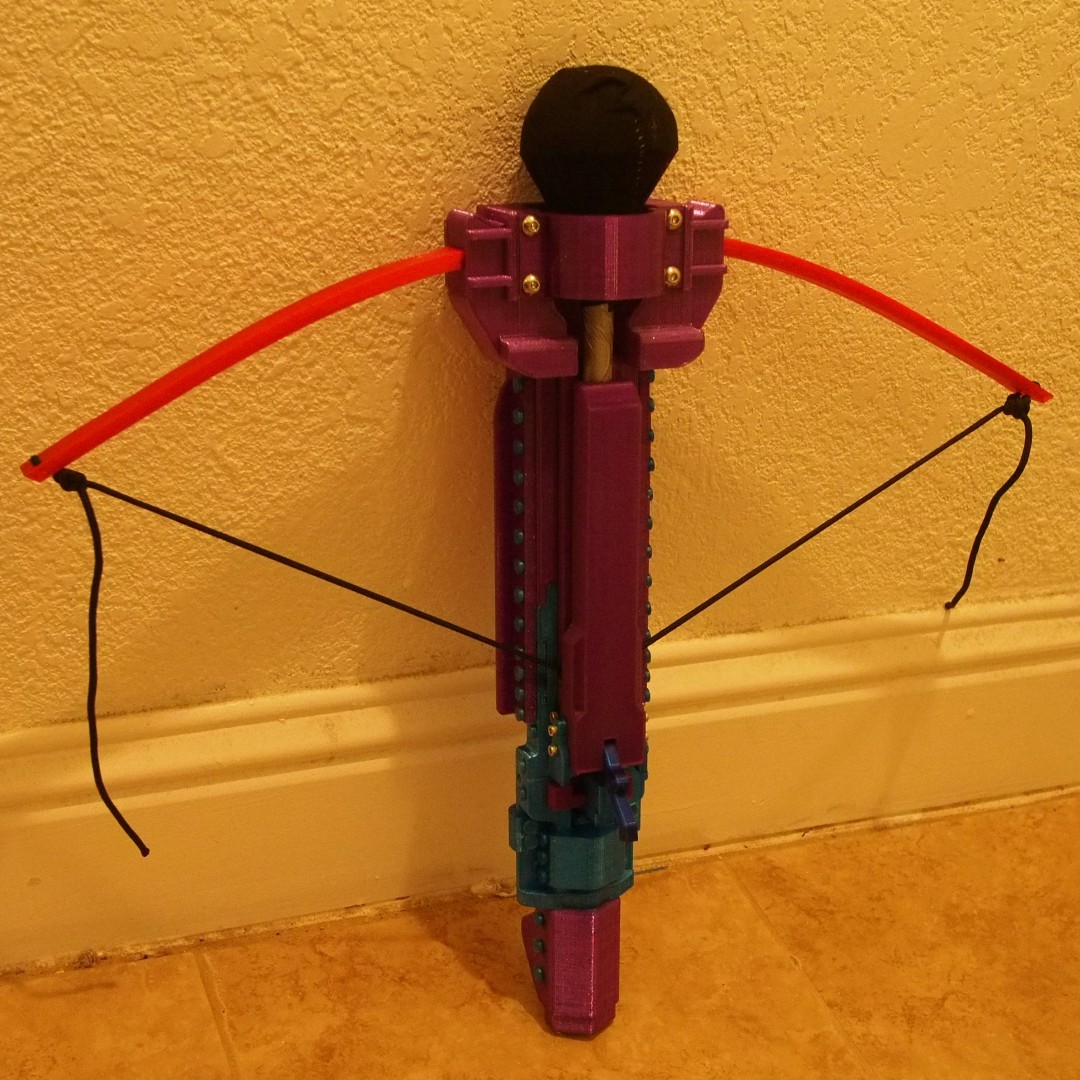
Hand Crossbow (LARP / Combat Sport)
prusaprinters
<p>For assembly, see the original Nerf Crossbow Assembly video (below). Note that some parts have changed and will look a bit different, and this no longer includes the two sight pieces and front covers (not integrated into the front). </p><p>Strongly recommend all parts should be printed in PETG or better. Avoid PLA especially for the arms. </p><p>Using a 0.4mm nozzle, 0.25mm layer heights, for the front I recommend 4 perimeters and 8 solid top and bottom layers. For all other parts, 3 perimeters and 6 solid top and bottom layers. Infill of 10% is fine for most parts, but for the front you may need to add 20% infill around the holes that the arms are inserted into. For the arms, perimeters should be set to an arbitrarily high number so they consist of nothing but perimeters. For the most powerful arms, increase the extrusion width to between 0.6mm and 0.7mm (even on a 0.4mm nozzle) and set your extrusion multiplier to just under the point of overextruding, I use an extrusion multiplier of 1.05 (some experimentation may be necessary, and watch your prints in progress closely to make sure they don't glob up or fail). The PrusaSlicer version 2.5 profiles I use are included. </p><p>For the axle that holds the trigger lever, it's possible (but not recommended) to use 3d printed one. However I highly recommend using the hollow one and embedding a m3 40mm screw through it for strength. For all the 3D printed rivets or mounting pins, M5 screws of appropriate lengths can be used instead, if desired.</p><p>"crossbow5 string stop side bracket h.stl" can replace the two 9mm pins on the spring stop part. This makes it easier to remove the top cover, trigger, etc.</p><p>An Ender 3 bed compression spring is used in the bottom spring holder, and a spring kit spring is used in the rear spring holder. </p><p>Ender 3 spring kit: <a href="https://www.amazon.com/gp/product/B07V6YCYP5">https://www.amazon.com/gp/product/B07V6YCYP5</a></p><p>General spring kit (note there are many like this, this is just one, you may find others that are less expensive): <a href="https://www.amazon.com/gp/product/B000K7M36W">https://www.amazon.com/gp/product/B000K7M36W</a></p><p>I know there is a spring-less trigger that the modular slingbows use, but I don't think I'll be adapting it to this one because the long trigger pull required isn't too desirable for a hand crossbow.</p><p>Included the source files for the (lower) rail and the (upper) string stop so that it can be adapted to the desired bolt size. Note that bolts should have a reasonably wide diameter (minimum 10mm, preferably 13mm or larger). </p><p>Some notes on theory and testing: In all my experience, the top rail, which extends almost as far as the bottom rail, is critical when using such short bolts with large, heavy heads and no fletching. Without it, the bolts had a tendency to flip as they came off the end of the rail. </p><p>Options / Variants:</p><p>Included is an optional pistol grip, it is not the most ergonomic but it does the job if that's what you want. See: “crossbow5 grip pistol-under b.stl” and “crossbow3 stock pistol h.stl”</p><p>Also included is the pieces used for a “double” or stacked version. While this loses some functionality, such as the ability to fire it one-handed and the pull trigger, it's still very compact and can be fired twice in quick succession. Note the stacked version is based around bolts with 2.75" diameter heads, so if your bolts are using heads larger than this, they likely won't fit.</p><p>Included is a lever stock version that is an experiment, primarily to design a device that can be fired while also holding a weapon in each hand (hold the foregrip with your off hand, place the stock against your body, and slide the solid part of a weapon like the hilt of a sword or dagger in your main hand down the top of the device so that it hits the lever trigger and fires a bolt.) Alternatively this single-piece lever trigger can be used easily if the weapon is held in both hands (with or without the stock). This version is somewhat shorter than all the others since it eliminates the pull trigger and rear spring box. </p><p>If you want more power, and are using bolts with round heads made from foam balls that have been sliced in halves, included is a slightly longer version with an open, multi-piece front. This will require multiple M5 screws [ m5 40mm (x4), m5 25mm (x4), m5 20mm (x4), m5 hex nut (x4) ] to assemble so I recommend getting a m5 screw kit for this option. For this, I also recommend using the slightly longer tapered arms (crossbow_arm_short, crossbow_arm_short_mirrored) as well as the new “arachne” option in PrusaSlicer 2.5.0+. </p><p>Finally included is a front piece that allows the use of taller arms to support the vertically tapered arms used with the slingbow family, however in my testing this was not able to deliver any more velocity or power for a device of this size. </p><p>TODO: Add a breakdown / maintenance video. </p><p>Demonstration Video:</p><figure class="media"><oembed url="https://www.youtube.com/watch?v=QW3nSPwbKFE"></oembed></figure><p>Build Video:</p><figure class="media"><oembed url="https://www.youtube.com/watch?v=lI8SPmZvMAY"></oembed></figure>
With this file you will be able to print Hand Crossbow (LARP / Combat Sport) with your 3D printer. Click on the button and save the file on your computer to work, edit or customize your design. You can also find more 3D designs for printers on Hand Crossbow (LARP / Combat Sport).
