Hampelmann ich meine Bärchen
prusaprinters
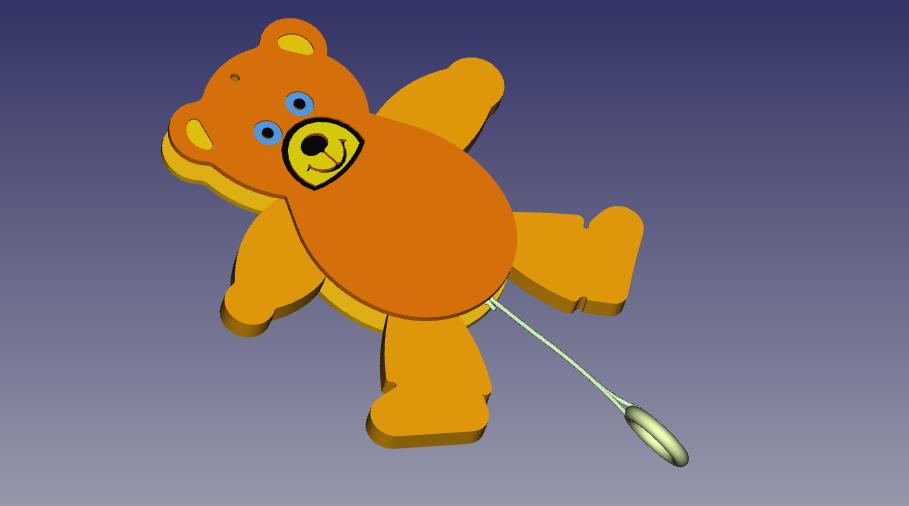
<p>Die 7 Teile ausdrucken <i>(oder 8 mit Zugring)</i>. </p><p>Material am besten ABS oder PLA <i>(PETG oder PC geht natürlich auch)</i></p><p>Füllung min. 15%</p><p><strong>Rückseite 01</strong> flach hinlegen, die 4 Gliedmasse einsetzen <i>( sollten beweglich sein)</i>. Zum eventuellen schmieren kann ein wenig mit wasser verdünnte flüssige Seife verwendet werden.</p><p>Die <strong>Zahnstange 01</strong> sollte vor dem einsetzen unten mit einem Zugbändchen versehen werden. <i>(und optional an der oberen Öse mit einem sehr kleinen Haushalts-Gummi-Band welches über die freie Achse im Kopf eine bessere “Rückbewegung” ermöglicht, dies sollte nicht erforderlich sein )</i>.</p><p>Die <strong>Vorderseite 01</strong> nachdem die 4 Gliedmasse und die Zahnstange einsetzt sind mit den rückseitigen Stiften in die Hohlwellen einsetzen. Diese Stifte sind eine leichte Spielpassung. Je nach Drucker-Kalibrierung und Quallität sollte die <strong>Vorderseite 01</strong> leicht zu fügen sein, für dauerhaften Halt ist eventuell <strong>ein wenig</strong> Klebstoff erforderlich.</p><p>Nachdem man jetzt noch einen Befestigung-Faden oben am Kopf angebracht hat kann das Hampelmänchen (Bärchen) aufgehängt und “<i>losgehampelt”</i> werden.</p><p>Viel Spass ;-)</p><p>Nachtrag: Da die Rückseite eine plane Fläche hinter der Mechanik hat kann man ihn auch z.B. mit doppelseitigem Klebeband auf eine ebene Fläche kleben.</p><p>-----------------------------------------------------------------------</p><p>Google translates:</p><p>Print out the 7 parts (or 8 with pull ring).</p><p>Material best ABS or PLA (PETG or PC are of course also possible)</p><p>filling at least 15%</p><p>Lay back 01 flat, insert the 4 limbs (should be flexible). A little liquid soap diluted with water can be used to lubricate.<br>The rack 01 should be fitted with a drawstring at the bottom before it is inserted. (and optionally on the upper eyelet with a very small household rubber band which allows a better "return movement" via the free axis in the head, this should not be necessary).<br>After inserting the 4 limbs and the rack, insert the front 01 with the pins on the back into the hollow shafts. These pins are a slight loose fit. Depending on printer calibration and quality, Front 01 should snap together easily, a little glue may be needed for permanent hold.<br>After you have now attached a fastening thread to the top of the head, the jumping jack (little bear) can be hung up and “start jumping”.</p><p>Have fun ;-)</p><p>Addendum: Since the back has a flat surface behind the mechanism, you can also stick it to a flat surface with double-sided adhesive tape, for example.</p>
With this file you will be able to print Hampelmann ich meine Bärchen with your 3D printer. Click on the button and save the file on your computer to work, edit or customize your design. You can also find more 3D designs for printers on Hampelmann ich meine Bärchen.