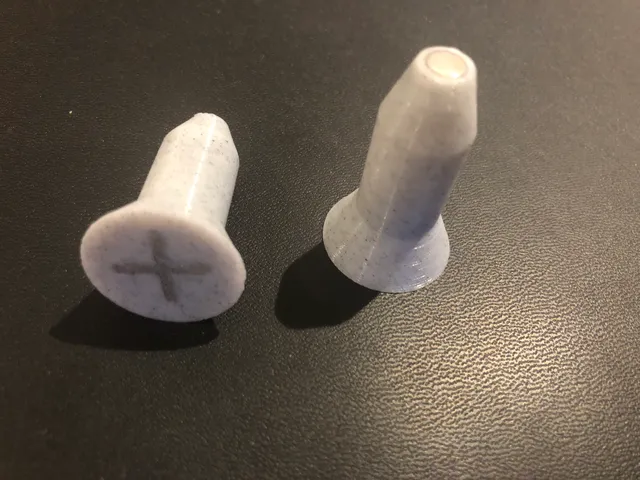
Hammer Magnet Nail for Friction Fitting
prusaprinters
Easily deposit magnets in without worrying about getting the polarity wrong or them flipping when trying to hammer them in. Also makes it super easy to get it lined up just right.You ideally want to print two of these, one for positive and negative. Consistency will be helpful. I like to keep the first piece or bottom piece of whatever that needs magnets to be negative, and positive next but you might already have a different system for like a GridFinity Base so just use whatever works for you.I'd recommend 100% infill (10 grams total for 1) since you will hit it with a hammer.Current model supports 6x2mm magnets. The hole is 6.1mm to friction fit it in yourself, you can adjust the scale if needed. If it's too big you can also just easily glue it in. If it's too tight, Dremel with a 5mm cylindrical bit works wonders for friction fitting magnets that are way too tight.You can also use different colors to help differentiate them, like red (+north) and blue (-south).Note: If you don't care too much about the specifics its easy to just know positive goes in one end and negative in the other and it just works. However, if you are thinking about what polarity the exposed side should be rather than what side to hammer it into because you want north facing up, then just understand things will be flipped. The magnet nail's outer side is the side that goes in the plastic and won't be exposed, so you'd need to hammer a negative into a positive which can be confusing, perhaps consider using text instead or polarity to prevent confusion if you care about the exposed side instead.
With this file you will be able to print Hammer Magnet Nail for Friction Fitting with your 3D printer. Click on the button and save the file on your computer to work, edit or customize your design. You can also find more 3D designs for printers on Hammer Magnet Nail for Friction Fitting.
