Hair Ornament: Get Girls Excited About STEM!
thingiverse
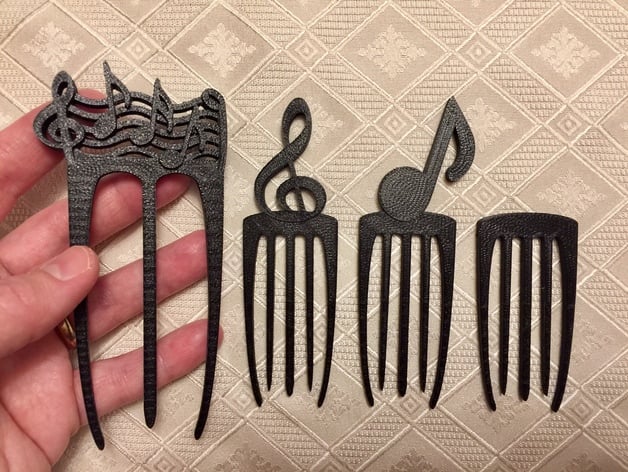
This project is a remix of the lovely Art Nouveau Hair Ornaments by WeeksB. You can print the music ones here, or follow these steps to create one for yourself! Note that there are two sizes, the smaller one being the original size/design by WeeksB, and the larger one altered to work for people with more hair. I'm also uploading the STL file created in the how-to video. Print Settings Printer: FlashForge Creator Pro Rafts: No Supports: No Resolution: 0.1 Infill: 100% Notes: 2 shells Be sure to print at 100% infill so it's stronger. Post-Printing After Printing: Solid colors are great, but try painting the top design in different colors, even metallic gold / silver. I highly recommend sanding the tines until they're Super Smooth! Remember to sand safely: don't breathe the dust and rinse with cold water when you're done sanding. How I Designed This Started with the Art Nouveau Hair Ornament by WeeksB. Removed top in Tinkercad Added various top designs (see below for how to) Overview and Background Create your own "uniquely yours" hair ornament. This is an artsy approach to design - girls of all ages with basic computer skills can do it! Lesson Plan and Activity Here's a video walkthrough: https://youtu.be/D1OaTZaojsk Download hairfork_plain.STL or large_hairfork_plain.STL Open STL file in Tinkercad Go to Pixabay.com and search for a vector graphic that you like. Simple, large designs work best. Download the vector graphic that you like Log on to Selva3D.com and upload your chosen vector graphic Download the free version of the resulting STL file Import the STL file into your Tinkercad file Resize and arrange the top to your liking. Make the height of the object 4.5. Download your STL file from Tinkercad Print it on your printer! Materials Needed Computer with internet access Tinkercad.com account Free Selva3D.com account 3D printer & filament Skills Learned Tinkercad 2D to 3D Basic Design Basic Engineering Working With STL Is It Printable? Duration of Lesson 1 hour, if all accounts are easily available to students and students have had prior instruction in basic Tinkercad operation (how to move/resize things, how to activate the ruler and change dimensions - Tinkercad has great tutorials for this) Preparation Make sure computer & internet is working! Make sure each student has access to an account at Tinkercad.com and Selva3D.com. Make sure you school district allows access to Pixabay.com (a great free source of vector graphics). You the teacher need to understand what is printable and what is not so you can pass the knowledge on to your students. Basic knowledge of Tinkercad operation is also helpful. References
With this file you will be able to print Hair Ornament: Get Girls Excited About STEM! with your 3D printer. Click on the button and save the file on your computer to work, edit or customize your design. You can also find more 3D designs for printers on Hair Ornament: Get Girls Excited About STEM!.