Haenau - Big Box
thingiverse
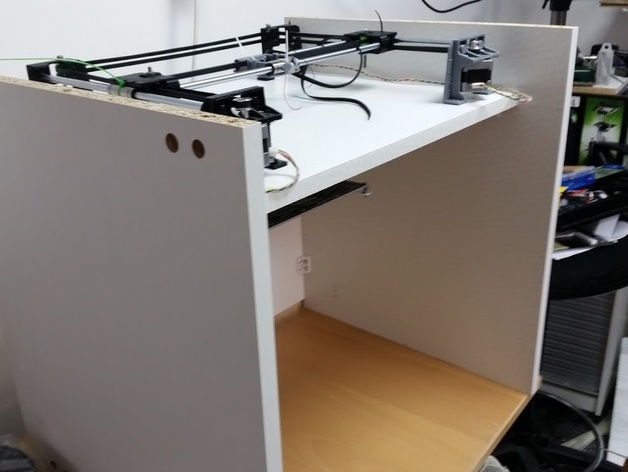
This is my CORE XY box printer, With as few as ten parts - truly just six components that need to be printed twice - a feat of efficiency that saves on construction complication. I have designed this printer to require only the bare essentials: a hand drill, some drill bits, screwdriver, saw, and a good metal ruler for measuring accuracy. Super cheap to assemble is essential, I've managed to minimize construction complexity while designing parts to fit standard 8 mm smooth rods. You can easily find almost any length (pairs - especially for X & Y) of these rods. Inexpensive, too, as it does not require costly maker-beam, aluminum extrusions or other expensive materials. Here's an early test video: https://goo.gl/photos/ZvNmUdDvC9jRPmzk7 It's worth noting that I would recommend getting a genuine E3D hot end to make the most out of this setup, Considering you will have saved money by opting for cheaper alternatives, the investment is well worthwhile. To get more information about this project in the coming days, feel free to reach out to me. Swansea-based individuals are welcome to check out the prototype at Swansea Hackspace, located at http://swansea.hackspace.org.uk/. How I Designed This Printer: Step 1: Mark perfectly parallel lines on another sheet of wood. Next, assemble the box, using a shelf-pack from B&Q - an excellent choice for its affordability and high quality. About 25% cheaper than a standard sheet of contiboard, this 'shelf-pack' option offered an even more affordable way to build this project, The cost-effectiveness of choosing a genuine product instead of opting for cheap alternatives has made it possible for individuals with limited budgets to assemble the printer without compromising on performance or quality. Here are the necessary components required: • Perfectly square sides, each 18 mm thick • Good quality 'wood' from which this design has been crafted. • Corner brackets A few screws and some small corner brackets are needed, Yes I know it should of been printed but at least it was available anyway, Setting up the Z mounts can be somewhat complicated due to their parallel requirements, two-dimensional to be precise. However, using a spare shelf helps to overcome this difficulty as the following steps explain. Step 1.4 Align The Dimensions A: Set a perfect square line on your top by aligning the dimension from one end, overlapping it perfectly and check it for any discrepancies that would prevent flat surfaces. Assemble all parts (belts free of course) before placing the gantry in its appropriate location atop it, Once there tipple-check, twice for extra precaution. Double-and-Tipple Check The Print Head Next ensure your printer's print head has access to all 4 corners of the heated plate (which should already have a built-in hotend) Lightly mark these places.
With this file you will be able to print Haenau - Big Box with your 3D printer. Click on the button and save the file on your computer to work, edit or customize your design. You can also find more 3D designs for printers on Haenau - Big Box.