Hackers Kit for the fablab_ruc_dk_DIY-digitizer
thingiverse
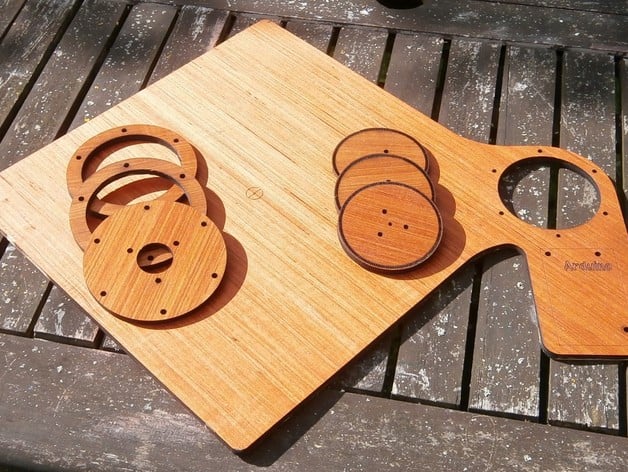
2D capture it's ideal for CNC or laser cutting Saw this design from fablab_ruc_dk. Not having any Encoders I thought maybe I'd play around with some old mice and optical end stops before ordering Encoders from China. The holes are all the right size for the 6mm Shaft 600P/R Incremental Rotary AB phase encoders, plus extra wheels with the 120 degree holes for mounting the laser cut encoders. I haven't made any mounts yet for the mouse innards or opto endstops because this is an experimental hack. Another thought was to try high-grade, high-precision potentiometers in a potential divider circuit and use analog-to-digital (atod) inputs on the Arduino. So here's my hacker-type redesign - encoders based on 0.15mm to 0.17mm laser kerf at 2 degrees spacing, because anything closer wouldn't leave any material left over. I added an Arduino mounting area so everything is kept together on one platform. Original design http://fablab.ruc.dk/diy-digitizer/ Great links for mouse repurposing: https://sourceforge.net/projects/mousesensor/files/ ,http://thedenneys.org/pub/robot/encoders/, http://ferretrobotics.blogspot.co.uk/2011/01/interfacing-optical-mouse-usb-with-pic.html, http://www-bsac.eecs.berkeley.edu/~sbergbre/research/publications/OpticalMouseHack.pdf ,http://diy3dprinting.blogspot.co.uk/2015/05/diy-contact-3d-scanner-with-arduino-and.html ,http://www.wildcircuits.com/2013/03/optical-mouse-hacking.html Instructions: Get 5mm plywood or 3/16th if you're in the US. All holes for fixings and mounting are 3mm screws, with Arduino mounting holes using standard PC motherboard brass standoffs. The captive nut in the T joint is a 3mm half-nut - they seem to work much better than full nuts for these joints. In the UK, it's not possible to get those nice square nuts everyone uses for these T-joints. Vector engrave violet lines with settings 60-80 mms at 20% power on 60W laser. Next laser-cut red lines as holes - settings 9-12 mms at 90% power on 60W laser. Finish with black lines by laser cutting, using the same power and mm settings. http://diy3dprinting.blogspot.co.uk/2015/05/diy-digitizer-with-detailed.html?utm_source=dlvr.it&utm_medium=facebook http://fablab.ruc.dk/diy-digitizer/
With this file you will be able to print Hackers Kit for the fablab_ruc_dk_DIY-digitizer with your 3D printer. Click on the button and save the file on your computer to work, edit or customize your design. You can also find more 3D designs for printers on Hackers Kit for the fablab_ruc_dk_DIY-digitizer.
