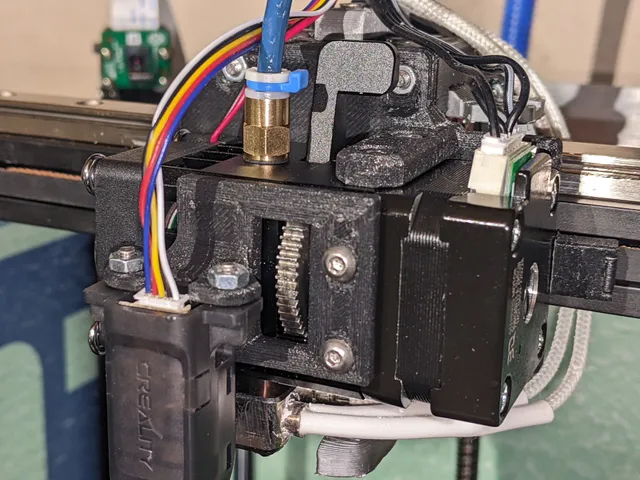
H2 Mount for Ender 5 using EVA Carriage
prusaprinters
Remix of https://www.thingiverse.com/thing:5151234, but it wont let me put that in the actual remix link boxNOTE: Update posted with H2 mounting holes 4mm lower to fix clearance issue with the duct tips and the shorter heatbreak in the high temp version of the H2. Also the plate has wider slots for belts in an attempt to be compatible with Mercury One.1 beta as of August 1, 2022. Belt routed in behind the plate, back out the front, and out to the sides to be clamped with your favorite 2GT belt ends. Updated version also can have the H2 installed while the plate is already bolted to the EVA 2.x carriage if you're willing to use the two mounting holes on top of the extruder and only the lower one on the back of the extruder. You can sneak an allen key in there to tighten up that single M3.Used with Flatesian back, standard top/bottom of EVA system, and RHD 3-prong fan duct.H2 mount plate print notes:Dimensional accuracy is paramount. The H2 mounting screws horizontally and vertically are TIGHT to keep the whole thing from flopping around in usePriline PC-CF filament used - Lots of other things would work tooUsed 6 perimeters for max strength on the holesSolid infill used - Wanted max rigidityObviously print on the backI used auto-generated supports to help keep the screw head pockets on the back and the screw holes/pockets on the “tongue” well formedCable tower print notesPETG - Wanted some flexibility to thisUsed 6 perimeters and 1.5mm min top/bottom thicknessUsed approximately 30% gyroid infill to give it some substance so the cables pulling on it dont fold it over or break the outer shellInstall 2 heatset inserts instead of nuts to mount the “claw” for zip-tieing the cable bundle to Build advice / order. There may be more than one way to skin this cat, but the H2 mounting complicates the normally easy EVA assembly. This is how I did it:Put the 4 nuts into this to connect it to the rest of the carriage (2 top, 2 bottom)Put the 3 nuts into the flatesian back for the cable towerPut the nut into the x axis endstop piece which is used to help stabilize the tower against the top carriage printed pieceAssembly the top carriage, flatesian back, and cable tower, using:3 short M3s connect the tower to the back1 longer M3 connects the tower to THROUGH the slot in the printed carriage top and into the X endstopPut the 4 M3x35's through the back and top/bottom in preparation for mounting the face (with belt and h2 already installed) laterMount the assembly of top, back, tower, bottom to the MGN carriage with the standard 4 M3's for EVA assemblyWrap the belts around the slots on the face plate we printed. I used one standalone endstop like this on the stepper side of the mounting plate, and a loop clamp like this on the fan side of the mounting plate. Hopefully youre starting with a virgin length of belt…. leave yourself plenty of extra at this pointMount the H2 to it's plate with 4 M3 screws, 2 from the back, 2 from the top, making sure the belts stay in their slotsMount the front plate + belts + H2 to the rest of the carriage using the 4 M3x35 screws we pre-positioned beforeAdd the fan duct to the bottom, do your cable routing, and fire it upMy notes:I've built this up on a heavily modified E5Pro. I have the Printermods Y axis rail brackets and MGN9's for the Y travel (mounted outside the frame… they tell you to mount the rails on the inside, but that puts them in the way of other things). I have the Y end stop moved on the inside of the right hand side Y extrusion, interfacing with a stop block mounted on the bottom side of the original right hand side Y plate.
With this file you will be able to print H2 Mount for Ender 5 using EVA Carriage with your 3D printer. Click on the button and save the file on your computer to work, edit or customize your design. You can also find more 3D designs for printers on H2 Mount for Ender 5 using EVA Carriage.
