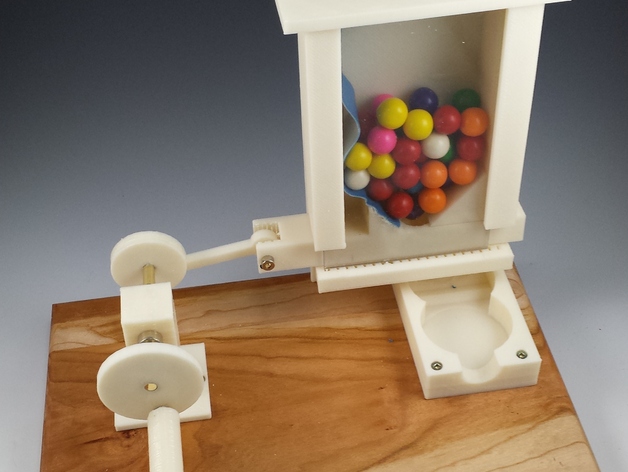
gumball machine
thingiverse
Rewrite: A hand-cranked gumball machine awaits you in this project. Watch a video tutorial here: http://youtu.be/Wts8OPt1Hdw. To create it, print one of each STL file and ensure that the base is printed with support material. Use settings like .4 nozzle, .4 infill, and layer height .2. You will also need a piece of plexiglass (5 3/4" x 3 5/8"), flexible vinyl fabric (1 1/8" x 6"), brass rods of various lengths (1 1/2" x 1/4", 3 1/2" x 1/4", 3" x 1/4", 1 1/2" x 1/8"), three 1/4" wheel collars, and two 1/8" wheel collars. Additionally, prepare a wood base (11x7x3/4") and gumballs for the machine. Assemble your gumball machine by gluing the receiver to the base on the right-hand side using an acetone and ABS mixture. Attach the vinyl fabric to the slide triangle and the inside left wall of the base. Follow the pictures provided for guidance. Next, glue the brass rods to their respective hubs, ensuring that the long rod is threaded through the hubstand first. Drill both the handle and the hubstand with a 19/64" drill bit to facilitate smooth spinning. Add wheel collars and attach everything securely to the wood base before adding gumballs and the top. Finally, add rubber feet to the bottom of the wood base for stability. The ABS glue seems to be holding up well, but if the hubs become loose, you may need to pin the brass rods to the hubs for extra security. Most importantly, enjoy watching your kids or grandkids have fun with this gumball machine!
With this file you will be able to print gumball machine with your 3D printer. Click on the button and save the file on your computer to work, edit or customize your design. You can also find more 3D designs for printers on gumball machine.
