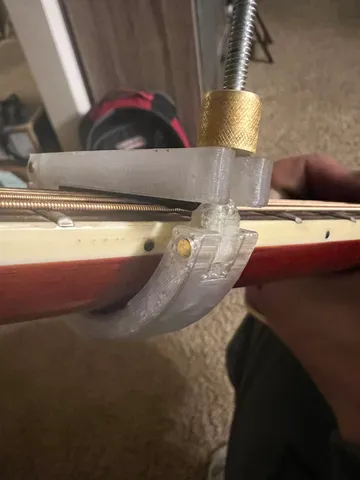
Guitar Capo
prusaprinters
Summary explains most of it. Print top bottom and hinge in PETG @ 100% infill with supports everywhere. Place hinge on one of the faces with pin hole(NOT the threaded hole) so that hole is vertical to prevent from breaking under pressure on layer lines. Place bottom on side face. Place top on its flat top surface. Liners are printed from TPU also at 100%, no supports. The liner inserts are meant to be able to be cut to specific sizes if you so choose, a friend wanted this to enable him to capo only specific strings as a quick and dirty method of getting around retuning. I have tested it as a normal capo and it works nicely, if you are interested in cutting the liners up to target specific strings I would love feedback on how well it works for this. I machined brass pins for all of the hinges, but you can just use whatever instead if you cant make pins. Toothpick, a nail, some thichish copper wire.. Glue in place if not a tight fit. Super glue the 6-32 all thread into the hinge thing, do this before mounting it to the base and inserting/gluing the pins. Make sure there is adequate clearance for the pin, if not it will be a pain to use. Use fabric adhesive spray on back of small piece of fabric (1.750" x 0.500") and stick it in the slightly recessed part of the bottom to keep plastic from scratchin' up your axe. Glue will probably work fine but spray adhesive is better for sure. Glue in the TPU inserts if you feel like it or don't if you think you might change them out later. The TPU inserts could be subbed out for pretty much anything you can think of that will fit in the slot. Fish tank tubing, insulated copper wire, probably even wood. Be creative :)
With this file you will be able to print Guitar Capo with your 3D printer. Click on the button and save the file on your computer to work, edit or customize your design. You can also find more 3D designs for printers on Guitar Capo.
