GuerillaBeam Beta
pinshape
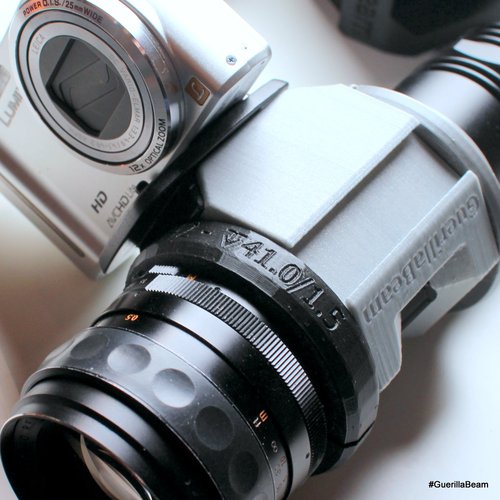
This is the latest GuerillaBeam projector base unit. GuerillaBeam is not a toy, but a weapon of mass distraction. It's often referred to as "the most powerful gun you are allowed to print." Current versions include: v.58 - currently recommended standard version; v.57x - same, but with a second accessory rail at the top; and v.49e - slightly older but most compact version. GuerillaBeam features include brightness and portability, long runtime, great image quality (depending on lens and light), and a short bill of materials with easy-to-find parts. You can print your own slides, projector, and accessories. By purchasing the GuerillaBeam Beta now, you will also receive the 1.0 release version ("GuerillaBeam One") which I will publish here soon. Please note that your purchase will be under a CC BY-NC-SA license, meaning you are allowed to copy, remix, and share it as you like, as long as you give credit and do so in a non-profit way. To get started, follow these steps: First, find a suitable LED (flash)light. The flashlight should project a uniform spot of 45mm (the 35mm slide image area) at the distance to the slide (which is also around 45mm). Look for Cree XM-L T6 lights with 1000 Lumen (this means two AA batteries), or even better, XM-L2 lights. A good and affordable light is the SomeFire X8 (for example UltraFire X8). Second: you'll need a reasonably bright SLR lens (f/2.8 or better). The brighter the better! For starters, just pick any 135mm or 50mm lens, but don't pay more than $23. Third: print adapters for light and lens. Fourth and final: Just attach lens and a light and project away! (more detailed directions can be found at http://guerillabeam.net) As time allows and demand dictates, templates for accessories are and/or will be available too, like: * Adapter for M42 and T2 lenses * Tripod mount / quick release plate * Adapters for Pentax, Canon EF-S, Minolta, Rolleiflex, and others (online soon) * Pistol grip with slide magazine * Flashlight adapters * Flash adapter (planned soon) * Slide on quick mount plates (online soon) * Slide on NATO accessory rail (online soon) Possibilities are endless, and my pipeline is currently full of ideas. You can also create your own extensions and variants of GuerillaBeam. I will publish all needed schematics. In case you need something specific, you can just ask me. I also offer complete beamer sets for all purposes. Printing tips for printing with fused deposition modeling: I usually slice with Cura, and print on an Ultimaker Original (0.4mm nozzle) with ~60mm/s in PLA. I recommend 0.2mm layer height, 1.2 mm shells (3 walls), and 13% fill for reasonable printing times of around 4 hours. The base unit will hold lenses over 2kg without problems this way. You can print usable projectors with 0.5mm nozzles and layer heights of up to 0.4mm, or at insane speeds, but you will have more cleanup work and worse ergonomics then. If you are interested in my current Cura profiles, please drop me a line and I will put them online.
With this file you will be able to print GuerillaBeam Beta with your 3D printer. Click on the button and save the file on your computer to work, edit or customize your design. You can also find more 3D designs for printers on GuerillaBeam Beta.
