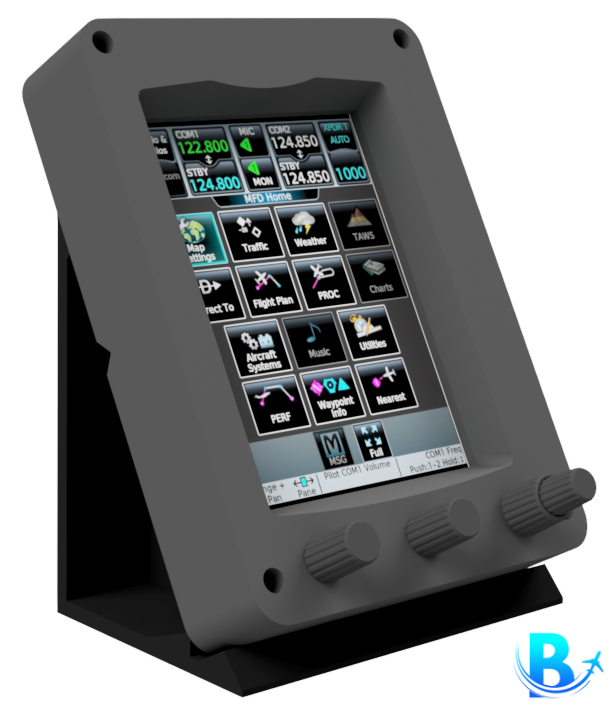
GTC570 waveshare 7" touch display Case + Encoders for MobiFlight
thingiverse
Upgrade your GTC 570 experience with our new design. This version includes three rotary knobs which are connected to an Arduino Pro Micro running MobiFlight. Pushing the middle button allows to cycle through all GTC inside one aircraft. The housing did grow a little in size compared to the non rotary housing, the stand is still the same. MobiFlight config files for the Arduino Pro Micro are in the download section. For MSFS2020 use "Pop Out Panel Manager" by Hawkeyesk. https://flightsim.to/file/35759/msfs-pop-out-panel-manager ---------- Parts ---------- (Parts availability and price heavily depends on your location, please also compare to local dealers.) 1x Display https://www.waveshare.com/7inch-hdmi-lcd-h.htm 1x Arduino Pro Micro https://tinyurl.com/3djjy8ps 12x Dupont Jumper Wire, female - female, (ideal 200mm, ~7,9") https://tinyurl.com/2p976hsx 36x Pin headers 90°, 2,54mm (0,1") (2 x 12pc., 12x1pc.) https://tinyurl.com/ypxmc7dc 1x Breadboard, laminated paper with Copper, 2,54mm (0,1") spacing, Size min. 39 x 7 rows! https://tinyurl.com/2s3u2x54 <- Used in this build, probably too expensive outside of GER https://tinyurl.com/3dh7ey9n <- Closest to our example 2x Single Rotary Encoder + hexagon nuts, EC11E, 20mm Shaft https://tinyurl.com/yxftbj8y 1x Dual Rotary Encoder EC11EBB24C03 https://tinyurl.com/ymb5x29r 4x M3x16mm threaded screws or 3x16mm self-tapping screws --------- Installation ---------- (-> YouTube video for visual installation guide arriving soon <-) Check solder&wire.pdf inside download folder! 1. Cut breadboard in 39 x 7 rows 2. Solder rotary encoders and 90° pin headers to board according to .pdf example 3. Solder 90° pin headers to Arduino Pro Micro 4. Install Mobiflight 5. Flash Arduino with Mobiflight software (MF asks on the first startup) 6. Open Built2Fly .mfmc config file for Arduino (Extra -> Settings -> MobiFlight Modules) 7. Open Built2Fly .mcc config file depending on the amount of connected devices 8. Set correct Module in every Input action (Input configs -> Edit -> Module) 9. Test functions 10. Assamble breadboard in front, insert display, fix arduino with double-sided adhesive tape, screw front and back together. Happy building, your Built2Fly Team https://built2fly.com/7-touch-hv/
With this file you will be able to print GTC570 waveshare 7" touch display Case + Encoders for MobiFlight with your 3D printer. Click on the button and save the file on your computer to work, edit or customize your design. You can also find more 3D designs for printers on GTC570 waveshare 7" touch display Case + Encoders for MobiFlight.
