GravBright- Gravity Powered Light
pinshape
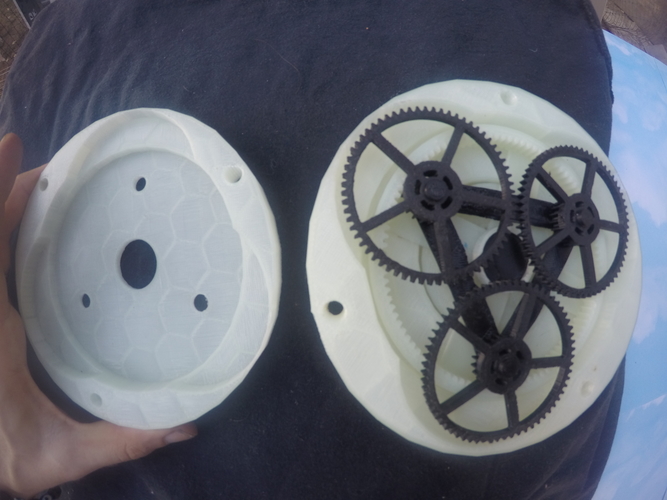
GravBright is a gravity-powered light that harnesses kinetic energy from a falling weight to power an LED, and can also be used to charge your phone or tablet for other energy needs. I captured images of the assembly process, but will provide step-by-step instructions below. If you have any questions or issues, please let me know in the comments and I'll do my best to assist you. First, assemble the weight pulley assembly by gluing together the weight pulley ring and bottom, then adding the ratchet and pin in the center. Make sure the ratchet is facing the correct direction and add glue on top of the pin for extra security. Next, attach the hemp string to the pulley wheel using the holes in the wheel to tie it off. Wrap one piece of hemp around the wheel most of the way, leaving about 6 inches unwrapped, then wrap the other piece in the opposite direction on the opposite side of the wheel. This will be used for the counterweight. Add the three bolts to housing1 to make assembly easier in the long run. Then, attach housing2 on top of housing1 and glue together the inner gear and flat plug. Insert the inner gear into housing 2, gluing it to ratchet 2 via flat plug. Add the tripgearframe with 3 gears onto the inner gear, then set the 3-gear assembly inside inner gear. Add housing 3 on top of housing 2, aligning the gear holes and tripgearframe posts to create a frame for the 3 gears. Glue together gearplug, innergear, and flat plug, then insert it into housing 3 with the gearplug going through the center of the 3 gears. Put the final 3 gears onto the second tripgearframe and insert them inside inner gear. Add housing 4 on top of housing 3, making sure to align all 6 holes with the posts of tripgearframe and the bolts. Connect the motorgear to the motor, then insert it into housing 4 and glue it in place. Solder wires onto the motor if necessary, then insert the LED into housing 5 and connect it to the motor wires or use electric tape. Add housing 5 to housing 4 and secure it with nuts, then add your paracord and bolt handle to the assembly. Connect the weight and counterweight, and you're done! You now have a gravity-powered light that can provide free lighting or electricity for charging your devices. If you encounter any issues during assembly, please let me know in the comments and I'll do my best to help you troubleshoot. Thanks for building the GravBright with me!
With this file you will be able to print GravBright- Gravity Powered Light with your 3D printer. Click on the button and save the file on your computer to work, edit or customize your design. You can also find more 3D designs for printers on GravBright- Gravity Powered Light.
