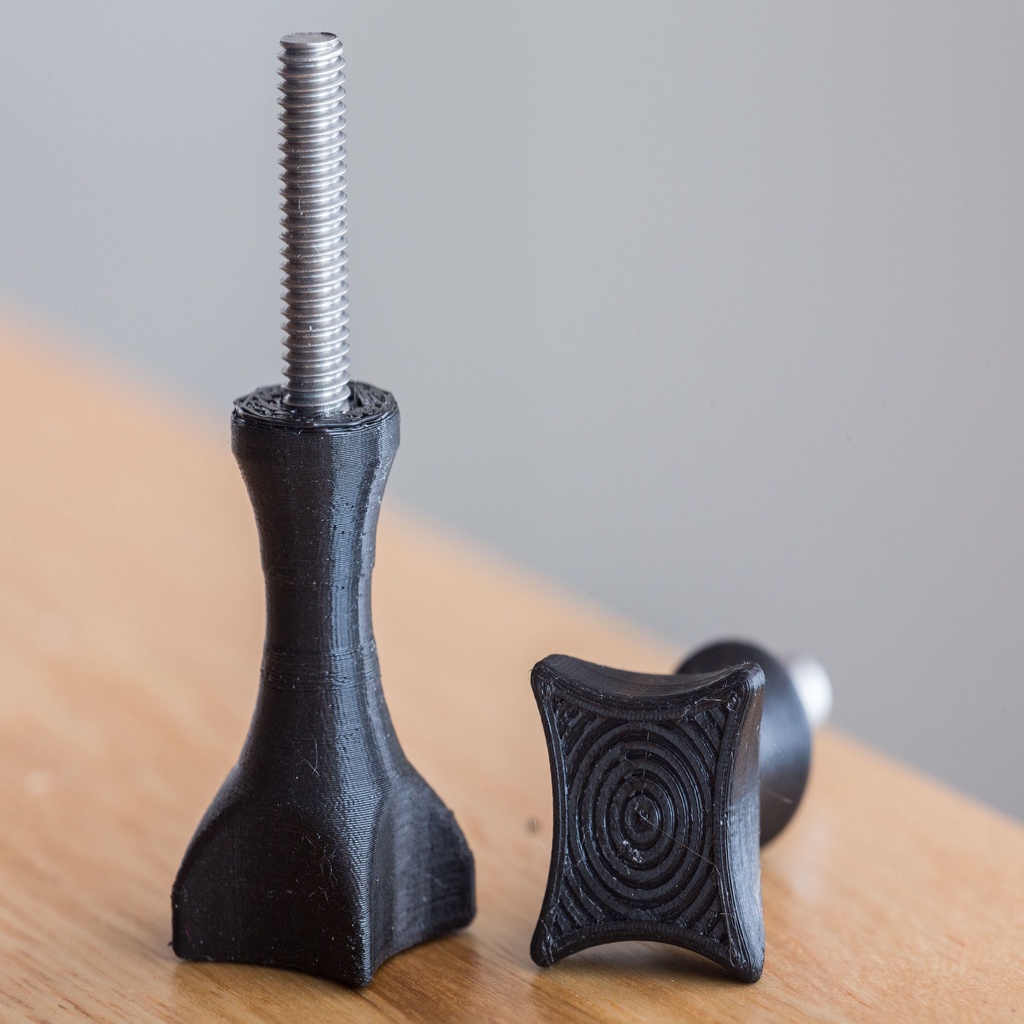
GoPro knob (bolt fully enclosed)
prusaprinters
<p>This is a replacement for the standard knob/thumbscrew found on GoPro mounts that has 3/4" (19mm) of shaft exposed.</p><p>This design uses a trick to embed the bolt fully into the knob (the top of the knob is closed over, you can no longer see the head of the bolt like you can in the original).</p><p>It requires an M5 hex bolt of length 40mm and head diameter (across the flats) of 8mm. Head height must be smaller than 4.4mm. These bolts are sometimes called "hex head set-screws" because they are threaded along their entire length.</p><p>I printed mine in black PETG from <a href="https://www.filament-pm.com">Plasty Mladeč</a>.</p><p>I've included both a .3mf file (PrusaSlicer - everything already set up ready for printing) and an .f3d (Autodesk Fusion 360) file.</p><h3>Slicing and printing instructions</h3><p>These slicing instructions are for <a href="https://github.com/prusa3d/PrusaSlicer/releases">PrusaSlicer v2.1 final</a>.</p><p>Add the "print stand" model to the build plate. Right click on it and add a support enforcer to it using the "support enforcer.stl" file. Now right click on the model and "add part" from the "knob.stl" file.</p><p>Choose the "0.1mm detail" print profile. Set the infill to 15% rectilinear and set supports to "for support enforcers only".</p><p>Right click on the cylindrical stand part, and add "layers and perimeters" and "infill" settings to it. In those settings, set bottom and top layers to 2, perimeters to 1, and infill to 10% rectilinear. (This is to save on plastic for this spacer piece)</p><p>Right click on the overall model and click "Height Range Modifier". Set the range to 0 - 25mm, and set the layer height to 0.2mm. (This is to speed up the printing of the spacer).</p><figure class="image"><img src="https://media.prusaprinters.org/media/prints/143771/rich_content/7bc10357-445e-43c6-a81e-aeb4a1dc4328/screen_shot_2019-09-12_at_54513_pm.jpg#%7B%22uuid%22%3A%228734ed16-a114-4847-ba4e-22e8956ba2c6%22%2C%22w%22%3A2880%2C%22h%22%3A2160%7D"></figure><p><strong>All parts of model loaded in</strong></p><figure class="image"><img src="https://media.prusaprinters.org/media/prints/143771/rich_content/af3c7776-1cf8-4c01-9bea-36f85eadd23c/screen_shot_2019-09-12_at_54536_pm.jpg#%7B%22uuid%22%3A%22349187e1-1f3b-4ff9-84af-7153f9946d1d%22%2C%22w%22%3A2880%2C%22h%22%3A2266%7D"></figure><p><strong>Model sliced - notice the supports generated between the knob and the spacer. This will allow the knob to cleanly detach from the spacer.</strong></p><figure class="image"><img src="https://media.prusaprinters.org/media/prints/143771/rich_content/597a11bb-9796-4b3f-a2e2-4c36fa2e5f84/screen_shot_2019-09-12_at_54604_pm.jpg#%7B%22uuid%22%3A%222b7485d6-79cf-496b-add9-ea0c42771e6d%22%2C%22w%22%3A1695%2C%22h%22%3A1271%7D"></figure><p><strong>Looking down through a cross section of the knob, check that there are no supports generated inside the screwhole</strong></p><p>Switch to the layers mode and drag the vertical slider to 51.60mm - this is the height of the solid layer that caps off the hex bolt cavity. Add a colour change here by clicking the plus button.</p><p>Now print! Once it gets to the colour change layer, it'll beep and prompt for you to eject the filament. Eject the filament, and trim the tip. Insert the 40mm hex bolt into the screwhole. It'll probably catch on a stray curl of filament inside the spacer transition, so give it a light tap with a hammer to bring it flush with the surface. Then use a tool like an allen key as a punch with the hammer to bring the head of the bolt*below* the surface. This ensures that the nozzle will not catch on it during the next layer:</p><figure class="image"><img src="https://media.prusaprinters.org/media/prints/143771/rich_content/60562fff-0022-40a0-bc41-daec2921be27/827c7303.jpeg#%7B%22uuid%22%3A%2263c7f9f7-d206-4052-bb15-a39d217ae7a4%22%2C%22w%22%3A2880%2C%22h%22%3A1920%7D"></figure><p><strong>Printing in progress...</strong></p><figure class="image"><img src="https://media.prusaprinters.org/media/prints/143771/rich_content/adb63041-a15d-4c95-bf9d-a1a6ee04400a/827c7306.jpeg#%7B%22uuid%22%3A%22f870cdfd-adc9-4362-b945-80ba1ebe1d08%22%2C%22w%22%3A2880%2C%22h%22%3A2160%7D"></figure><p><strong>Printer has paused for us to insert the bolt</strong></p><figure class="image"><img src="https://media.prusaprinters.org/media/prints/143771/rich_content/8ad6ffa3-5227-4d68-a3e6-225ec3f3eea3/827c7307.jpeg#%7B%22uuid%22%3A%22b277566d-9dd5-4dbb-8d54-142c8fe96690%22%2C%22w%22%3A2880%2C%22h%22%3A2160%7D"></figure><p><strong>Insert the bolt and use an allen key as a punch with your hammer to ensure the head sits just below the print surface</strong></p><p>Now reinsert the filament and resume printing. Have tweezers or similar ready to grab the bit of filament that is ejected just before the printhead departs to resume the print!</p><p>After printing, the knob should easily break away from the supports below it, and it's ready to go.</p>
With this file you will be able to print GoPro knob (bolt fully enclosed) with your 3D printer. Click on the button and save the file on your computer to work, edit or customize your design. You can also find more 3D designs for printers on GoPro knob (bolt fully enclosed).
