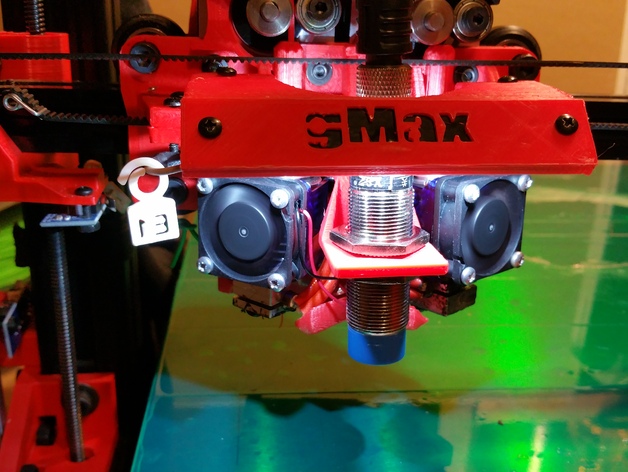
Gmax 1.5 XT Inductive Sensor Bracket and LED Hood
thingiverse
I have crafted a customized inductive sensor bracket and LED hood for my gMax 1.5 XT, but since I lack a single extruder assembly, I had to design the bracket only for dual extrusion assembly use. Auto bed leveling has transformed 3-D printing into an incredibly convenient process. Although I haven't found a set-it-and-forget-it paradise of 3-D printing yet, auto bed leveling brings us quite close. Enjoy! This unique bracket and LED hood are very easy to install and print; no supports or additional screws are required. E3D V6 hot ends are currently in use with my setup, but the bracket should work with the stock Reprap hot ends as well. I am utilizing an LJ18A3-8-Z/BX-G 3-Wire DC 6-36V 200mA NPN NO 8mm Inductive Proximity Switch for the sensor. This switch is outstanding because it allows an 8 mm proximity, which provides ample room between the sensor and extrusion nozzles. The sensor can be easily sourced from Amazon Prime: http://www.amazon.com/gp/product/B00D12BJ7C?psc=1&redirect=true&ref_=oh_aui_detailpage_o06_s02 For more information on how to set up auto bed trimming (auto bed leveling) with an inductive sensor and Marlin firmware, refer to this great video: https://www.youtube.com/watch?v=EcGFLwj0pnA. To aid you in your firmware modifications, I've included my probe offset values from extruder defines below. The X and Y offsets can be utilized as-is; however, determining the Z offset will require your own calculations. X_PROBE_OFFSET_FROM_EXTRUDER: -26 Y_PROBE_OFFSET_FROM_EXTRUDER: -25 Z_PROBE_OFFSET_FROM_EXTRUDER Important Note: The build bed that comes with a stock gMax printer is acrylic and may not react to the inductive sensor. This does not mean you cannot use an inductive sensor; all you have to do is place aluminum tape in areas that will be probed for auto bed leveling. Then, cover the aluminum tape with painters tape so that it's available for printing with any desired material. Post-Printing Features: • Uses existing screws from hotend mounting point on motor bracket. • Bracket now screwed into place. • E3D nozzles fit best at 30mm from the bottom of the bracket. • Stock LED hood won't accommodate the sensor - This one does. • Enjoy using it and remember: The "G" and "A" Too!
With this file you will be able to print Gmax 1.5 XT Inductive Sensor Bracket and LED Hood with your 3D printer. Click on the button and save the file on your computer to work, edit or customize your design. You can also find more 3D designs for printers on Gmax 1.5 XT Inductive Sensor Bracket and LED Hood.
