Gizmos Marble Dispenser
prusaprinters
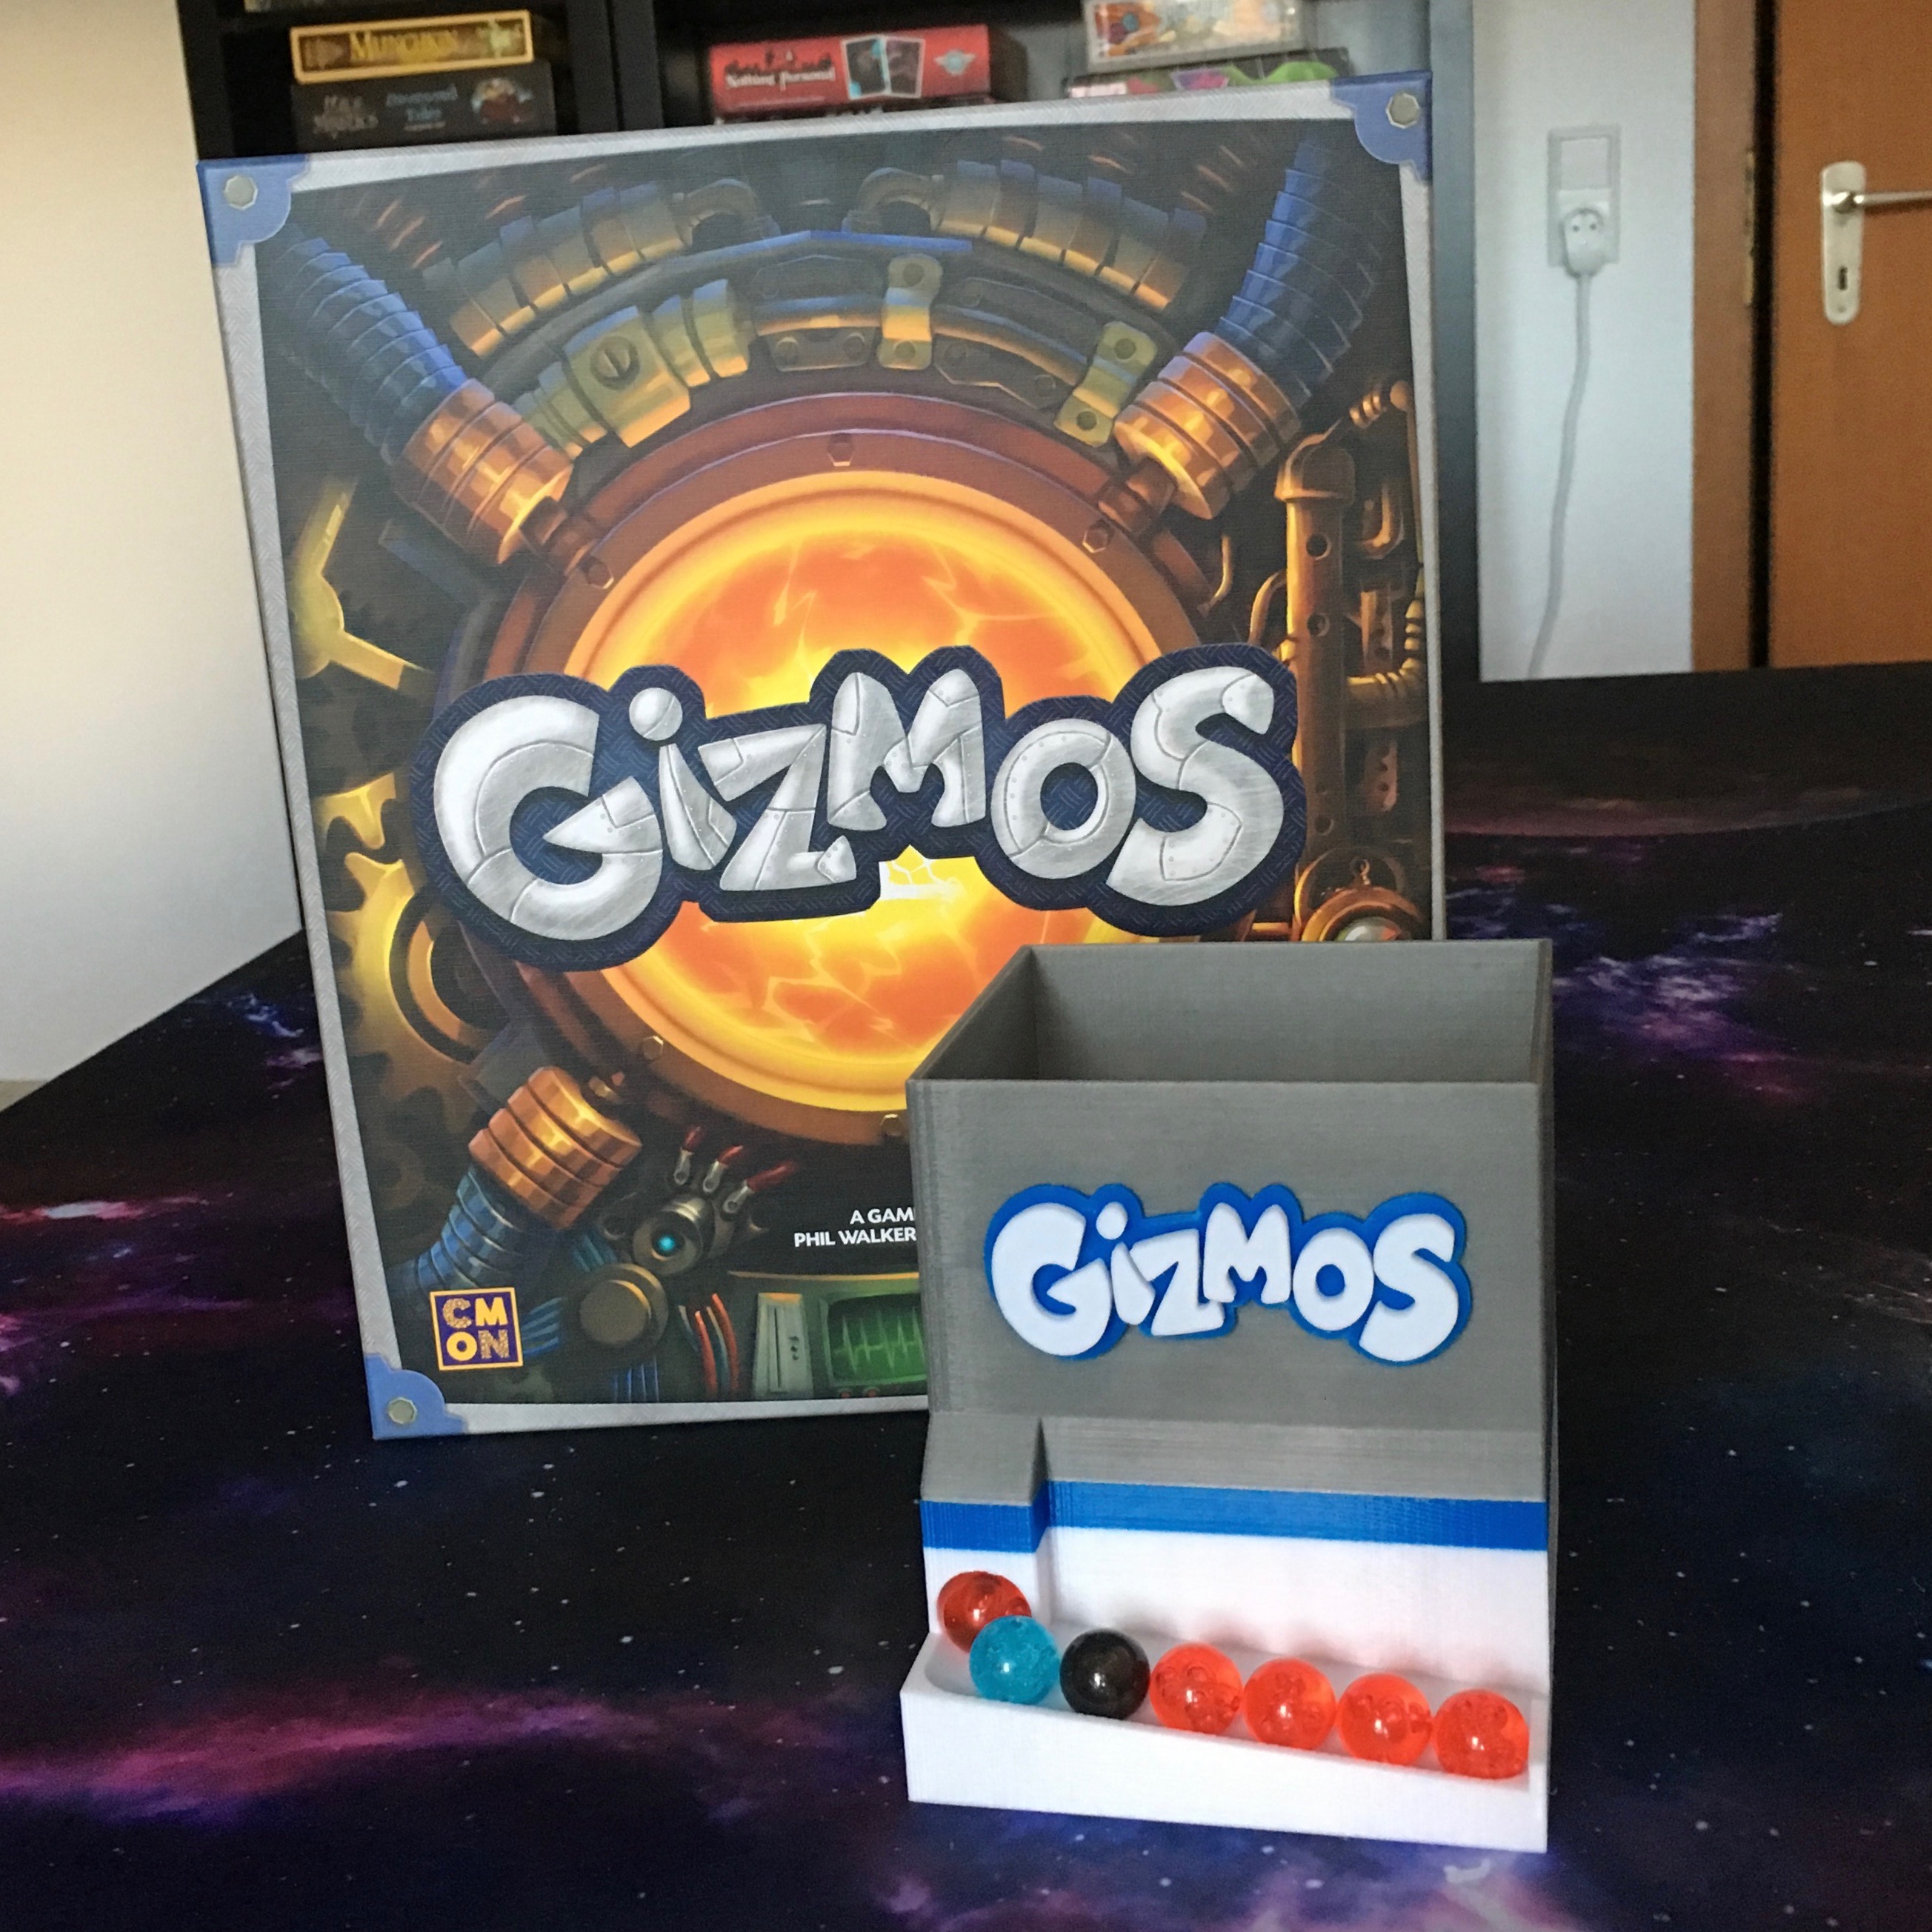
<p>This is a remix. Thank you mikevec23 for you initial design.</p> <p>I made the improvements that mikevec23 suggested in his original thing.</p> <ul> <li>Increased the overall size by 5%.</li> <li>Graduated the hole in the hopper to make the marble release more reliable.</li> <li>Added a stop to the end of the feed shoot to keep marbles from rolling off.</li> <li>Shortened the connecting pegs on the base.</li> <li>In addition I added the logo.<br/> Please read the print settings and post-printing notes.</li> </ul> <h3>Print instructions</h3><h3>Category: Games Print Settings</h3> <p><strong>Printer:</strong> Anycubic I3</p> <p><strong>Rafts:</strong> No</p> <p><strong>Supports:</strong> Yes</p> <p><strong>Resolution:</strong> .2</p> <p><strong>Infill:</strong> 10% on Base, 16% on Everything Else</p> <p><strong>Filament:</strong> Anycubic PLA Silver, Blue, White<br/> <strong>Notes:</strong></p> <p>For the base I paused the printing around 80% and changed color (I recommend white as a base to make the marble colors pop). This made for a nice transition to the hopper. I also used supports to ensure the feed hole remained round with no sagging. Be sure to clean out ALL support material.</p> <p>The logo can be printed as one piece with a pause and color change at 2mm (recommended) or printed separately and then glued together. Center and glue the completed logo to the hopper.</p> <p>I used super glue for all glue-ups.</p> <h3> Post-Printing</h3> <p><strong>Reaming the hopper.</strong></p> <p>To make the hopper fit easily on the base I carefully reamed the holes in the bottom of the hopper with a small drill. I recommend you do this gradually and carefully.</p>
With this file you will be able to print Gizmos Marble Dispenser with your 3D printer. Click on the button and save the file on your computer to work, edit or customize your design. You can also find more 3D designs for printers on Gizmos Marble Dispenser.