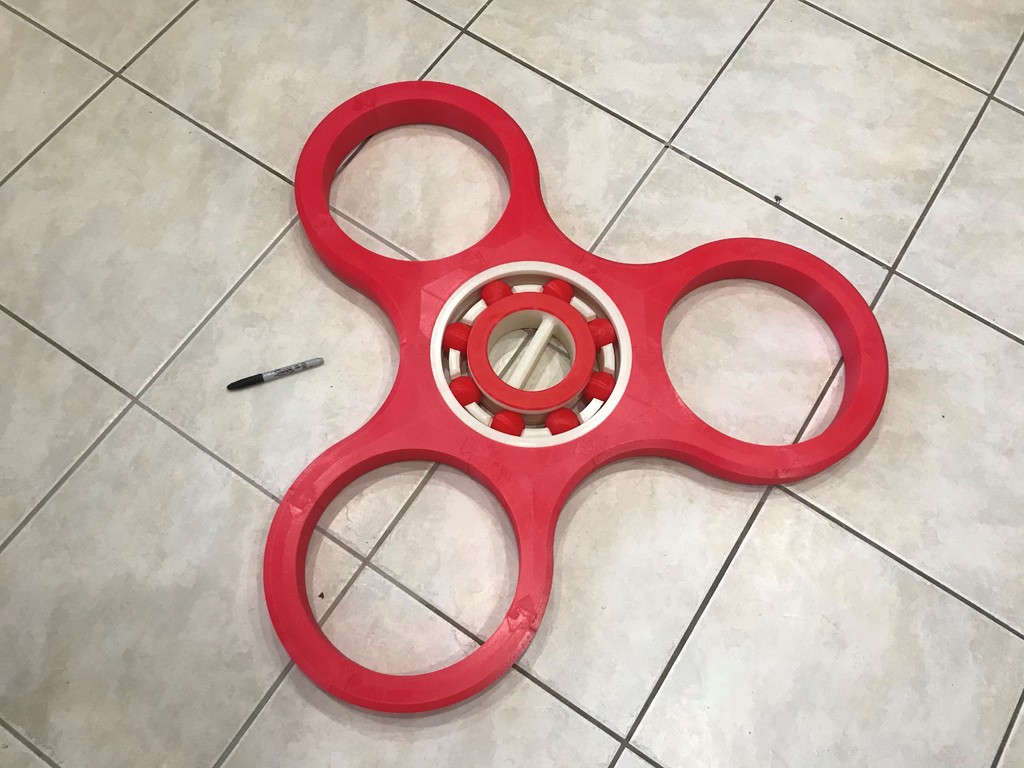
Giant 1m Fidget Spinner with Bearing (no glue or screws 100% PLA)
prusaprinters
<p>This is a very large fidget spinner meant to be printed in multiple pieces on a 300 x 300 printer bed. The entire project including the bearing and holder were designed in Fusion 360 and to not require any glue or screws. The main spinner pieces fit together like a simple puzzle, The bearing is a press fit, and the center holder is threaded to screw together. The whole thing is slightly bigger than 1 meter round (1010 mm).</p> <p>This is a very long print and took me around a week and a half of 24/7 printing on my Duplicator 9 3d printer. It took me several days designing it in fusion 360 including time to print test pieces to make sure the tolerance/fit was not too tight or too lose for the parts to fit together on my 3d printer.</p> <p>I got the idea on how a real bearing is supposed to work from thing:3361380 made by edlsmith. The idea for designing a ball cage made a big difference in how easily the plastic bearing spins.</p> <p>This was designed to not require support except for the balls (print 8 of them). See notes below on Cura settings to help print them as round as possible. They will require some light filing/sanding where the support touches them on the bottom.</p> <p> <figure class="media"> <oembed url="https://www.youtube.com/watch?v=N3H2889pHUE"></oembed> </figure> </p> <p>NOTES:</p> <p>20% Gyroid infill for bearing<br/> 10% Gyroid infill for everything else<br/> Support is only needed for printing the balls</p> <p>COMMON CURA SETTINGS<br/> Layer Height: 0.2 mm (except the balls which need 0.1 mm)<br/> Infill Pattern: Gyroid<br/> Infill: 10%<br/> Wall Thickness: 1.2 mm<br/> Top/Bottom Thickness: 0.8 mm<br/> Top/Bottom Pattern: Lines<br/> Bottom Pattern Initial Layer: Lines<br/> Top Surface Skin Pattern: Concentric</p> <p>BEARING SETTINGS<br/> Infill: 20%</p> <p>BALL SETTINGS<br/> (print 8 balls and elevate them 2.5 mm from the bed in your slicer)<br/> Layer Height: 0.1 mm<strong>Important to make them smoother all around<br/> Infill: 20%<br/> Support: enabled<br/> Support Pattern: Zig Zag<br/> Support Density: 30%<br/> Support Z Distance: 0.2 mm</strong>Important to make sure bottom is smoother<br/> Gradual Support Infill Steps: 2<br/> Gradual Support Infill Step Height: 3 mm</p> <p>I included some small test pieces to test tolerances on your printer to make sure it will work for your printer. The spinner pieces will be a little tight on purpose but they should go in with force. You can print SpinnerBody1_test.stl and SpinnerBody2_test.stl to test for tolerances for the main spinner pieces. You can print a ball and 280mmBallCage_test.stl to test for tolerance of the ball inside the ball cage.</p> <p>The reason for elevating the balls 2.5mm from the bed is so that the bottom will not have a flat spot. The support structure will be even on the bottom of the ball instead of part of it sitting on the bed and getting squished into the bed.</p> <p>I recommend printing all parts 1 at a time including the balls to minimize any defects from the nozzle starting and stopping on the print.</p> <p>Practice printing the balls until you can print them as round as you can.</p> <h3> Print Settings</h3> <p><strong>Rafts:</strong></p> <p>No</p> <p><p class="detail-setting supports"><strong>Supports: </strong> <div><p>Yes</p></div><strong>Resolution:</strong></p> <p>0.2 mm</p> <p><p class="detail-setting infill"><strong>Infill: </strong> <div><p>20% Gyroid for bearing and 10% Gyroid for everything else</p></div><br/> <strong>Filament:</strong><br/> 3D Solutech PLA Real Red</p> </p></p> Category: Toy & Game Accessories
With this file you will be able to print Giant 1m Fidget Spinner with Bearing (no glue or screws 100% PLA) with your 3D printer. Click on the button and save the file on your computer to work, edit or customize your design. You can also find more 3D designs for printers on Giant 1m Fidget Spinner with Bearing (no glue or screws 100% PLA).
