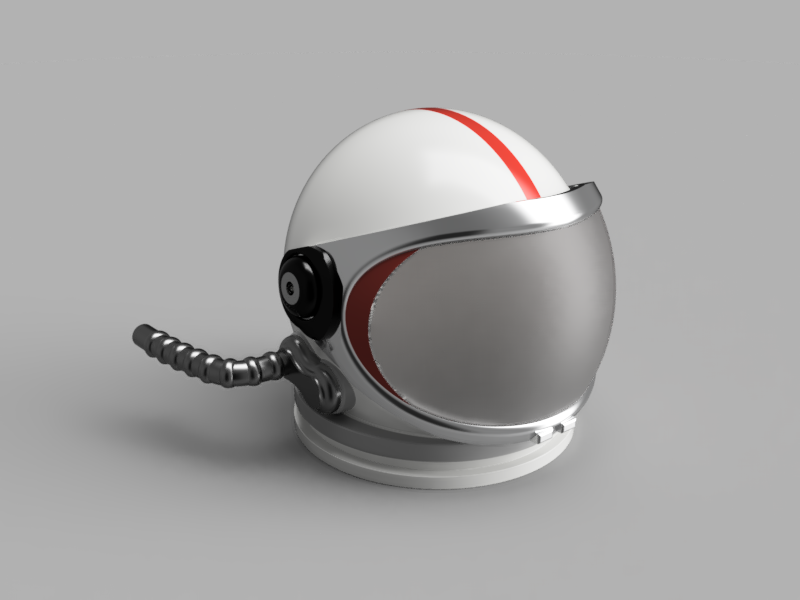
GI Joe Gemini (style) Astronaut Helmet
prusaprinters
<h3>GI Joe Gemini Style Astronaut Helmet </h3><figure class="image"><img src="https://media.prusaprinters.org/media/prints/111246/rich_content/c67824cf-2d98-4565-896c-d4b1bf71b7a7/gi-joe-gemini-helmet-2.png#%7B%22uuid%22%3A%22958b17f4-1e1d-4795-9420-ae4853678ef9%22%2C%22w%22%3A1357%2C%22h%22%3A1154%7D"></figure><p>For those in the know - Joes can have a variety of head sizes. I designed this one to fit the larger head size I had in my collection. </p><p><br>I use raw filament for hinge pins and as a means to attach the hose. You can CA glue them into the hinge caps but because of the slight bend in the channel you don't need to glue them into the helmet and liner.<img src="https://media.prusaprinters.org/media/prints/111246/rich_content/c14e1c67-7ca9-42b6-8c12-a654bed41cb5/image.png#%7B%22uuid%22%3A%229f7c7f7c-3cd6-4586-b86a-b7b739adf509%22%2C%22w%22%3A773%2C%22h%22%3A616%7D"></p><p>I've used clear filament for the glass section of the visor and the results are about the best you can expect. It's kind of neat, you can use GOLD instead, and that sort of looks authentic, too.</p><p>Printing in multicolor can be a challenge as you can see here the clear changed just a little once it was done with the red. I even set a ridiculous purge volume amount. Still, not so bad and if you use an opaque filament it won't show up as much. </p><figure class="image"><img src="https://media.prusaprinters.org/media/prints/111246/rich_content/aedad101-b0b6-46a1-9455-300aea3a3fa8/image.png#%7B%22uuid%22%3A%2260d2d8e8-4ed3-48c2-af1c-f984120b3a6a%22%2C%22w%22%3A1980%2C%22h%22%3A1062%7D"></figure>
With this file you will be able to print GI Joe Gemini (style) Astronaut Helmet with your 3D printer. Click on the button and save the file on your computer to work, edit or customize your design. You can also find more 3D designs for printers on GI Joe Gemini (style) Astronaut Helmet.
