Ghost Paperclip
prusaprinters
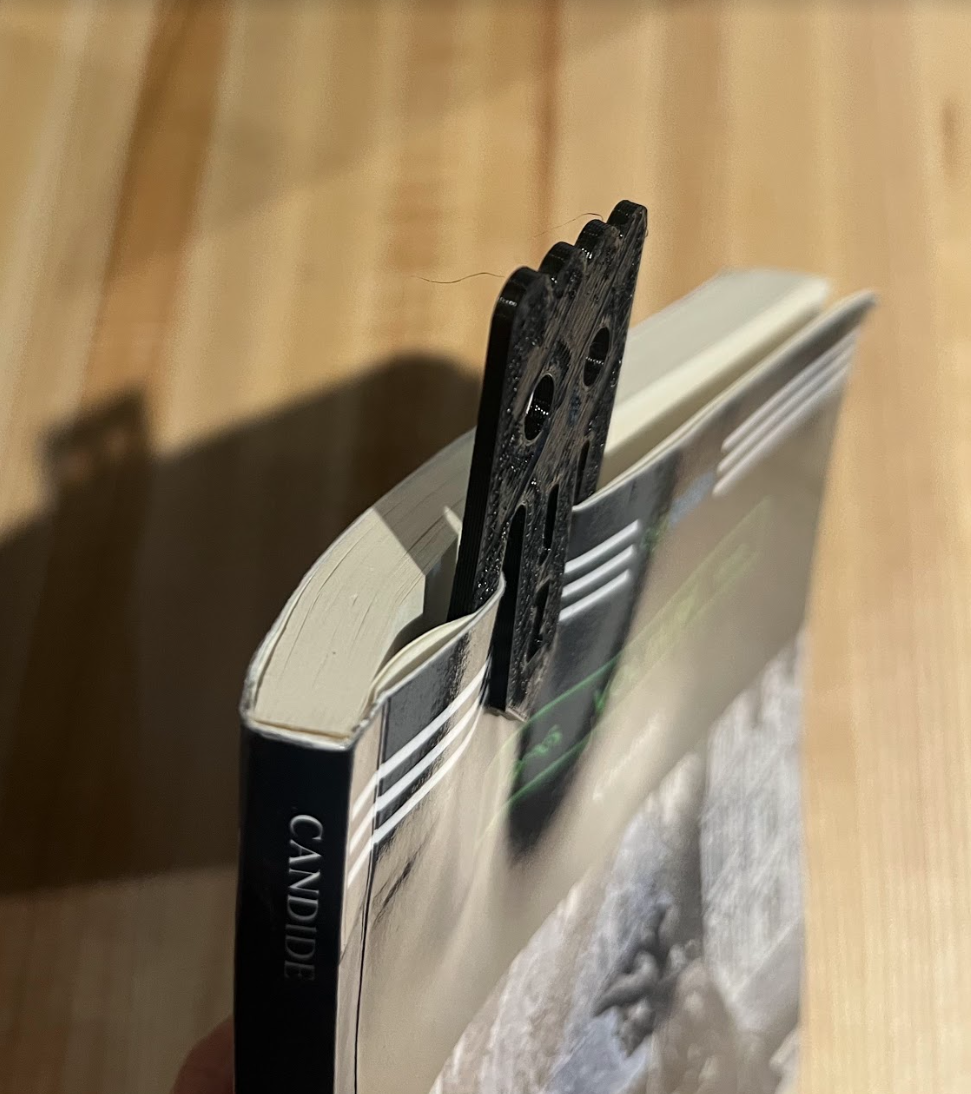
<p>Made in partnership with https://www.printables.com/social/396225-avi-wald/about</p><p> </p><p><strong>Objective:</strong></p><p>With a partner, recreate a supplied ghost clip using Solidworks. The goal was to maximize BOTH accuracy and coordination while creating the model.<br> </p><p> </p><p><strong>Assembly Instructions:</strong> </p><p>1. Create a construction center rectangle off of the origin. Match dimensions on drawing.</p><p> </p><p>2. Add a horizontal construction line below the top of the construction box.Match dimensions on drawing.</p><p><br>3. Add a horizontal construction line above the bottom of the construction box. Match dimensions on drawing.</p><p><br>4. Add a line on top of the construction line made in step 3 coming from the left, use smart dimensions to match it with drawing.</p><p><br>5. Place an anchor point on the bottom of the construction box, below the midpoint of the line made in step 4</p><p><br>6. Add a line connecting the left point of the line made in step 4 to the anchor point made in step 5, and again with the right side.</p><p><br>7. Create an anchor point on the midpoint of the bottom line of the construction box, connect that point to the right end of the line made in step 5.</p><p><br>8. Mirror everything made in steps 5-7 to the right.</p><p><br>9. Delete the extra construction line and smart dimension made in step 4, and set the lines made in steps 6-8 equal to each other.</p><p><br>10. Create an arc coming off of the left end of the construction line made in step 2, use dimensions in drawing. Create another arc to the right of the previous arc. Use the same dimensions.</p><p><br>11. Mirror arcs in step 10 to the right across the y-axis.</p><p><br>12. Create a line within the construction box, smart dimension top point to the top left corner with the dimensions on drawing.</p><p><br>13. Create a diagonal line from the bottom point of the previous line. Smart dimension the bottom point of the new line to the bottom left corner of the construction box.</p><p><br>14. Use offset entities of the two lines and check off bi directional and check reverse.</p><p><br>15. Mirror steps 12-14 to the right of the y-axis.</p><p><br>16. Create solid lines from the bottom of the arcs at the top corners to the top of the diagonal lines at the bottom corners.</p><p><br> </p><p><strong>Design Choices:</strong></p><p>To construct this paperclip, we created dimensions on graph paper, twice the size of how it will actually print. We labeled these dimensions on the graph paper the size we actually wanted them to be in real life. This is to see how the dimensions of the eyes, mouth, curves, and edges all line up in relation to each other. Then we created the ghost in solidworks, matching the dimensions on the paper. </p><p><img class="image_resized" style="width:58.42%;" src="https://lh6.googleusercontent.com/X_Ilz0ht1pnTADSc0QNGTwH8j8ZeeFNua8tkzwLENNU_PUz5B1o3LJshk-XrEgKLy5_mS6JsaaI8FDcyMcfVJ_-4us3EaLfpFJ-w60Y6LlwAHMhLeWJq0ouFcjW48Ty9A1mhwwrffb1bKOcVN9w5iZLzdZbyv3obBUAlT4vg24s3BWe7TX0gYMpzDw"></p><p> </p><p>After constructing and designing our ghost clip in solidworks, we compared our models to the actual ghost clips we had to replicate. We noticed some dimensions off on our model.</p><p>We originally had the center of each eye 1.30 cm below the top of our model, but we changed it to 1.40 cm to more accurately represent the ghost clip. Also, we moved the center of the eyes inward by 0.50cm, now having them at 0.85 cm from the left and right side of the ghost.</p><p><img class="image_resized" style="width:42.64%;" src="https://lh5.googleusercontent.com/YwybbAEjBbPrUjrGTXPmEDRw26a-h9INdLGxitmsESza5suXdP5Tc9YxjyjI0AyZm1DaCUKcagH0IULN-ymXgmoJGlD8ce4D3v7eg31D3OVjpLnI8QC7srcDdi13zdMqKLq1oHbkJSjLEtNxUywKeqF-cfB3WWYo7p9X3QdBW0QJOSYYO-YxhjF6Pw"></p><p> </p><p>We also moved the entire mouth down 1 cm after comparing it to the real model, having the bottom of the mouth 0.80cm from the bottom instead of the original 0.90cm we had planned. We also moved both sides of the mouth 0.10cm inwards so that the mouth was 0.60cm from the left side of the model instead of 0.50cm.</p><p><img class="image_resized" style="width:33.73%;" src="https://lh4.googleusercontent.com/ssvSK7knGfKDUz8LJ-2kkN28N2J86uEGlmFUsB5vJH3gn9b2DXqs4BngYuqAnqED63HczP5aahmMx2xPaq60nlnk5lEfogp4mjzn7GiJOUNyq9YxpHzubq0AzNHiPGFMiwB5X2y2Gxdo3BX-qSLykaO-aohl4gakRmtDUv1Xs6HfWuB2jDFRLHhwoQ"></p><p> </p><p>At first, we decided to use basic shapes and dimensions to create the entire outline of the left half of the mouth, and then mirror across the center y-axis of the ghost. We later realized we could use the offset entities tool to create the width of the mouth by just offsetting two lines inward, for a width of 0.30cm, and mirroring that.</p><p><img class="image_resized" style="width:32.33%;" src="https://lh5.googleusercontent.com/KQ_dPkVAxTNxLVhn9UtEV2Z4mvEz_f_20jmK9sVQK0AO7Z5VXKDgUf_JOYD_PxXf4sb42hq6kBLlFdVt6HXpYyFq_Yx3yjkAHbTpfxXec1V5V6D-oLs7FaC3YGYJ16tWVV3ZW-ahiO7EuifPJ-AaKd1tbzRNmmDSzqEX_z88-NQFPeVexGkjLYILKQ"></p><p> </p><p>Lastly, we originally decided to create one semicircle at the top of our ghost clip and mirror that 3 more times to fill the top of the clip. This didn’t work however, as there was no line for it to mirror across from. We realized that we had to create two semicircles at the top and mirror that once across the center construction line along the y-axis of the ghost.</p><p><img class="image_resized" style="width:63.69%;" src="https://lh5.googleusercontent.com/ZGkS7ffx-5y4ggm2IlKtfkFMm_ualzS306HLZWHwrYFB1CsOF8ji0Ph7BQvBJ_AXsJp6MNZBmVtkCU4md37wrwRf-m_AGpO8ZnOl1JmqRwpcY5Pv2-iw7hMFjjCeC828g4mvjow-P_pyFvZKsNjswdkO0rE8zdQrsHixxsPvFn-bti_RSRkFd9uvyQ"></p>
With this file you will be able to print Ghost Paperclip with your 3D printer. Click on the button and save the file on your computer to work, edit or customize your design. You can also find more 3D designs for printers on Ghost Paperclip.