Ghost Clip
prusaprinters
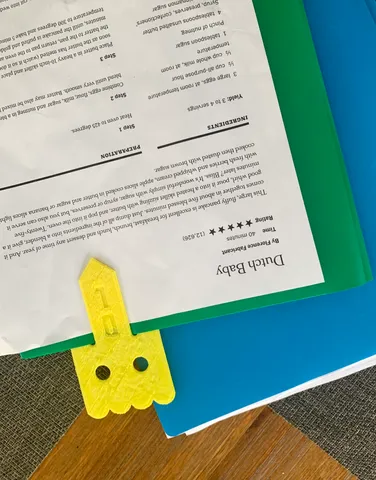
Summary: This is a ‘Ghost’ Paper Clip that is intended for holding loose papers together. However, this paper clip is very versatile and can be used for other purposes, it makes a great bookmark! It measures 13 x 6 x 0.15cm and is comparable in size to a notecard. I made this in collaboration with my partner, Ari Grossman. Here is a link to his project: https://www.printables.com/model/604534-ghost-clip Lesson Plan: In this project we were tasked with, collaboratively, recreating the original ghost paperclip in SolidWorks. The purpose of this assignment was to develop our collaboration and 3d modeling skills to better prepare us for future, more complicated, projects. Assembly Instructions: Constraint Box: Use the rectangle tool to make a 6 x 13 cm box, make sure to add construction lines from midpoints and to start the rectangle from the origin. Mark the whole rectangle “for construction.”Bottom Triangles:Add a construction line 1 cm off the bottom of the constraint boxFrom point A, using the line tool, draw a line segment to point B. From there, using an automatic perpendicular relation keep drawing the line segment to point C, and repeat to reach point D.Using the mirror tool, along the centerline, reflect the line segments AB/BC/CD to the other side to complete the ‘triangles.’Top Arcs:Add a construction line 0.6cm off the top of constraint boxDraw a three point arc. Center on point X, second point on the top of the constraint box, third point on the construction line. Dimension the diameter of the arc, attach the ‘left-most’ point of the arc (that's on the construction line) to the constraint box (where it meets the construction line).Repeat the same process as in step 6, however this time make three arcs on points Y, W, and U. Instead of dimensioning the diameter of the arc, add a manual relation making the arc equal to arc X. Attach the leftmost point of the arc to the right-most point of the arc preceding it.Eyes: add construction geometry off the top ~2.9cm~Draw circle Z on the construction line with proper dimensionsMirror circle Z onto the other side to make circle P.Mouth:add construction lines, top of the mouth, line going through the points where the mouth starts to go to a point, and construction geometry for bottom tip of the mouth (on the inside)Create line segments MNO, dimension the points from the edge of the constraint box, make M and N vertical to each othermirror MNO onto other side of centerlineOffset MNO out to create width of the mouth and cap ends. Double check dimensions, lock everything down, and delete excess geometry from the constraint box. Minimize smart dimensions using reference geometry Design Choices: Throughout the whole process of the project my partner and I had to make several design choices to ensure we had the greatest success making our ghosts identical to the original and making our ghosts identical to each other. The following image shows our paper sketch and our original ‘vision’ for recreating the ghost paper clip.When we first got into SolidWorks, we set up the constraint box and everything was as planned. After this we would work on the triangles. Originally we wanted to use manual relations in conjunction with the line tools to make the ‘bottom’ triangles on the ghost paper clip. We quickly realized, in the process of drawing the lines, that we could apply an automatic perpendicular relation to those lines. This sped up and simplified the process of making the bottom triangles tenfold. We adjusted our project plan accordingly to match our change of plans. You can see the relations in the SolidWorks sketch below.However, this was not the only time we had to change our original plan. When we were working on the top ‘semi-circles’ we realized that the process we were planning to apply would not work in a way that would give us a final product that matched the original ghost paper clip. As a result, we had to improvise and revise our plans, utilizing the three point arc tool instead of the regular arc tool as it would allow us to draw arcs with the correct precision required. In addition to this we had to use manual ‘equal’ relations and smart dimensions to space the arcs correctly and ‘lock them down’ in the sketch to get the best possible result. If you look at the following image, you can see how the final relations look in SolidWorks.The final instance when we had to change our plan was in relation to the eyes of the ghost. Originally we weren’t sure if mirroring a circle for the eyes of the ghost would work in SolidWorks as we knew for a fact that mirroring an arc would not work and we thought that since an arc is a portion of a circle, we would not be able to mirror the circle. Thus, in our original plan we were going to manually make the second circle eye. However, while we were in SolidWorks we attempted to mirror the circle and it worked without a problem. This simplified our original plan, saved us a bunch of time, and also provided us a more accurate result.After completing the mouth and the rest of the sketch for the ghost it was time to double check our measurements and make sure that our ghosts would match the original. When we went to compare our SolidWorks sketch to the original ghost we had in hand, they didn’t quite match. While the geometry was correct, the measurements were all slightly off. Even worse, when we compared multiple ‘original’ ghosts we came to find out that not all the ghosts were the same as a result of differences created while printing. To fix this, to find the correct measurements we needed to make the most accurate replica of the ghost clip, we decided to take all the ‘original’ ghosts we could find and begin measuring them all and averaging the measurements until we had a good idea of the ‘right’ measurements. After this we made sure to take these measurements and apply them to our sketch before comparing the ghosts and the sketch again. When we finished this step we were sure that we had gotten as accurate of a replica we could make and we were done with the project. If you look at the image below you can see how the final sketch looked like in SolidWorks
With this file you will be able to print Ghost Clip with your 3D printer. Click on the button and save the file on your computer to work, edit or customize your design. You can also find more 3D designs for printers on Ghost Clip.