Geeetech prusa i3 axis wobble fix
thingiverse
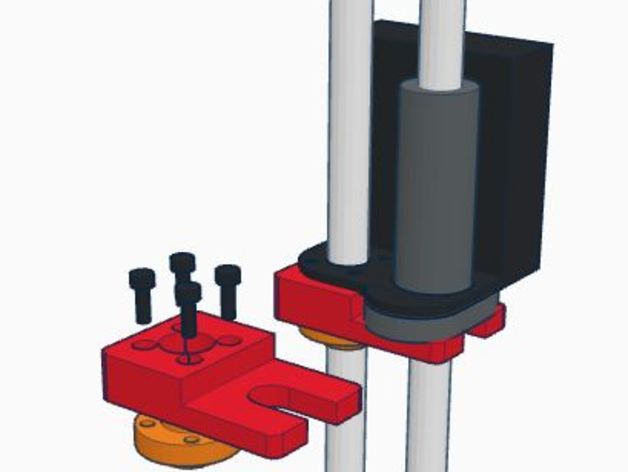
I'd had this printer for three days before I decided to fix the minor issues it had been experiencing. The axis wobble, in particular, was a problem that left my prints with unappealing lines running along their sides. However, after researching solutions on Thingiverse, I found some "fixes" that seemed over-engineered and wasteful to me. So, I opted to create my own solution, utilizing the existing brass 8mm lead screw nut instead of abandoning it like other designs tend to do. This brass nut is designed specifically for the lead screw, and it works perfectly fine after all. The installation process was incredibly simple. First, I removed the four bolts holding the brass nut to the axis ends, then loosened the 8mm lead screw from the coupler below. Next, I unscrewed the lead screw from the brass nut. Now, using the same four bolts originally used to mount it, I bolted the brass nut to the new part design. I reinstalled the new part in place, tightened the coupler back up, and finally re-leveled my axis. And that's it! The result is a smooth-sided part with no more unsightly lines (see the example above of the first part printed after the fix was installed). Print Settings: Printer: Geeetech Prusa i3 pro B Rafts: No Supports: No Resolution: 0.3 Infill: 30%
With this file you will be able to print Geeetech prusa i3 axis wobble fix with your 3D printer. Click on the button and save the file on your computer to work, edit or customize your design. You can also find more 3D designs for printers on Geeetech prusa i3 axis wobble fix.