 Thingiverse
Droid Cast H4
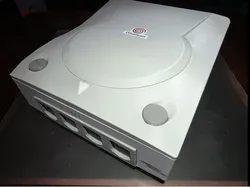
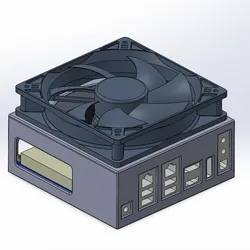
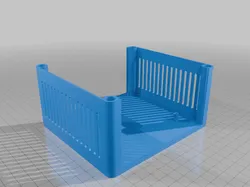
This oddly shaped case might be vaguely reminiscent of consoles of a bygone era, but it's not and is definitely completely different and should in no way be considered as similar to them by anyone. Don't CAST aside your DREAMs, build them. The end resulting model should be around 8"x7"x3".I used Bambu Labs PLA matte (ash) grey for the base and buttons, PLA basic (light) grey for the walls and lid, PLA matte (ivory) white and charcoal (black) for the power led cover.Other parts are as follows:sourced from Ameridroid:Odroid-H4 [just the base model as the other models have different io ports in the back]15v power supplyNVME SSD 2tb16GB DDR5 RAMAmazon:4: sdlqy: adhesive bumper pads transparent rubber feet4: pzsmocn: dupont 200 pieces 2.54 mm pitch 1-pin adapter connector female housing black socket terminal1: areme: 90 degree USB 3.0 adapter1: thermalright TL-C12015 120mm slim fan1: dmwd: 16mm ultra short metal waterproof anti-vandal momentary push button switch silver shell 5/8" high head1: fidioto: USB extension cable 1 male to 4 female1: saitech: it 4pk 15cm USB 3.0 extension cable to a male to female right angle 90 degree1: chanzon: 5mm orange LEDother parts:4: m3x5 bolts4: m3x20 bolts2: m3x8 bolts6: m3x7 od black flat washerAssembly:I originally posted this on makerworld where I was able to post the images along with the instructions, but I guess in thingiverse I have to post the instructional images up above.These instructions assume you've already setup the bios for the Odroid H4, and Batocera for your NVME .. I didn't do this and had to disassemble everything to go back and do that after I had completed the build. Connect the RTC battery and areme 90 degree USB adapter to the H4. Flip the H4 over and connect the RAM and NVME.Crimp the dupont connectors onto the orange LED and momentary push button.Insert the fidioto 1 to 4 USB cable through the inside of the base USB slots, it's snug but I used some hot glue to help hold them in place.Using 4 m3x5 bolts, mount the H4 to the baseUsing 4 m3x20 bolts and 4 m3x7mm washers, mount the base to the wallsConnect the saitech USB 90 degree cable to the areme 90 USB adapter at the back of the H4Connect the saitech 90 degree cable to the fidioto 1 to 4 USB cable, make sure the fidioto 1 to 4 cable is wrapped underneath the female ports at the front of the case so the wires don't interfere with the fan later on.Insert the chanzon 5mm orange led into the led cover, slide them through the lid from the top and then glue them in place together.Flip the lid over and glue the blank (eject) button on the right side of the lid.Flip the lid over once the glue has dried and mount the fan to the inside of the lid. It seems that due to printing the lid standing up, the bolt holes I added didn't print to proper size. I had to use threaded inserts to remedy this. The bolts I used came with the fan.Set the base/walls beside the lid, and then connect the three sets of wires to the H4. The fan is obvious but the power switch will go on the pins in the far back right counting towards the front as blank, blank, black, red, and the orange led will go on the pins near the very front left counting away towards the back as blank red black.Close the lid by sliding the front down to the wall and the back higher up, and slowly lower the back ensuring all of the cables are neatly to the sides of the fan and the heat sink. With the front properly wedged in place you can carefully lift the back to make sure nothing is pinching, pulling, or getting in anything else's way. With everything closed up, use 2 m3x8 bolts and 2 m3x7 washers to keep the lid in place from the back.Flip over the device and attach 4 of the sdlqy adhesive rubber feet to the base.Ensure everything is running as assembled, and when happy glue the printed power button to the top of the actual momentary power switch that can be seen through the hold in the lid.
Direct link to the original creator's page
More from JasonHutchins
Similar Models
Model Specifications
Frequently Asked Questions
How do I download Droid Cast H4?
Click the "View on Thingiverse" button above to visit the original model page on Thingiverse. You can download the STL file directly from the creator's page for free.
What 3D printer can I use for this model?
This model is compatible with most FDM 3D printers (Creality Ender 3, Prusa MK3S+, Bambu Lab, etc.) and resin printers (Elegoo, Anycubic). Check the original page for recommended print settings and materials.
Is this 3D model free to download?
Yes, this model is available as a free download on Thingiverse. Some creators accept tips or donations.
Can I modify this file?
Check the license (see original page) on the original Thingiverse page. Most STL files can be modified using free software like Blender, TinkerCAD, or Meshmixer.