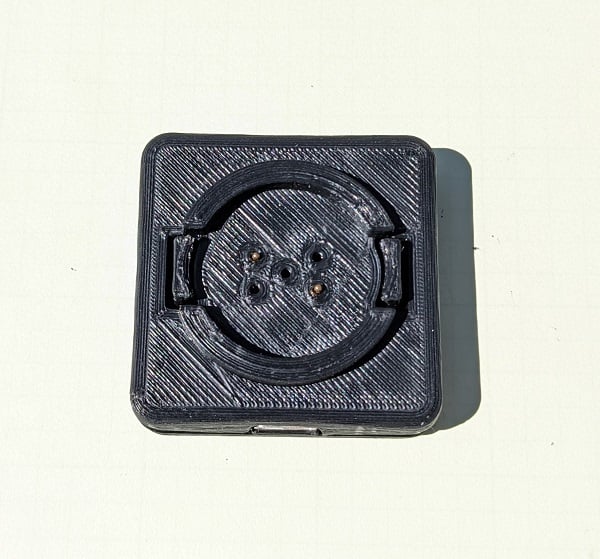
Garmin Edge Charging Cradle
thingiverse
This is a charging cradle for certain Garmin Edge computers so you do not need to plug a cable into the micro USB port on the computer. Just plug a USB C power cable into the charging cradle and snap the computer onto the cradle. Currently it should work for the Edge 530, 830, 1030, and 1030 Plus computers. I have only tested it on my 830. In addition to the two 3D printed parts, you will also need: * Two pogo pins, MillMax part number 0908-2, DigiKey part #[ED90386-ND](https://www.digikey.com/en/products/detail/mill-max-manufacturing-corp/0908-2-15-20-75-14-11-0/1991676). Plus one or two more in case they get stuck in the test gauge. * One SparkFun [BOB-15100](https://www.sparkfun.com/products/15100) USB C breakout board, DigiKey part #[1568-1958-ND](https://www.digikey.com/en/products/detail/sparkfun-electronics/BOB-15100/9770720) * Solder * Fine gauge wire- 26-30ga. * Optional: 4 thread forming screws- #2x1/4". The halves should just snap together, but screws can be used for redundancy. Because many 3D printers make smaller than expected holes, I have included a pogo pin test gauge to see which size hole the pogo pins properly fit. The numbers are just the holes oversized by that number of tenth's of a millimeter: 1 = 0.1mm larger, 2 = 0.2mm, etc. Print the test gauge, see which size hole a pogo pin fits snugly. and print the correspondingly numbered top piece. The bottom pieces are all the same aside from the screw hole sizes, so sizing isn't as important. If you do not want to bother printing the test gauge, just print the #3 versions and run through the holes with a 1/16" or 1.5mm drill bit. The pogo pins may be slightly loose, but the bottom piece will prevent them from falling out. Only two pogo pins are needed, one each in the 4 o'clock and 10 o'clock positions when viewed from above. Solder a wire from one pogo pin to the VBUS hole on the SparkFun break out board, and the other pogo pin to the GND hole. Polarity does not matter since the computer can be plugged in 180 degrees around anyway. Important notes about this setup: * This does not have any provision to prevent a short circuit, therefore, do not allow anything- such as loose change or other metal objects- to short across the two pogo pins. If travelling with the charging cradle, unplug it before packing it. * Charging is at a lower current than through the micro USB port, so it will not charge as quickly through the cradle. * After removing the computer from the cradle, it may warn that the external power was lost. This is an intentional feature when using the external Garmin power pack, but less useful for a stationary charging cradle. I do not know how to prevent this kind of warning. * Finally, the computer will power on when being charged through the cradle and may attempt to connect to various peripherals. Namely, it may attempt to create a light network and cause connected lights to turn on or blink. Cameras that are part of the light network may turn on and stay on even if the lights are off. I do not know how to fix this besides unpairing the lights.
With this file you will be able to print Garmin Edge Charging Cradle with your 3D printer. Click on the button and save the file on your computer to work, edit or customize your design. You can also find more 3D designs for printers on Garmin Edge Charging Cradle.
