Garmin BC40 Backup Camera Mount
thingiverse
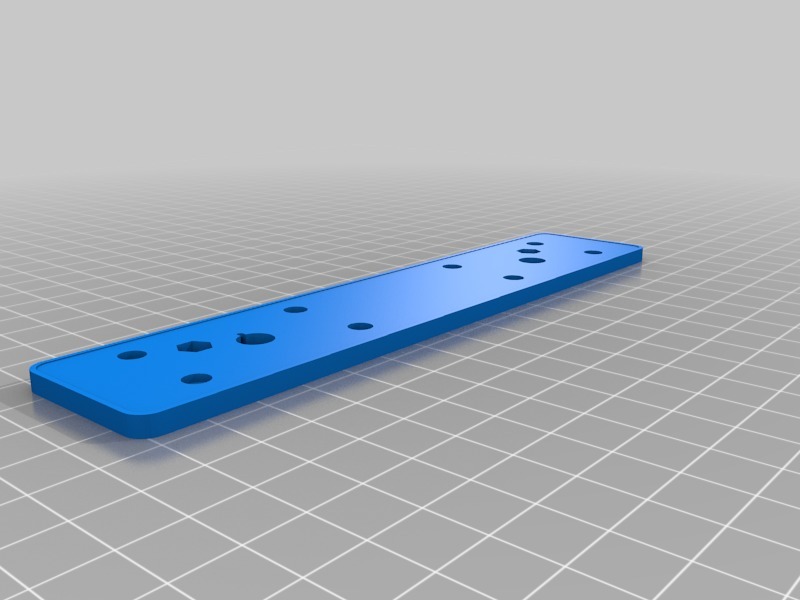
I purchased a Garmin BC40 backup camera to install on my RV's rear end. This unit came pre-attached to an aluminum bracket that securely attaches to the license plate. Since I preferred positioning the camera directly in the center of my RV, I designed and 3D printed a custom mounting plate that replaces the original aluminum bracket. The new plate is then attached to the vehicle using strong Gorilla Mounting Tape, which provides excellent outdoor durability. Required parts include two nuts that fit onto the angle position bolts and double-sided Gorilla Mounting Tape. Here's how you can use it: Step 1: Create a new mounting plate using your 3D printer. Step 2: Remove the eight tiny screws from the back of the Garmin mount, which attach the black bracket to the aluminum frame. Step 3: Unscrew the two bolts on the Garmin bracket that allow for angle adjustment, then remove them from the threaded inserts in the aluminum bracket. Step 4: Find two small nuts that fit onto the angle mounting bolts and place them into the recessed cavity on the new mount. Screw the Garmin mount onto the new mount using the two angle bolts (loosely for now). Step 5: From the back of the new mount, screw on the eight mounting screws you removed earlier. Step 6: Attach the mount to your vehicle using double-sided Gorilla Tape and adjust the angle to your liking.
With this file you will be able to print Garmin BC40 Backup Camera Mount with your 3D printer. Click on the button and save the file on your computer to work, edit or customize your design. You can also find more 3D designs for printers on Garmin BC40 Backup Camera Mount.