Gardena 7000/D impeller and pins (repair kit).
prusaprinters
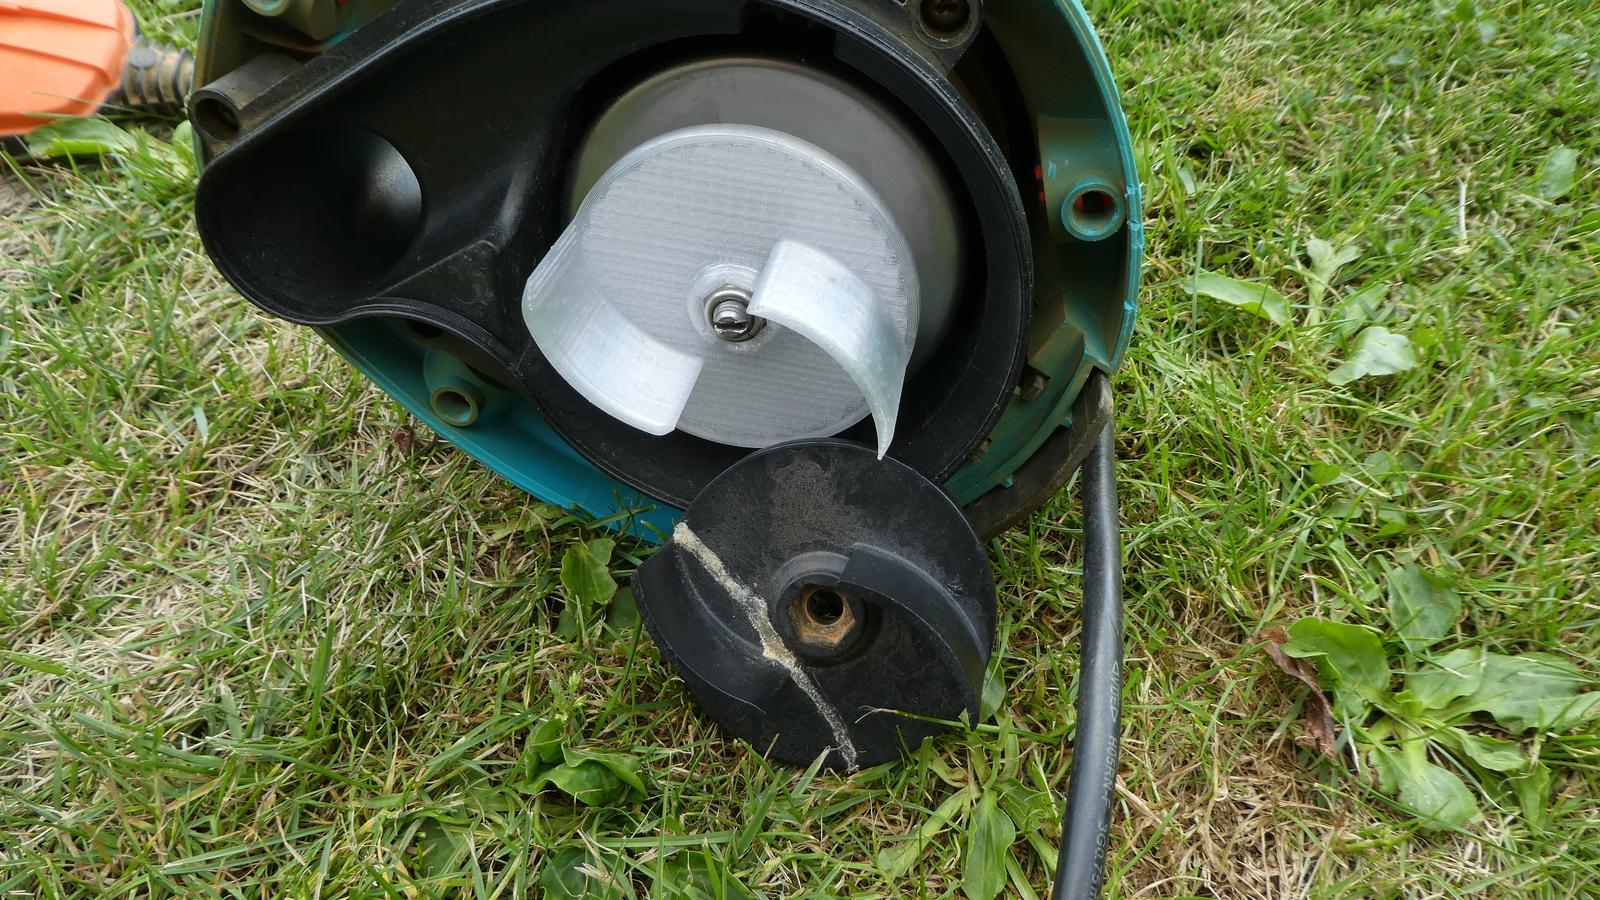
<p>I used Gardena 7000/D a few years ago and I stopped using it because its plastic parts had very low quality. First I broke 3 of 5 pins that are used to keep the blue and the black parts of the pump together. I used a metal wire winded around the pump several times to keep both parts joined then! But one day the impeller separated into 2 pieces and I had to buy another pump because I couldn't find such an impeller anywhere around. I bought a new pump of another brand, of course, and it turned out to be cheaper but of better quality :) And now that I have a 3D printer, I decided to practice FreeCAD modelling and give Gardena yet another new life, because its motor is still working well...</p><p>The pins should be printed 100% solid (use 10 walls/perimeters parameter). Support is not needed as I slightly redesigned them to avoid support.</p><p>The impeller that I made is not the exact copy of the original Gardena 7000/D impeller. I kept the external dimensions and the form of the blades the same, but also made some improvements. The differences are as follows:</p><p>1) The bottom spacer and the impeller are printed as separate parts in my version while the original impeller has the spacer "glued" at the bottom. I separated them to avoid any support during printing and keep all the surfaces as flat as possible (flatter surfaces = less friction). You don't have to glue the spacer to the impeller. Just put the spacer to the shaft, and then put the impeller, and then screw the nut - it will keep them together hard, so the glue is not required here.</p><p>2) I slightly increased the height of the round base to simplify its form and avoid support during printing. It also makes the whole thing more reliable. I printed the round base with GRID infill, 5 mm between the lines).</p><p>3) I increased the thickness of the blades because I found that the blades of the original thickness in my first prototype could be easily broken because of weak adhesion between layers:</p><figure class="image"><img src="https://media.printables.com/media/prints/273616/rich_content/9f30d30d-4214-45e8-90d8-86c2ea1c8f5c/broken_tn.jpg#%7B%22uuid%22%3A%22fd6f5cc7-548c-471d-970a-7d4e63364c4f%22%2C%22w%22%3A1600%2C%22h%22%3A900%7D"></figure><p>Thicker blades in my final version are not that easy to break because the increased area also improves the adhesion between layers. I highly recommend to print the blades 100% solid as they are the weakest parts of the thing anyway (set 6 walls/perimeters, this should be enough to avoid infill inside the blades).</p><p>Other settings that I used: PETG 240/70, 0.4 nozzle, 0.4 width, 0.2 layer height, 5 top, 4 bottom, seam position: random (less beautiful but more reliable), fill gaps (to avoid small empty spaces in the blades).</p><p>All the stuff that I offer here was tested in real life with my pump - it works! I tried it with clean water only, though. I didn't try it with sand, stones and other hard pieces that can theoretically reduce the life of the impeller considerably. You can try to drain water with some garbage if you want, and if you destroy the impeller, you can print another one in approximately 3 hours!</p><p>Let me know if you use this impeller and have some problems with it and maybe I will improve it further for you because I restored this pump more for fun than for work as I have more powerful pump of another brand now…</p><p><strong>The model is free for non-commercial use. This model and the prints of this model are not for sale. </strong></p><p><i><strong>Update 2022.10.28.</strong> As the first version of the impeller was broken by a stone that was sucked inside the pump, I had to make a new version V2 with thicker blades and better adhesion. It was proved to be reliable after draining more than 1 ton of dirty water with slime, hair and stones from a septic tank. I also made a stone filter that doesn't allow large stones get inside the pump. It really works but it needs cleaning once in a while because it also catches hair, grass and other stuff like that and the flow becomes weaker, so finally I removed it and impeller V2 survived everything that was sucked inside without the filter. Standard 3.8 mm pins always break. I tried PLA, PETG and ABS. Designed 4.0 mm pin (max possible for the lock), but they also break because the lock just tears them by layers. I will try to print them in horizontal direction later, this needs support but it will probably make them stronger.</i></p><figure class="image"><img src="https://media.printables.com/media/prints/273616/rich_content/916871ea-0925-49bb-a949-4d3bcb36229c/p1220203_tn.jpg#%7B%22uuid%22%3A%226777a8e8-e2e4-4c9a-8340-eaeb3a064273%22%2C%22w%22%3A1920%2C%22h%22%3A1080%7D"></figure><figure class="image"><img src="https://media.printables.com/media/prints/273616/rich_content/be065fd4-93c7-4601-9b69-18f95f660eed/p1220207_tn.jpg#%7B%22uuid%22%3A%222dd8595a-6a91-49e7-b9f7-b227810e4405%22%2C%22w%22%3A1920%2C%22h%22%3A1080%7D"></figure>
With this file you will be able to print Gardena 7000/D impeller and pins (repair kit). with your 3D printer. Click on the button and save the file on your computer to work, edit or customize your design. You can also find more 3D designs for printers on Gardena 7000/D impeller and pins (repair kit)..