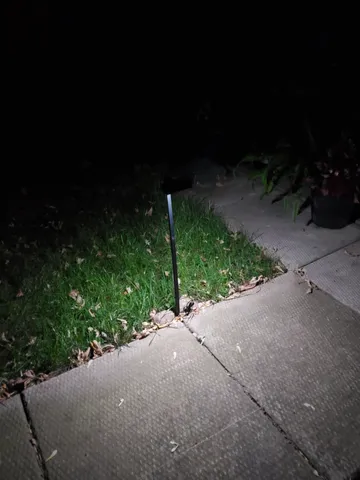
Garden/Pathway Light (LED)
prusaprinters
This model is for a “streetlight-style” wired garden/pathway light. Brighten up your garden path with lights, without spending a fortune on MoonRays or similar products where a single lamp can cost up to $20! In bulk I can make these for about $3-5 a lamp, give or take.The design consists of a head section, a set of poles that allow customized heights and allow the wire to feed through them, and then a removable stake that can be pounded into the ground for a stable fit.The insert comes in two varieties: one for an LED strip light segment (should fit most standard white LED strip lights with ~50mm segments), and one for 4x 3mm LEDs. I started with the latter but after burning out several LEDs created the former as a replacement and I'm much happier with it, but the flexibility is there.There is also an optional “diffuser” cover that can be printed in clear/transparent plastic to help spread the light, but I found this unnecessary; it's included just for customization purposes. This will fit over either the strip or individual LED versions.My standard build pictured consists of one stake, one bottom pole, two riser poles, the head, and the insert. I print the non-insert parts and the insert separately due to different slicing settings, but you can play around to find settings that work well for your printer and filament. All the STLs are correctly oriented and print laying down, so you will need a printer that can accommodate the longest piece (the bottom pole) which is 210.1mm long.I slice with Cura 5.1 and print on an Flsun QQ-S Pro with Klipper. Non-material-specific slicing settings are:Bodies: 0.15mm layer height (including initial layer), 15% gyroid infill, concentric top/bottom, tree supports touching buildplate only at 85 degrees overhang, 0.3mm line width w/0.4mm nozzle, 5 wall lines, inside-out wall ordering, concentric ironing on top layer.Inserts: Same as above but with 100% concentric infill to avoid distortions.Once printed, I use a razor scraper to ensure everything is clean of stringing and bulges/artifacts.I printed my ~16 of these using ABS, but ASA might last longer in the sun (I will update this after some time regarding durability there), and PETG is of course an option as well.To assemble the lights, I use a thick ABS slurry (roughly 50/50 mix of acetone and scrap ABS from brims, etc.) and paint a little bit into each of the connections between the poles to keep them permanently together, as well as a layer along the very bottom outside of the bottom pole (see pictures) to prevent accidental cracking or layer separation at the weakest point where the stake is inserted. Superglue could also work for this when using different materials, and the friction fit would also be sufficient in some cases. I also coat the cable where it connects to the LED strips (for the LED strip insert) and the backs of the LEDs (for the individual LED insert) to keep everything in-place and the solder joints protected from the elements; again superglue could be used instead and this part is likely not optional for optimal longevity.Once assembled I clamp the pole to a 90-degree angle iron to ensure it cures straight, though it's hit and miss within about 5 degrees due to ABS warping and imperfect joints - YMMV - and leave it for at least 2-4 hours. The wire can be fed through the poles either before assembling/gluing, or afterwards using a guide wire. I use 22-gauge stranded two-wire cable for this and it just fits; ensure your wire doesn't exceed about 3.75mm wide and it should fit fine. The lamps are then connected to direct burial cable however you see fit; I personally use these connectors and leave about 6 inches of slack wire out the bottom of each lamp for adjustments, as well as a bit extra up in the head (maybe another 1-2 inches) just in case.The end result is a fairly robust lamp: the ABS version that I've made is quite sturdy despite its small size and appearance, and while I haven't “torture tested” them yet, they've been knocked by a lawnmower and lightly kicked without issue and have survived several storms, high wind days, and just general outdoor conditions for at least a month at this point.Tinker it on TinkerCAD.
With this file you will be able to print Garden/Pathway Light (LED) with your 3D printer. Click on the button and save the file on your computer to work, edit or customize your design. You can also find more 3D designs for printers on Garden/Pathway Light (LED).
