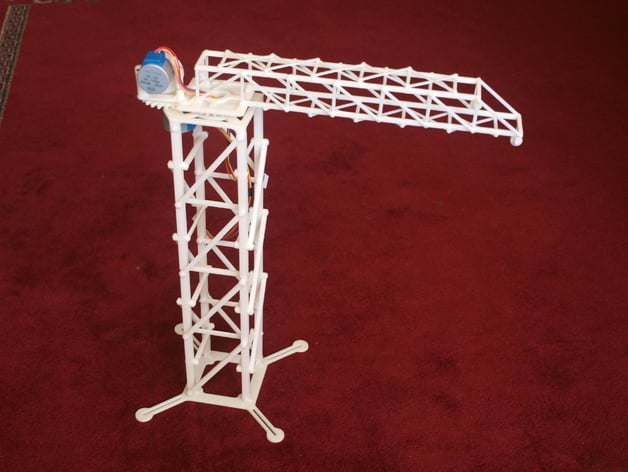
Gantry Crane
thingiverse
Gantry crane powered by 2 stepper motors, assembled from individual components.\n\nInstructions for the Gantry Crane Project\nDon't expect this project to be completed in a day; patience is required.\nAdditional hardware needed:\n- Two 28BYJ-48 stepper motors - One 37 x 17 x 10 ball bearing - A string This project's modular design allows you to customize its height as desired, with main supports needing to be multiples of two and the crane arm in multiples of three.\nEvery component will fit within a 200 x 200 print bed and can be printed without support materials.\nThe parts were drawn using Autodesk Inventor; however, some scaling adjustments need to be made due to an issue with the slicer.\nTo print the main tower, everything must be scaled by a factor of ten in Slic3r.\nVerify the orientation of each part after assembly, as specified:\n- The main uprights should be printed upside down - All disk components need to be rotated 90 degrees\nUse the same member type for the crane arm, but scale all parts by half the size of the main upright to achieve the correct dimensions.\nThe base assembly consists of eight main uprights secured together using angle bracing and horizontal cross-bracing.\nTo secure pin joints, plastic rivets were used. Here's how it was done:\nDrill 3mm holes Cut short lengths of filament (20-25mm) to suit the project's needs Heat one end of the filament with a soldering iron until it mushrooms Insert the rivet and trim excess filament to about 3-4mm Mushroom the exposed end of the filament by applying heat from a soldering iron\nFor the crane arm, use the same method but substitute 1mm styrene rod for securing the parts. An alternative option is using gravity-extruded filament and drilling 0.6 mm holes.\nAn old bearing from a go-kart was repurposed as the turntable. The outer bearing retainer features an interference fit design to provide stability, though it can be secured with adhesive in extreme cases.\nThe crane arm's assembly begins with attaching front wheel braces to smaller main uprights, using angle bracing, horizontal bracing, and cross-bracing for securing purposes.\nEleven components will need to be glued together, including the cable drum, half wheels, hook, bearing base ring with roller bearing installed.\nThe preferred adhesive choice is "Plumbers' priming fluid for PVC pipes," a highly aggressive formula that dries quickly, resulting in clean welds. This product can be found at most hardware stores and comes in 250mL bottles for a relatively low cost.\nThe only components secured with screws were the stepper motors.\nGiven the slow operation of the cable drum, an external gearbox may be considered to improve performance; this could lead to a potential future update.\nThis is where you can provide feedback, share suggestions, and offer any ideas for improvement.
With this file you will be able to print Gantry Crane with your 3D printer. Click on the button and save the file on your computer to work, edit or customize your design. You can also find more 3D designs for printers on Gantry Crane.
