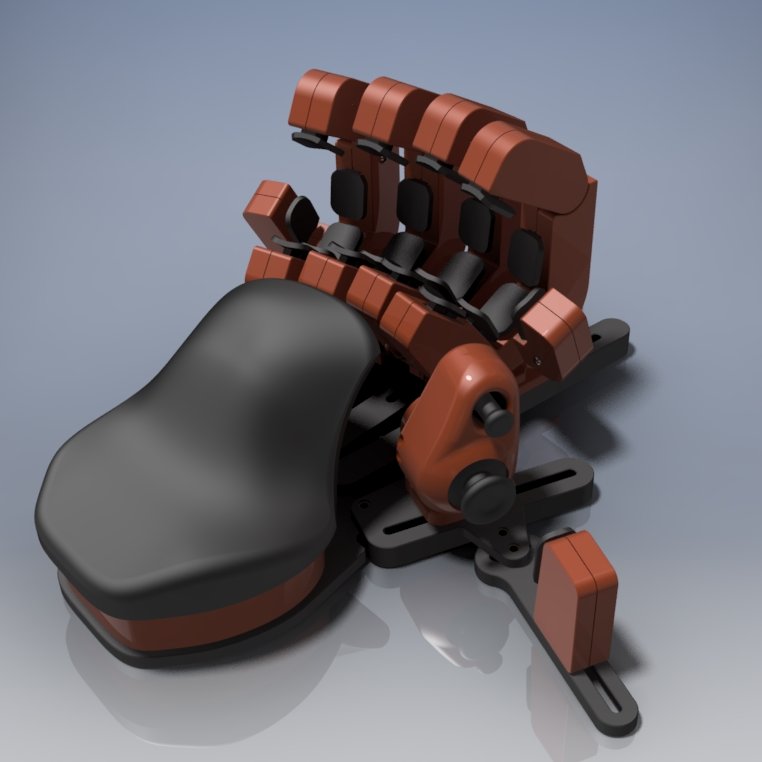
gameKey Ergonomic Controller
prusaprinters
<h3>gameKey Controller</h3><p>This is an attempt at an easy to print and easy to build adjustable ergonomic game controller. It is based around two custom PCBs, hosting a SparkFun Pro Micro as the main controller (hooked to up to 30 buttons), and a daughterboard containing a joystick and navigation switch for additional controls, including analog.</p><p>It uses a combination of M2 and M3 heat-set inserts and as narrow a variety of attachment hardware as reasonably possible. The primary goal is simplicity without sacrificing adjustability or quality.</p><p>The entire assembly can be mirrored at the part level to create a version intended to be used with your right hand instead of your left - with the exception of the thumb back/body parts. The control PCB will fit in either direction.</p><p>This project can be found in a more complete form on GitHub in the following repositories:</p><p><a href="https://github.com/andrewb435/gameKey-STL">https://github.com/andrewb435/gameKey-STL</a><br><a href="https://github.com/andrewb435/gameKey-PCB">https://github.com/andrewb435/gameKey-PCB</a><br><a href="https://github.com/andrewb435/gameKey-Firmware">https://github.com/andrewb435/gameKey-Firmware</a><br><a href="https://github.com/andrewb435/gameKey-Companion">https://github.com/andrewb435/gameKey-Companion</a></p><h4>Printing Notes</h4><p>The middle and ring finger assemblies are identical. Index is the same, but with a special MainA part to allow the addon to attach. Pinky is a 100% mirror of the Index, with every involved printed part being mirrored.</p><p>The palm rest may need support in the center depending on your printers bridging capability. The thumb cluster front and back need supports.</p><p>These are largely designed to be printed at 0.3mm layer heights for speed, but should be fully functional at 0.2mm layer heights as well.</p><h4>Assembly notes</h4><p>Heatset inserts should also be in the A side of all parts. All shell assembly inserts/bolts are M2, and all adjustment inserts/bolts are M3. All buttons use 10mm snippets of 1.75mm filament as an axel/pivot.</p><h5>Fingers</h5><p>The switches nestle into the pockets in the A sides of all printed parts and are wired in place. All switches share a common wire that goes to the Column pad on the main control board, with the exception of the side button, which get dedicated lines to their specific row/column pad.</p><p>Side button assemblies are bolted to the side of the Index/Pinky A-sides before the main buttons go in, as the bolt is under the button at the bottom of the main clusters.</p><h5>Thumb Cluster</h5><p>The cap for the joystick needs to be inserted into the housing before the circuit board with the Alps stick, as it needs a bit of finagling around the lower edge insert.</p><h5>Palmrest</h5><p>The palmrest itself has 3 M3 inserts in the bottom, with the M3x35 Socket Head Cap Screws going through the lower plate, mid section, and into the palm. The control board has a single M2 insert and screw to fasten and locate it on the base plate.</p><h3>Status</h3><p>As of original posting, the firmware is mostly feature complete, and the configuration application is viable but rough. PCBs can be ordered inexpensively from JLPCB and the main board has the proper files for PCBA to handle the 30 diodes on the bottom.</p>
With this file you will be able to print gameKey Ergonomic Controller with your 3D printer. Click on the button and save the file on your computer to work, edit or customize your design. You can also find more 3D designs for printers on gameKey Ergonomic Controller.
