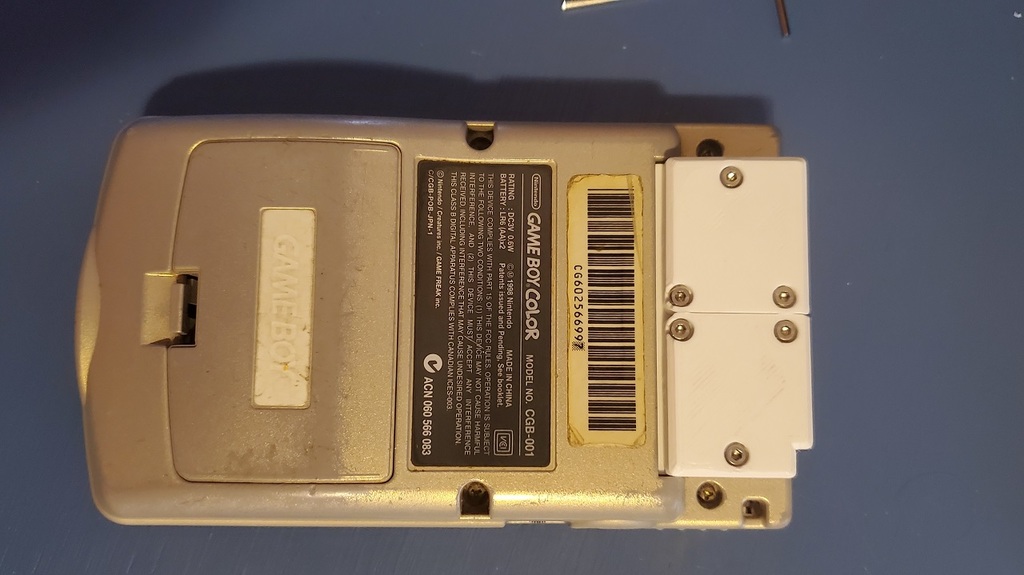
GameBoy Color Power Cartridge
prusaprinters
<p>This is a built in battery holder for the 2025 coin cells used in gameboy cartridges. These cells are what keep the memory working for saved games.</p> <p>The idea is that when one battery starts dying you can easily add a new one before removing the old one or you can use two batteries and have them both last a bit longer. This pack also allows easy replacement of batteries while the game is loaded and powered in a gameboy so that even if both batteries become disconnected the save won't be lost.</p> <p>I designed and built this over the weekend, if you have ideas or improvements let me know.</p> <p>Materials</p> <p>Power case</p> <p>Tab A</p> <p>Tab B</p> <p>6 m2 8mm screws</p> <p>6 m2 nuts.</p> <p>22 gauge wire stranded (lighter gauge may work better.)</p> <p>Solder and Iron</p> <p>Steps. (Be careful.)</p> <ol> <li>attaching the wire to the tabs and case.</li> </ol> <p>a. Strip about 5 cm of wire and press it into the outer hole on the tab and press the bare wire into the groove. Use the soldering iron to periodically press the wire into the groove melting the plastic to hold it in place. Make sure that most of the wire will still be able make contact with the battery. Make sure that the wire going into the tab can only contact the top of the battery, the tabs are the Negative terminals.</p> <p>b. Follow a similar procedure with the main case. The wire should go up through the holes with the grooves around them. Once again use the iron to press the bare wire into place. This will be the Positive terminal. 2. place the m2 nuts in their cutouts. If they are loose use glue to hold them in place, or the iron to melt them into position. 3. solder the 2 positive wires together. Keep them as short as possible while still able to reach the battery terminal with the case open.</p> <p>a. slide the tab wire through the holes so they line up with the edges of the case. Same as with the positive wires, keep the tab wires as short as possible and still able to reach the negative terminal with the case open. solder the 2 negative wires together. 4. If the game has already lost its saves or doesn't have one, simply de-solder the coin battery and solder your positive and negative wires in its place. Then place a battery in one of the tabs and screw it down. Make sure it works and you're done! 5. If You have a save worth keeping, remove the back cover of the cartridge and load the game on your gameboy and load your save. Make sure your GB has fresh batteries or is plugged in, if it dies you may loose your save.</p> <p>Now follow the steps from pt. 4. Once you have the wires soldered and a battery in place save your game again remove the cartridge and slide the cover into place.</p> <p>A great tutorial on replacing GB batteries while keeping your save can be found here.</p> <p><a href="https://www.instructables.com/How-to-Change-Game-Boy-Cartridge-Battery/">https://www.instructables.com/How-to-Change-Game-Boy-Cartridge-Battery/</a></p> <h3>Print Settings</h3> <p><strong>Printer Brand:</strong></p> <p>Prusa</p> <p class="detail-setting printer"><strong>Printer: </strong> <div><p>I3 MK3S</p></div> <p><strong>Rafts:</strong></p> <p>No</p> <p class="detail-setting supports"><strong>Supports: </strong> <div><p>No</p></div> <p><strong>Resolution:</strong></p> <p>.1</p> <p class="detail-setting infill"><strong>Infill: </strong> <div><p>20</p></div> <p><strong>Filament:</strong> doesn't matter PLA Any</p> <p><br/> <p class="detail-setting notes"><strong>Notes: </strong></p> </p><div><p>A finer resolution is generally better. Supports aren't required but can be used for the tabs screw holes.</p></div> </p></p></p> Category: Games
With this file you will be able to print GameBoy Color Power Cartridge with your 3D printer. Click on the button and save the file on your computer to work, edit or customize your design. You can also find more 3D designs for printers on GameBoy Color Power Cartridge.
