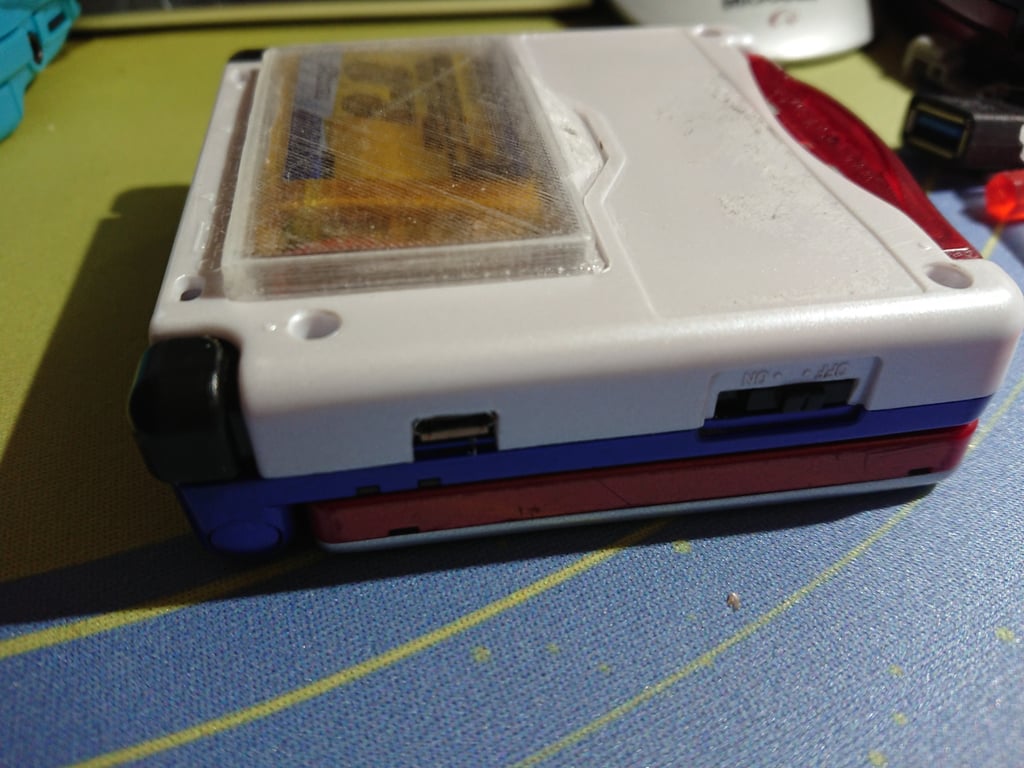
Gameboy Advance SP Extended Capacity Battery Cover
thingiverse
I tweaked the original cover from sheshin but expanded it to conceal a 2Ah turnigy battery from hobby king, also incorporating a mount for a micro usb breakout board for charging. Update 2018-05-17: I'm pleased with the shape of the cover as is, but I will be adding a third option soon for a USB C breakout board to charge via USB C. Additionally, I updated my pictures with the actual model hosted instead of an older one. Update 2018-12-29: I decided I wasn't happy with the shape of the cover. I added a new lower profile version that should still fit the same cell. This requires cutting out even more of the original casing and removing the springs for the shoulder buttons. There is no room for an extra charge port, so there is only one version. These are the parts I used: - Micro USB Breakout Board: https://www.aliexpress.com/item/5pcs-Mini-Micro-USB-to-DIP-2-54mm-Adapter-Connector-Module-Board-Panel-Female-5-Pin/32555774957.html - 2 Ah LiPo Battery: https://hobbyking.com/en_us/turnigy-2000mah-1s-1c-lipoly-w-2-pin-jst-ph-connector.html Warning: Completing this mod requires irreversible modification to the Gameboy Advance SP. You have to permanently remove portions of the lower housing to fit the battery snugly, even with the cover since the battery will sit at an angle. I recommend using an aftermarket housing. Soldering is required. You have to remove a large section of the internal battery tray on the lower housing near the cartridge connector. You must leave the other side intact otherwise the shoulder buttons will no longer install properly. After making physical room for the battery, I removed the battery connector from the motherboard and the JST connector from the battery and soldered the battery to the bare pads. Using a connector would be optimal but I have not yet found one that will fit properly and is strong enough. I used hot glue on the soldered terminals to secure the wires. You can solder directly to the battery connector on the SP without removing it, but I opted to remove it since it will give me a little bit more room to work with and it will make the mod reversible as long as I replace the lower housing and do not lose the desoldered connector. Until final assembly, the battery should always remain disconnected from the circuit board to protect from shorts. To add the Micro USB breakout board for charging, solder stranded wire (28 AWG is sufficient) to the VBUS and GND pads on the breakout board and connect the VBUS wire to pin 2 on the reverse of the power port and GND to pin 6. Make sure you use enough wire to maneuver the board through the hole made for the battery, around the battery and into the battery cover. I find that a service loop will give enough slack to maneuver the components and it will tuck neatly underneath the rear of the battery or to the right side. See pictures for more details.
With this file you will be able to print Gameboy Advance SP Extended Capacity Battery Cover with your 3D printer. Click on the button and save the file on your computer to work, edit or customize your design. You can also find more 3D designs for printers on Gameboy Advance SP Extended Capacity Battery Cover.
