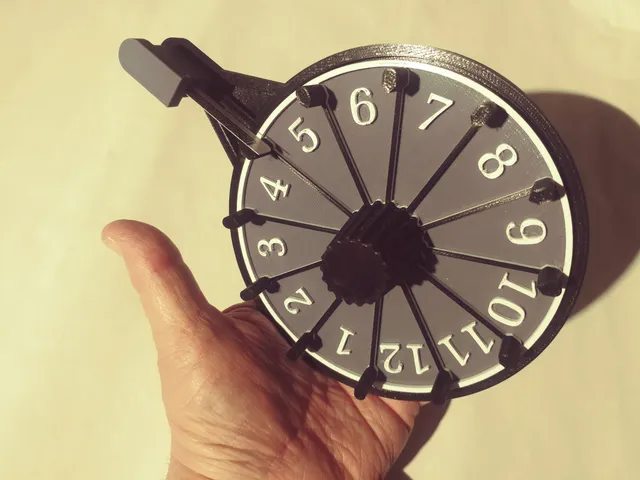
Game Spinner (Die Replacement)
prusaprinters
While in the process of creating my updated Stargate-themed game, I came upon the need for a “game spinner” to allow selection of 1-12 (just like using a pair of dice). I added the base included here to allow it to be used in any board game (eliminated the Stargate look). If you use the printed bearing, no other hardware is required!The Game Spinner has just three parts: The spinning top half, the card holder cap, and the base. In addition, you will need either a bearing or the alternative, 3D printed bearing, and a spare playing card.The bearing I used came from a local hobby shop, but is also available from Amazon: ARR610016 (8x16x5mm).Note: While I designed this to use an actual bearing, I have found that the unit works as easily with the printed bearing - you can certainly make it using the printed bearing, and replace it later if you prefer!Printing the base:I printed my base with Inland PLA+ filament. The base is an easy print, and no supports are required. I have provided a pre-sliced version along with the STL.Printing the spinner:I printed my spinner with Inland PLA+ filament. This is also an easy print, and while no supports are required, I went ahead and added supports for a smoother print. After printing, remove any support material from the bottom side, and clean up the remaining hole. I have provided a pre-sliced version along with the STL.(If you will not be using an actual bearing, you can print the “bearing” and prepare it for use)Printing the cap:The cap presses the card holding slot tight so the card will not slip, this can also be printed without supports.Printing the bearing:I designed this with a removable bearing so that if it did wear at all, it would be easy to replace without re-printing the entire spinner, another simple print with Inland PLA+. There are two bearing files one is 4.0mm height the other is 4.5mm - I used the 4.0mm if you get any binding on the surface, go with the 4.5mm!Assemble the spinner:Press either bearing (printed or metal) into the bottom of the spinner assembly, press the spinner onto the printed shaft on the base (the base shaft has been split to provide some “give” to the shaft.Cut a slice of playing card about 10-11mm wide and slide it into the slot, slide it down till it bottoms out then adjust so that it overhangs the spinner assy, just beyond the spinner “pins”. Cut off the rear of the card if you like, and slide the cap on top (this should lock the card in position). If you need to readjust the card, remove the cap first. The card can easily be replaced if it wears out.Please enjoy!Watch for my other versions coming soon!Please leave comments
With this file you will be able to print Game Spinner (Die Replacement) with your 3D printer. Click on the button and save the file on your computer to work, edit or customize your design. You can also find more 3D designs for printers on Game Spinner (Die Replacement).
