G600 Electronic Magnifier Stand "Improvement"
thingiverse
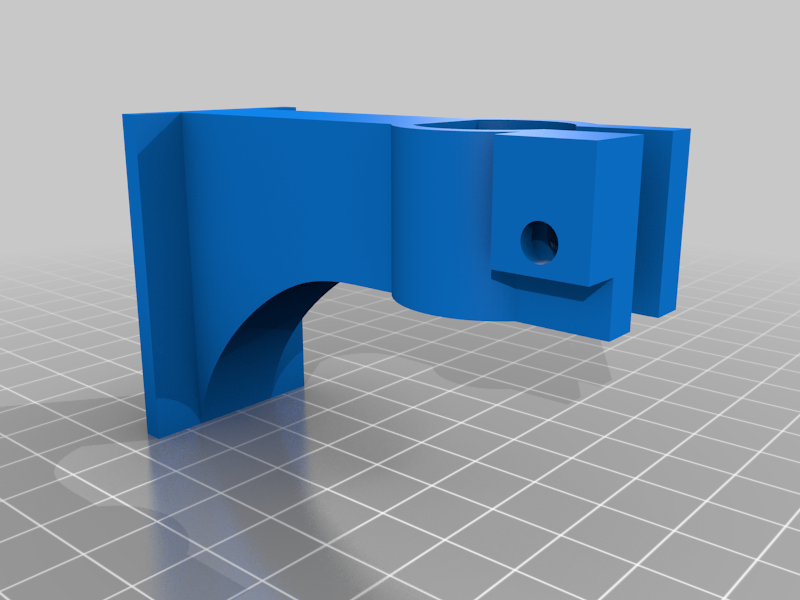
I recently purchased an electronic magnifier from one of the Chinese online retailers. It was billed as having 1-600X continuous magnification, but what I got was a fixed magnification level that could only be adjusted by raising or lowering the unit itself. The problem with this design was twofold: first, the goose neck that came with it was extremely stiff, making it difficult to raise and lower the unit; second, you couldn't get it high enough for the magnification to be low enough to be useful. I searched for an alternative stand, but they weren't what I wanted, so I decided to design my own. The new system consists of three main components: a base that snaps into place, a pillar to raise and lower the unit, and a bracket to attach the unit to the pillar. There are two types of pillars available: one is 200mm long with a center hole for an M5 screw, while the other is 50mm long with threads on both ends. The second pillar allows you to print as many as you want, screw them together, and have any length of pillar you desire. The bases come in two types: one has a hole for the 5mm screw that goes into the pillar, while the other has a 25mm pillar with a threaded hole that allows you to screw in one of the 50mm pillars. There is only one bracket that attaches to the back of the unit and slides up and down the pillar. It's kept in place by tightening an M4x25 screw through a M4 nut that gets slid into the bracket. The knob is designed to have one M4 nut screwed all the way up to the head of the screw, then slid through the nut. I recommend printing the 200mm pillar on its side and the 50mm pillar pieces on their ends with the hole on the print bed. If the 50mm pillars are printed on their sides, they require support, which can affect the quality of the threads. For the bottom with the threads for the 50mm pillar, I suggest printing it feet down with supports. If you print it on its side, it needs support for the threads, and they don't work as well. For the bottom with just the hole, I recommend printing it on its top with the feet off the print bed. The knob should be printed with the larger hole on the print bed. You can do supports or not, depending on your printer. Finally, I recommend printing the bracket with the flat side down and no supports. What I like about this design is that it's flexible, allowing you to choose what type of system you build and how high you want to go. What I don't like about this design is that it needs external hardware, which I normally try to avoid.
With this file you will be able to print G600 Electronic Magnifier Stand "Improvement" with your 3D printer. Click on the button and save the file on your computer to work, edit or customize your design. You can also find more 3D designs for printers on G600 Electronic Magnifier Stand "Improvement".