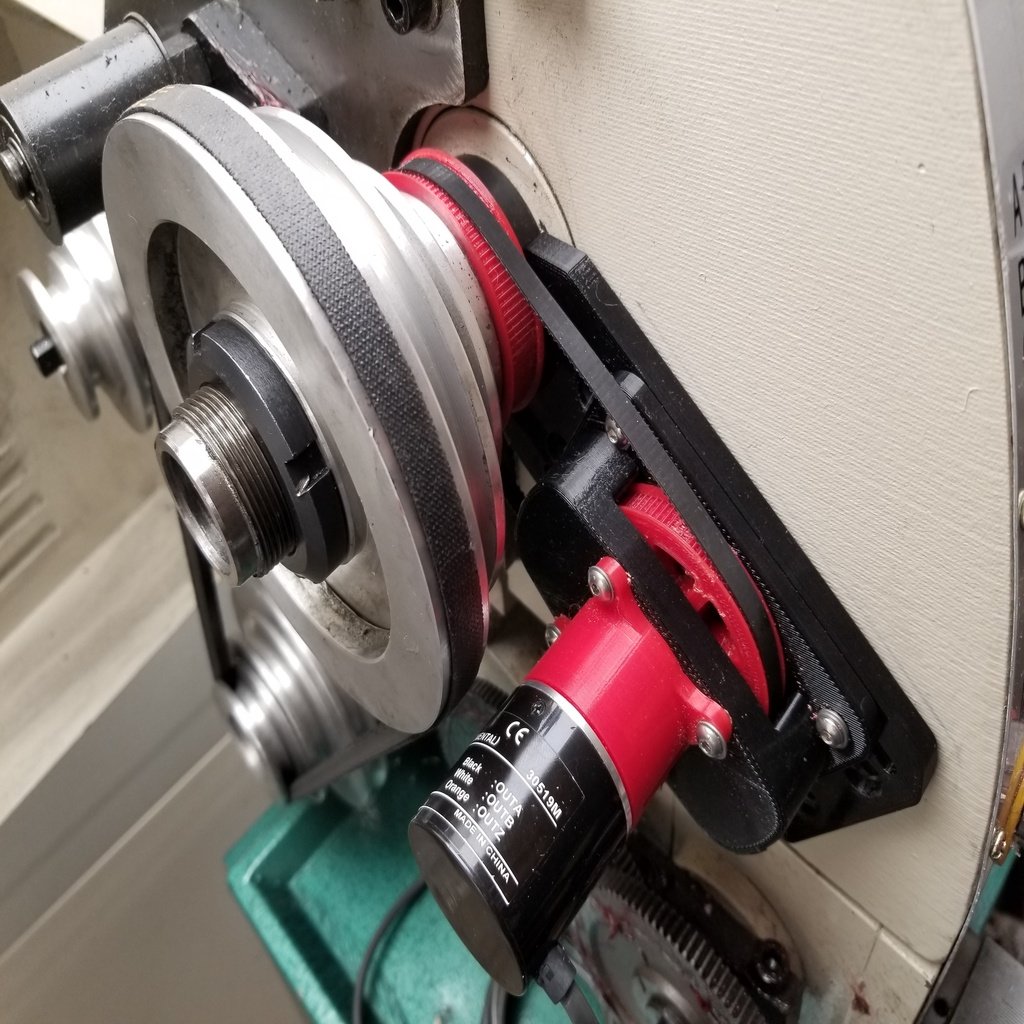
G0602 Lathe Encoder Mount
thingiverse
This project is an encoder mount for Clough42’s Electronic Leadscrew for the Grizzly G0602 lathe. James has done a fantastic job in his YouTube video series which can be found here: https://www.youtube.com/playlist?list=PLDlWKv7KIIr90ZZ7Zqt-ge5nVVdS3WVgg This collection includes the printed parts to mount the encoder as well as a pair of 3GT pulleys: one for the spindle and a second pulley that drives the encoder using a 162 tooth 3GT 6mm belt. The design offers belt adjustability, an encoder pulley that rides on two 10x26x8 bearings and utilizes an encoder coupler to decouple the pulley load from the encoder shaft. This collection includes the printed parts to mount the encoder as well as a pair of 3GT pulleys: one for the spindle and a second pulley that drives the encoder using a 162 tooth 3GT 6mm belt. The design offers belt adjustability, an encoder pulley that rides on two 10x26x8 bearings and utilizes an encoder coupler to decouple the pulley load from the encoder shaft. Here's how to assemble the mount: 1. Press a bearing into the 3D printed slider. 2. Use the M4 x 0.7 tap to chase the 8 threaded holes in the housing. 3. Press the 2nd bearing into the 3D printed housing. 4. Place the belt over the 3D printed encoder pulley and insert the pulley into the housing. 5. Insert the other side of the pulley into the slider. 6. Use 4 M4 x 16 button head cap screws to mount the slider to the housing. 7. Use 4 M4 x 16 button head cap screws, 8 M4 washers and 4 M4 square nuts to mount the slider to the base. Here's how to install the encoder: 1. Mount the encoder to the encoder mount using the 3 M3 x 10 button head cap screws. 2. Slide the encoder coupler onto the encoder shaft and use a 1.5mm Allen wrench to tighten the coupler onto the encoder shaft. 3. Mount the encoder mount onto the housing with the 4 M4 X 12 button head cap screws. 4. Push the pulley towards the encoder, and use the 1.5mm Allen wrench to tighten the coupler. Here's how to mount the base onto the lathe: 1. Slide the belt over the spindle and onto the 3D printed spindle pulley. 2. Fasten the base to the lathe using the M6 x 16 button head cap screws and tighten using the 4mm Allen wrench. 3. Adjust the belt tension by sliding the slider outward and tightening the M4 screws on the slider. Here's how to route the encoder cable appropriately: 1. Route the encoder cable through a suitable location, such as under the lathe or along the side of the enclosure. 2. Secure the cable with cable ties or adhesive tape. 3. Connect the encoder to the control system using a suitable interface, such as an RS232 or USB connection. Revision history: Housing_r03.stl -- increased housing stand off to 13.5mm (from 12mm). Housing_r04.stl -- added arrow and port text to housing. Updated instructions.
With this file you will be able to print G0602 Lathe Encoder Mount with your 3D printer. Click on the button and save the file on your computer to work, edit or customize your design. You can also find more 3D designs for printers on G0602 Lathe Encoder Mount.
