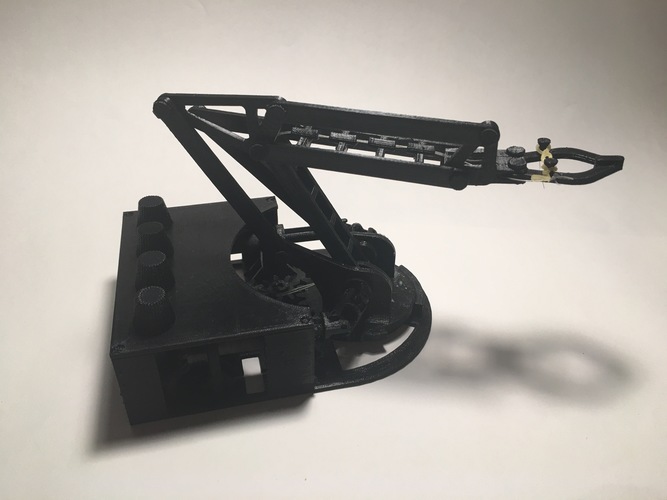
Fully Mechanical Desktop Robot Arm
pinshape
I've always been fascinated by robot arms and their intricate mechanisms that enable them to function. I wanted to take on the challenge of designing a small, desktop-sized robot arm that could be controlled without relying on servos or stepper motors. After researching various types of robot arms, I discovered that they all utilized servos or motors within the arm itself. Essentially, building a robot arm requires housing some motors in the base of the arm to rotate it. My initial vision was to create a small 3D printed arm with knobs on the base that would control it without any electricity or moving parts. I aimed to push the limits of 3D printing and my mechanical knowledge by designing a fully functional, mechanical desktop arm. I was determined to test the capabilities of these technologies. The biggest hurdle was designing the base of the arm that would allow the knobs to turn parts of the arm while it rotated with the base of the robot. Initially, I thought universal joints would suffice, but soon realized they wouldn't work alone due to the changing distance between the connections as the base rotated. I ended up using telescoping tubes with a cross intersection that allowed the axle to rotate, change lengths, and direction. I went through several iterations to design universal joints that would work with my design. My final design enables each joint to bend up to 64 degrees while transmitting rotation. This project was designed in SolidWorks, and I'm thrilled with how it turned out. Along the way, I gained valuable experience, which will help me improve future designs. To enhance the performance of the arm, I've applied bike wax lubricant to the joints, resulting in smoother movement. The arm can now pick up and move small objects around with ease. You can see a video of it in action here! SETTINGS Machine: Makerbot Replicator z18 Material: PLA Layer Height: 0.2 mm Infill: 50 % Support: No support up to 2 mm Rafts: Yes PRINTING Print the following parts, in the correct orientation and quantity: lower_base x1 - flat spur_gear_18_9 x3 - flat spur_gear_24_12 x1 - flat spur_gear_60_30 x1 - flat bevel_gear_20_15_gear1 x2 - flat bevel_gear_20_15_gear2 x2 - flat U_joint1 x2 - lying horizontally with the opening facing up and holes parallel to floor U_joint2 x2 - lying horizontally with the opening facing up and holes parallel to floor U_joint3 x2 - lying horizontally with the opening facing up and holes parallel to floor U_joint_cross x4 - flat telescoping_tube1 x2 - vertically right_arm_ext1 x3 - flat right_arm_ext2 x1 - flat right_arm_ext3 x31 - flat left_arm_ext1 x1 - flat left_arm_ext3 x1 - flat pin x12 - horizontally pin2 x1 - horizontally arm_ext_spacer x1 - horizontally fishing_wire_spool x1 - flat gripper1 x1 - flat claw1 x1 - flat claw2 x1 - flat top_base x1 - flat knob1 x1 - lying horizontally, rod is parallel to floor knob2 x1 - lying horizontally, rod is parallel to floor knob3 x1 - lying horizontally, rod is parallel to floor knob4 x1 - lying horizontally, rod is parallel to floor ASSEMBLY INSTRUCTIONS Please watch the assembly video here for detailed instructions on how to assemble the arm. Thanks for checking it out!
With this file you will be able to print Fully Mechanical Desktop Robot Arm with your 3D printer. Click on the button and save the file on your computer to work, edit or customize your design. You can also find more 3D designs for printers on Fully Mechanical Desktop Robot Arm.
