Full utilisation of PCB heatbed build area
thingiverse
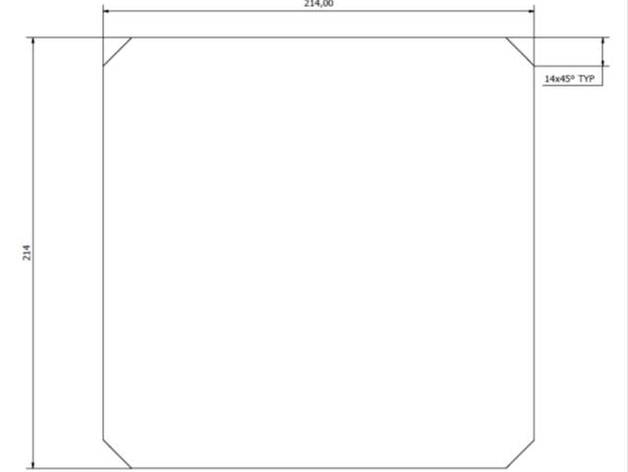
If you have a Reprap PCB heatbed (http://reprap.org/wiki/PCB_Heatbed) attached, it is probably made with a piece of 200mm x 200mm glass as your build platform. However, you will soon discover that trying to print an object requiring the entire 200 x 200 build area can be rather challenging. This problem led me to create my solution. My solution involves cutting a piece of glass to match the size of the PCB with pre-made holes for mounting and tiny printed placeholder pieces that are optional. The placeholder pieces need to fit into four corners of the print bed to keep the glass in place. These placeholder pieces stand 3mm high, matching the thickness of the glass, to prevent any accidental extruder crash. Instructions: Get a 214mm x 214 mm piece of 3mm float glass cut with 14mm chamfers removed from each corner, making space for holes, as shown on the diagram. Print out four corner pieces. Note that you will likely still need binder clips to keep the glass securely down even with these helper pieces in place.
With this file you will be able to print Full utilisation of PCB heatbed build area with your 3D printer. Click on the button and save the file on your computer to work, edit or customize your design. You can also find more 3D designs for printers on Full utilisation of PCB heatbed build area.
