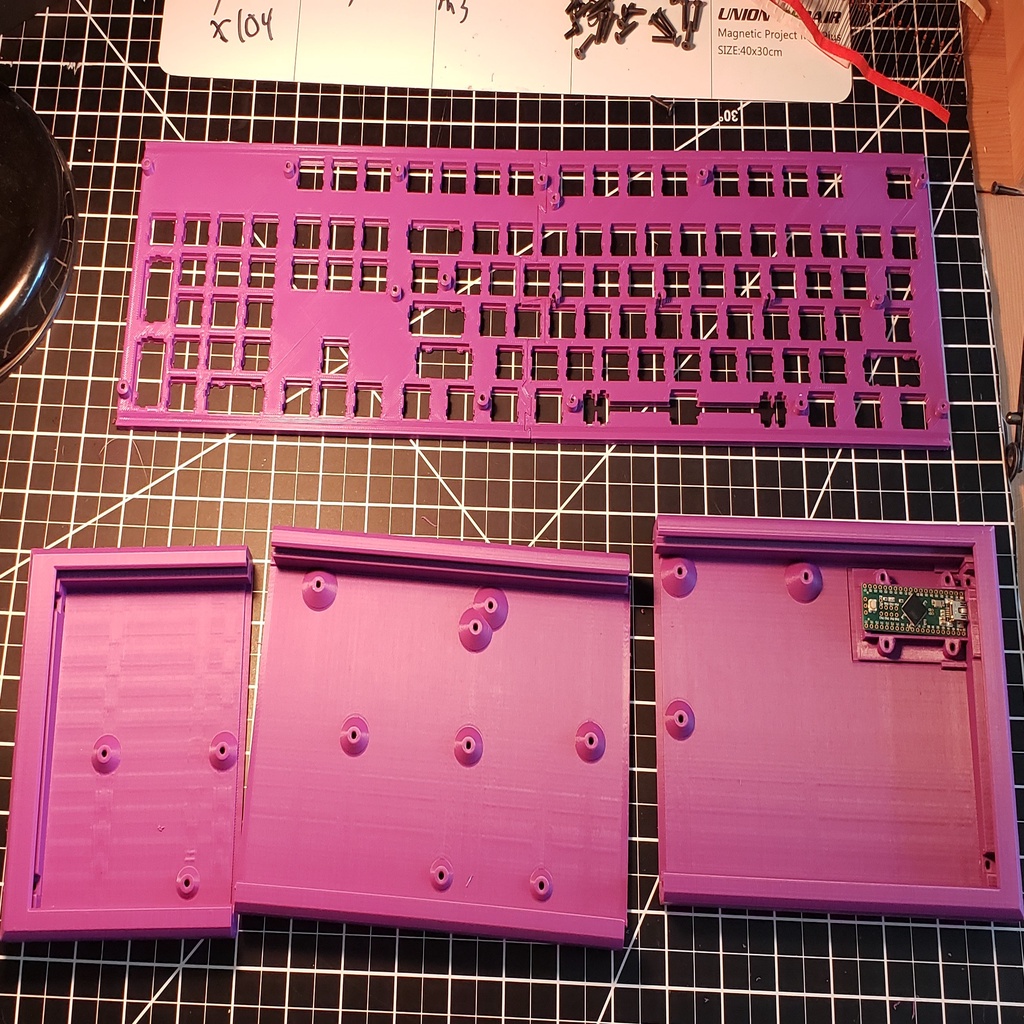
Full custom 104 Keyboard, Case + Plate
prusaprinters
<p>Update: moving this design back to WIP, as i am not happy with full design once printed, and will rework eventually. Assembly is a pain so attempt at your own risk or remix this first.</p><p>There is an updated case and teensy holder here, also back to WIP still <a href="https://www.printables.com/model/275937-update-full-custom-104-keyboard-case-v2">https://www.printables.com/model/275937-update-full-custom-104-keyboard-case-v2</a></p><p>Is a better V2 case + teensy holder for this system. Make sure to print the updated case over the files found here.</p><p>But the main documentation will still live on this page.</p><p>There is also a version of the plate split into smaller parts in remixes, but the version here is preferred.</p><p>Not intended for beginners. But if you have keyboard switches, diodes, and a controller laying around. You can make your own "normal" full size keyboard.</p><p>Its surprisingly stiff when using new case linked above. Print in the stiffest plastic you got, I went with matter hackers pla printed at a high temp for strength.</p><p>Printed items:</p><p>The plate for mounting the keyswitches was split in half to fit my prusa i3 (printed at 0.3mm)</p><p>The case is 3 parts, Which I printed vertically. (printed at 0.3mm)</p><p>A small sled that holds the electronics. It's a sled to allow assembly and remixing to different controller boards. (printed at 0.2mm)</p><p>Non-printed Items:</p><p>104 Cherry MX or compatable keyboard switches</p><p>104 Diodes</p><p>screws: 21 m3 x 12mm countersunk; 4 m3 x 6mm screws countersunk</p><p>teensy 2.0++ or similar controller with 27ish IO ports (or port multipliers).</p><p>keycap set (as well as spacebar stabilizers)</p><p>wire (mix of 22 gauge and 28 gauge worked well for me.)</p><p>usb cable.</p><p>Kapton/other insulating tape</p><p>Soldering tools.</p><p>Tips:</p><p>Maybe carve a small piece of the plate into a quick test print to check the cherry mx switch tolerance.</p><p>Dry fit everything a few times before wiring to make sure no snags. Designed with .3mm clearance in most fits.</p><p>cherry mx spacebar stabilizers are pinched to start and need to be bent/spread wider to guide smoothly.</p><p>Future Tweaks/small wants, some are fixed in V2 case:</p><ul><li>~~Improve usb location if mousepad is on right it can be in way.~~</li><li>Other sleds for electronics besides teensy2.0++</li><li>~~Better interlocking case body.~~</li><li>The spacebar stabilizer holes are for spacebars I had on hand, there some popular sizes missing.</li><li>Internal wire guides.</li><li>led for capslock+others</li><li>~~Strain relief on controller wiring~~</li><li>~~Adjustable feet to get different angles.~~</li><li>~~Deepen countersink for sled screws.~~</li></ul><p>Licensing / Sources:</p><p>BSD license. A link to this page would be preferred on derivatives/prints but no requirement.</p><p>Was designed from scratch, with the exceptions below: <a href="http://www.keyboard-layout-editor.com/">http://www.keyboard-layout-editor.com/</a> to Generate the base layout. The license for that site claims no ownership over output.</p><p>Inspired by the Wiring guide: <a href="https://deskthority.net/viewtopic.php?t=6050">https://deskthority.net/viewtopic.php?t=6050</a></p><p>Firmware used: <a href="https://github.com/qmk/qmk_firmware">https://github.com/qmk/qmk_firmware</a></p><h3>Print Settings</h3><p><strong>Printer Brand:</strong></p><p>Prusa</p><p><strong>Printer: </strong></p><p>I3 MK3S</p><p><strong>Rafts:</strong></p><p>No</p><p><strong>Supports: </strong></p><p>No</p><p><strong>Resolution:</strong></p><p>0.2-0.3</p><p> </p><p> </p><p>Category: Electronics</p>
With this file you will be able to print Full custom 104 Keyboard, Case + Plate with your 3D printer. Click on the button and save the file on your computer to work, edit or customize your design. You can also find more 3D designs for printers on Full custom 104 Keyboard, Case + Plate.
