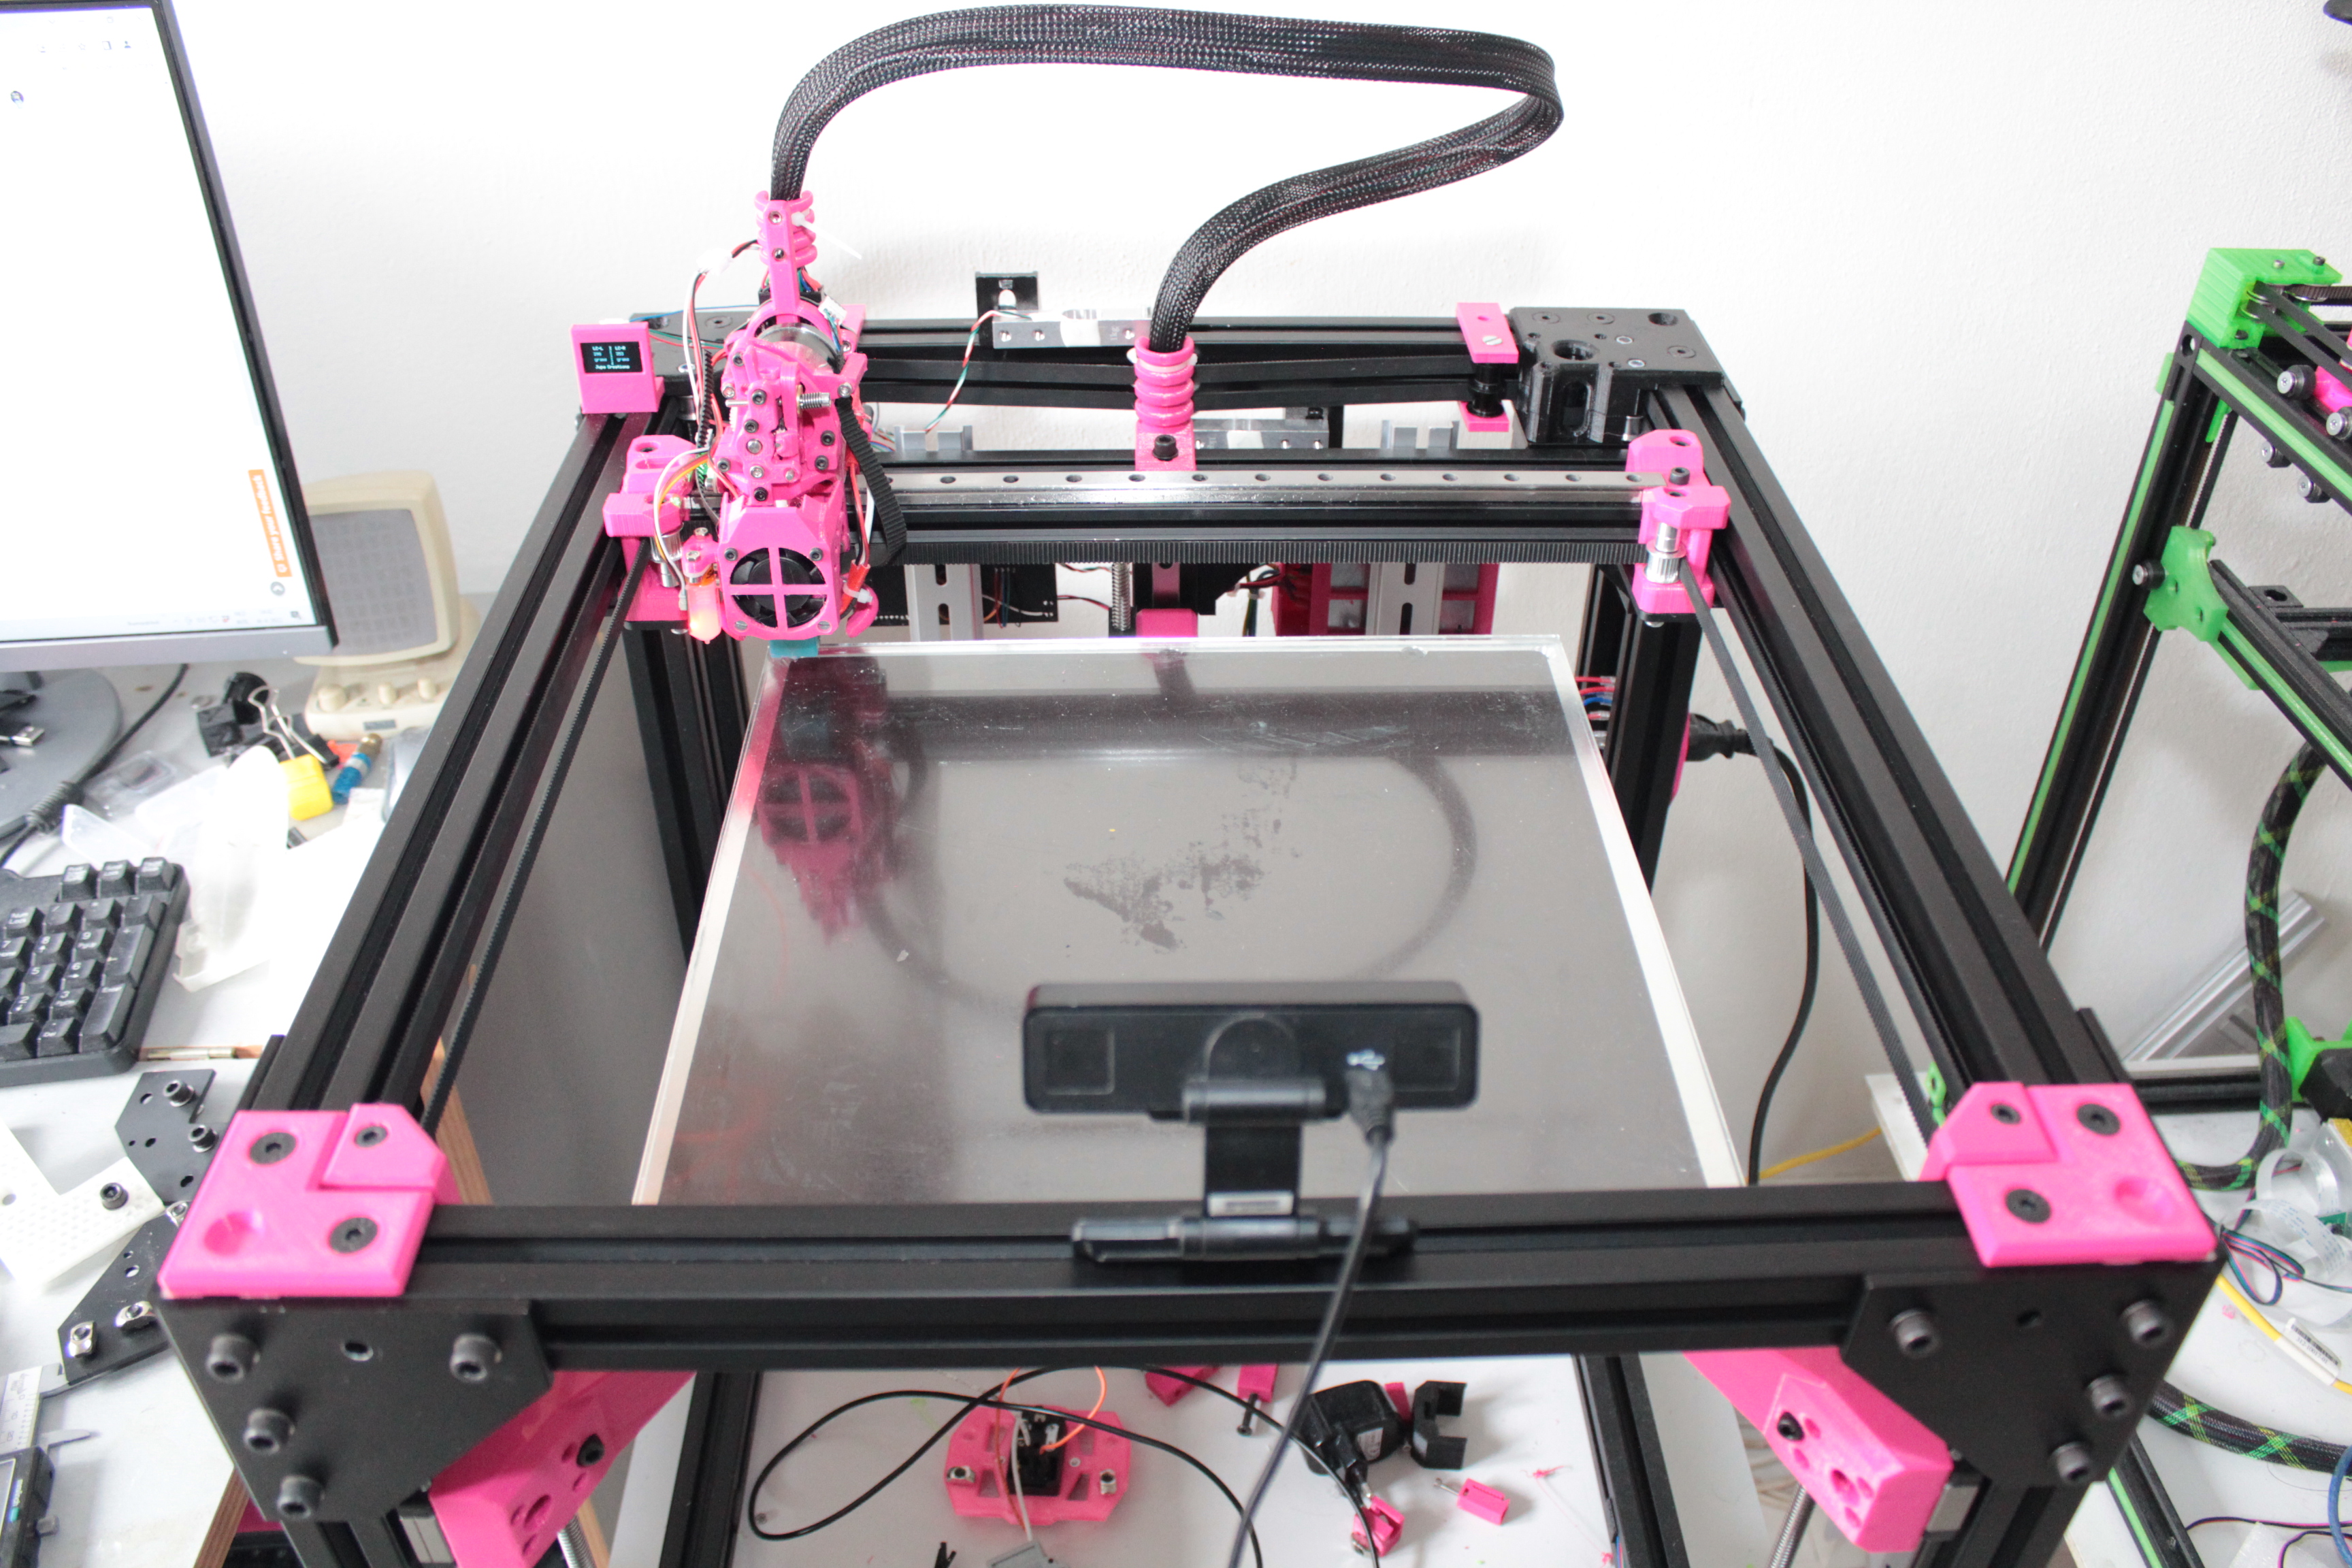
Front Belt Tensioner Vcore 3 retro fit
prusaprinters
<p><strong>Remix from</strong><br><a href="https://www.thingiverse.com/thing:5369512">https://www.thingiverse.com/thing:5369512</a><br>Christian Dyer his design only works on new builds.</p><p>The Retro Fit design works on printers that are already fully build and do not require tear down of the frame profiles.</p><p><strong>Installation description.</strong></p><p>1] Remove the black front top corner bracket.</p><p>2] Place the “Front Belt Tensioner Vcore 3 retro fit Drill Jig 6mm” in the slot of the front top profile fully at the left.</p><figure class="image"><img src="https://media.printables.com/media/prints/183313/rich_content/51cf1b9c-244a-4382-9b6d-50d248a17d58/img_7294.jpg#%7B%22uuid%22%3A%225599e2b7-3e74-4559-b9c2-48ebe9274ce6%22%2C%22w%22%3A3456%2C%22h%22%3A2304%7D"></figure><p>3] Drill a 6mm hole through the profile using a sharp drill bit.</p><figure class="image"><img src="https://media.printables.com/media/prints/183313/rich_content/5f0765e8-aa5f-4743-8138-2635a4daa7ff/img_7295.jpg#%7B%22uuid%22%3A%22e623b663-a51f-4586-9cc4-c9115af4491b%22%2C%22w%22%3A3456%2C%22h%22%3A2304%7D"></figure><p>4] Place the black front top corner bracket back but remove the M6 screw at the location of the drilled hole.</p><figure class="image"><img src="https://media.printables.com/media/prints/183313/rich_content/cd9cf8ae-0006-4f17-8567-2e7b6a9aee69/img_7297.jpg#%7B%22uuid%22%3A%22d36f69a1-3d01-4e2e-9872-e66c07c97720%22%2C%22w%22%3A3456%2C%22h%22%3A2304%7D"></figure><p>5] Remove the horizontal corner plate and the original printed part that carries the idler pulley.</p><p>6] Place the "Front Belt Tensioner Vcore 3 retro fit Top".</p><figure class="image"><img src="https://media.printables.com/media/prints/183313/rich_content/8bdf106c-6fd9-4961-81a7-94bc245ad0ee/img_7308.jpg#%7B%22uuid%22%3A%2266658b6e-c356-47b0-91c4-c83dba60622d%22%2C%22w%22%3A3456%2C%22h%22%3A2304%7D"></figure><p>7] Place a M6x40mm screw through the hole that was drilled.</p><p>8] Place a M6 nut in the "Front Belt Tensioner Vcore 3 retro L M6".</p><p>9] Place the "Front Belt Tensioner Vcore 3 retro guides" in the same slot.</p><figure class="image"><img src="https://media.printables.com/media/prints/183313/rich_content/aa6bb9ff-7882-43c8-9f7f-0c9ebeeaee74/img_7296.jpg#%7B%22uuid%22%3A%221b85bfad-bb7c-46c9-81c4-2bbeff7f7246%22%2C%22w%22%3A3456%2C%22h%22%3A2304%7D"></figure><p>10] Place the "Front Belt Tensioner Vcore 3 retro L M6" in the slot of the left hand inner side top profile.</p><p>11] Secure the "Front Belt Tensioner Vcore 3 retro L M6" with at each side a “Front Belt Tensioner Vcore 3 retro guide” using a M3x10mm hexagon screw.</p><figure class="image"><img src="https://media.printables.com/media/prints/183313/rich_content/58639f5a-4660-4795-9a37-0c465b318006/img_7306.jpg#%7B%22uuid%22%3A%227f840cb3-34ff-44f3-aec3-338ce03a5694%22%2C%22w%22%3A3456%2C%22h%22%3A2304%7D"></figure><p>12] To adjust the play. There are 3 types of "Front Belt Tensioner Vcore 3 retro guides" marked with a small v shape. 1 mark has the least play. 3 marks has the most. The step rate of play is 0.1mm. Print them 4 times.</p><p>13] Add a M6 nut inside "Front Belt Tensioner Vcore 3 retro L M6". Route the belt around the idler and fit the idler in the "Front Belt Tensioner Vcore 3 retro L M6" secured with the original M5 screw and nut. !No need for shims or other washers!</p><figure class="image"><img src="https://media.printables.com/media/prints/183313/rich_content/bc270c3b-671b-4f8e-b942-bf7c71b83483/img_7301.jpg#%7B%22uuid%22%3A%221f9f0e83-4582-4355-8b0c-3966bf00805e%22%2C%22w%22%3A3456%2C%22h%22%3A2304%7D"></figure><p>14] Fit the M6x40mm hexagon screw 3 to 4 full turns into the "Front Belt Tensioner Vcore 3 retro L M6".</p><p>15] Adjust the correct belt length in your system so the belt is under a base tension (not sloppy) and fix the belt. Leave +/- 2 mm of room between the idler holder and the frame. </p><p>Repeat step 1 to 15 for the right hand side.</p><p>When left and right hand side are ready adjust the belt tension with the M6x45mm hexagon screws to the proper value. Take care the M6 screw does not touch the idler when turned inwards. If it does add a M6 washer on the screw at the outside or reduce the length of the screw with a highspeed grinding tool.<img src="https://media.printables.com/media/prints/183313/rich_content/03a92305-7eb8-4f3b-8968-3a4c0dcc5fcf/img_7319.jpg#%7B%22uuid%22%3A%22ed2f1e83-7052-463d-beeb-0816ef56e0ae%22%2C%22w%22%3A3456%2C%22h%22%3A2304%7D"></p><p>Picture below is of the BBS.</p><p><a href="https://github.com/JupaCreations/Belt-Balance-System">https://github.com/JupaCreations/Belt-Balance-System</a></p><figure class="image"><img src="https://media.printables.com/media/prints/183313/rich_content/5d026ee9-cd0a-49a1-89c5-ef133d03ab60/img_7313.jpg#%7B%22uuid%22%3A%229b132855-d7f6-4872-aa75-7ade7b0ee76f%22%2C%22w%22%3A3456%2C%22h%22%3A2304%7D"></figure>
With this file you will be able to print Front Belt Tensioner Vcore 3 retro fit with your 3D printer. Click on the button and save the file on your computer to work, edit or customize your design. You can also find more 3D designs for printers on Front Belt Tensioner Vcore 3 retro fit.
