Friction Grip Mounting Brackets for Govee Permanent Outdoor Lights - Model H705
prusaprinters
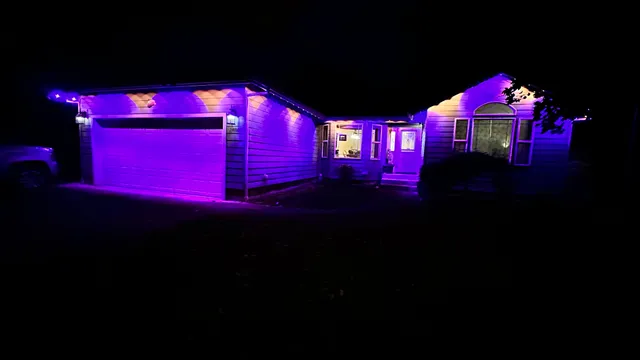
NEW!Feb 23, 2024 - Added new 45 degree model with side tabs for screws by request. If you're looking for the Pro model friction grip mounting brackets you can find them by clicking here.Also added a retainer to hold lights in place during installation added by request. 22.5, 25, 30, 40, 50, 55 & 60 degree models added by request.Description Are you having trouble keeping your Govee Permanent Outdoor Lights up because the adhesive pads aren't holding? Does your roof have a nonstandard soffits, overhangs or rafter tails? Do you want to be able to easily remove your lights and easily replace them from time to time? Don’t want to pay someone for the files or to have someone print the mounts for you?If your answer is yes to any of the above, then this is the mount you need. These mounting brackets use a friction grip connection to hold your lights securely in place, allowing you to easily install and remove them as needed. Why? Wouldn't it be easier to just stick them using the supplied 3M adhesive backing? Well, probably. But here are two reasons I needed the mounting brackets: I'm going to be painting my house next spring and I didn't want to have to completely remove and replace the entire lighting kit. Also, tracking down more 3M adhesive is a pain. With the brackets, I can quickly (and I do mean quickly) remove the lights. I don't have flat soffits so I needed a way to attach the lights to the underside of the overhangs without messing up the way the lights are supposed to look. As you probably already know, the lights are supposed to be installed 2"-4" away from the side of the house. My overhangs don't really allow for that because of the beams that stick out. And, it didn't allow the light to cascade down the side of the house as intended. By using the angled brackets, I get a very similar effect to what Govee intended. ModelsAlthough the Flat and 45 degree models were the primary models that I designed, I've had requests for other angles as well. YMMV on the look of the lights depending on which angle you select. Flat VersionThis version works well if you have flat soffits and just want a better way to attach your lights without relying on the 3M tape on the back of the lights. 45 Degree Angled Version (2 Versions)This version works well if you have angled soffits or overhangs. I landed on this specific angle after testing a variety of angles in five degree increments. This angle allows you to mount the lights farther from the exterior wall of your house and still get a similar effect as if the lights are mounted at the distance and angle as recommended by Govee.Version 2Same as version 1 but a maker asked for a version with side tabs. Alternate AnglesIf anyone would like any other angles, please let me know. For the sake of clarity, I consider the angles from the plane of the mounting hole, rather than the location on the soffit. 10 Degree22.5 Degree25 Degree30 Degree40 Degree50 Degree55 Degree60 Degree80 Degree Spacer ToolAs I started to install my lights I quickly realized that keeping them aligned and properly spaced wasn't exactly easy. So, I made a tool that allowed me to keep things better aligned. The tool consists of the spacer and a snapfit lid. It's sized to hold a standard 12" wooden ruler. The ruler I had was actually 12 1/8", so the spacing tool was built around that ruler's specific dimensions. I also designed it so that when the mounts were spaced, the wiring on the lights was pulled fairly tight (which may not be as desirable for some installations). The tool is mostly a proof of concept and may or may not be of any value to your specific installation. However, whether you find this tool useful or not, I strongly suggest the use of some type of tool to ensure consistency of spacing and alignment of the lights as you install them. Of course, you will need to print two of them (one for each end of the ruler).Beta Models Magnetic VarientSomeone asked me to make a magnetic variant. I'm not convinced the angled mounts would work very well this way (unless the magnets were very strong) so I've only included the flat mount. After some thought I realized not everyone will have or want to use the same magnets. So, instead of baking them into the model, I added them via negative space modifiers in PrusaSlicer. These will likely only work with PrusaSlicer as other slicers may recognize the negative space as a solid. I haven't had a bunch of time to test these yet, so I figured I'd put the files out in “beta." I’ve included four examples of how you could arrange the magnets. In PrusaSlicer you can adjust the size and position of the negative spaces any way you wish to accommodate whatever magnets you want to use. I used these 10x3mm magnets from Amazon. They aren't actually 3mm thick though; more like 2.57mm. It would be wise to test their ability to hold your lights up before printing a bunch of them. I'd also suggest using organic supports for the magnet holes. The supports should pop out pretty easily. Included FilesYou'll find .3mf files and .stl files for each model so that you can reslice them as desired. I have deleted the .gcode files due to the changes regarding the binary .bgcode files possibly not being compatible with all printers. You'll also find .3mf and .stl files for the various tools and devices that I've come up with to make installation easier. (There are also links below to other prints that you might find helpful.)Printing InstructionsI printed my mounts with the following recommended settings:Printer: MK4 (with Input Shaper)Filament: Generic PETG. I used a clear filament to make it easier to blend in better with the lights themselves. I also don't recommend using PLA due to the potential heat that the mounts may need to withstand. Print Settings: 0.20mm (speed)Supports: Organic supports for the angled brackets. I had quite a bit of difficulty with the supports failing on some of my prints. What I did find that helped mitigate that problem was turning the print speed to 200%. Not only does this speed up the print time significantly, it seemed to create more robust supports. I have no idea why, but your mileage may vary. Infill: The infill doesn't really matter, but I used 15%, with a gyroid fill pattern. Nozzle: 0.4IMPORTANT NOTE: @GadgetBlues pointed out something that I hadn’t thought of that’s probably pretty important: If printed with the correct clearances as designed your individual lights will stay securely in place. However, depending on your brand and type of filament and your printer brand/model, you may need to play with the scale a bit for the perfect fit. They had the best fit at 99%. So, I suggest printing just one at first to check the fitment. Then go up or down in 1% increments as needed. The perfect fit should snap into place with a satisfying click. it shouldn’t wiggle around or take a bunch of force to pop them in or out. Another way to assess the fit is to place one light in a mount and dangle the rest of the 12 light string from it. The light should hold. If you give it a bit of a shake, the light should pop loose. What You'll NeedThe extra 3M tape included with the Govee kit were quite helpful with placing the mounts before screwing them down. They were particularly helpful in areas with peaks. I used these specific screws (click here). I realize they aren't wood screws, but they are magnetic and self tapping which made installation atop a ladder much easier. The models are also specifically designed around the dimensions of this screw.Assembly InstructionsI started my assembly at the top of the one and only peak in my roof and worked my way backwards from there toward the power source. I used the spacing tool to ensure I got the mounts aligned and spaced consistently. I placed the first mount, then placed the spacing tool over the mount. Next, I snapped the first light into the first mount. When snapping the lights into the mount you should hear a distinct click letting you know they are solidly connected. Before doing anything else, I used the included wire clips to hold the end of the light string in place (more on this later). For the tricky areas (such as the roof peak) I used the extra 3M adhesive pads on the back of the mount to attach the mount temporarily. After testing the next light in the string to make sure the wiring is at the desired tension, screw the mount in place. Repeat this process until reaching a corner. At the corners bend the wire and tuck it neatly into or around the corner. Keep it in place with the included wire clips as needed, and start the process over with the next mount. Where two strings are connected together the wiring ends up being a bit longer than it is between two lights on the same string. In that case, I suggest using the spacer tool to keep the distance consistent (in case you need to move the lights after putting the up backwards - ask me how I know), then use the included wire clips to tuck away the excess wiring. Using the wire clips also has another added benefit. I learned the hard way that if you aren't careful and drop the string of lights while it’s partially installed it can cause the previously installed lights to pop out of the mounts. This can cause a domino effect and the entire string will fall. But, if you’re using the wire clips and you happen to drop the string during installation that domino effect will stop at the next installed wire clip. Or, see the retainer tool below for a 3D printed solution to this potential problem Retainer ToolHave you been a victim of the Domino Effect causing all of your lights to end up on the ground? Are you worried you could be? Well fear no more! The Retainer Tool is here to help. Just clip your light into the mount, then add the retainer to keep your lights where they're supposed to be. The best part is, you can leave it or remove it after your are done. And, you can always remove it later if you need to take down your lights. Thanks to fellow makers @DanB_1553703 (who came up with the idea) and @Tpptotal_1542122 (who discovered I had already made the solution without realizing it and provided the attached video). Painting ToolIf you're wanting to paint the lights to match your house, I've created a simple painting tool that you can find by clicking here. Big thanks to @Tpptotal_1542122 for the idea, the photo, and for test printing it for me.Cover/Diffuser CapsAt the request of a community member I added cover/diffuser caps (click here) that you can use to cover lights that may be too bright or that you need to hide. Spacer tool by @DennisM@DennisM created this super cool spacer tool (that you can find by clicking here) just for use with these mounts. Check it out, and if you like it, be sure to leave him a ★★★★★ rating. Mounting Bracket Top by @FodenSimilar to my Retainer Tool, is this Mounting Bracket Top created by @Foden which he made specifically to fit these mounts. It serves the same function, but with a bit of style. If you print it, be sure to leave a ❤ and a rating if you print it. “Do you sell these mounts?”No. You’ve already paid a metric ton of money for lights; I don’t need to take more of your hard earned cash. If you don’t have your own printer, you’re welcome to ask a friend to print these. Help WantedI'm looking to make a set of these for the new Pro model. I don't own the pro model; I'm looking for someone who's willing to send me detailed dimensions and is willing to print the prototype to ensure fitment. If that's you, please message me. :) FeedbackAs always, thank you for taking the time to check out my model. I’ve put a lot of hours into this project to get it just right. Please consider clicking the ❤ and/or leaving me an encouraging comment if you appreciate my effort. If you print this model, please take a picture of your awesome new Govee RGBIC LED Permanent Outdoor Lighting Mounting Brackets in action. Then, post your make here and leave a review. ;) If for some reason you don't think my model deserves five stars, please reach out to me with your feedback before leaving a negative rating so I can have an opportunity to address any issues. Often, problems encountered can be solved with some simple trouble shooting or a small redesign. If you have suggestions on how the model could be better, please let me know. Along those lines, if you would like some adjustment to the model that you personally would find helpful, please reach out. I am more than happy to tweak the design to fit someone's needs if I can. I will continue to update the model with new variants as long and often as needed to ensure it is the best possible quality. See the Updates section below with notes on changes to the models. I’m always happy to share my designs with anyone who wants to use them. For now, the license does not allow for remixing because someone was trying to use my design to make money without permission. It should be noted that the files nor the printed items based on them may be sold.If you really appreciate my work, you can also donate to my PayPal filament fund: NotesNote #1: This model was designed in Fusion360. It was sliced in PrusaSlicer 2.6.1, using the MK4 Input Shaper profile.Updates23 Feb 2024 - Added a 45 degree version with side tabs for screws by request. 3 Jan 2024 - Changed the name of the model to include “Friction Grip” to more accurately describe how the model works and to differentiate it from my new “Duel Screw” model. 18 Dec 2023 - Added 22.5, 25, 40, 50, 55 & 60 degree angle brackets by request, Added slightly updated 30 degree bracket (added numbers inside). Removed .gcode files.15 Dec 2023 - Added files for the Retainer Tool. Changed file names (lighting to light) to better comport with Govee product names. Changed the name of the model for same reason. 11 Dec 2023 - Added .stl files at maker's request. Also updated the names for the 80 degree mounts and the magnetic mounts. No changes to the mounts themselves. 9 Dec 2023 - Added 30 Degree Model. Added .gcode files for all angles. Added updated 45 degree model pictures. Fixed an issue with the spacer tool .3mf file showing the tool at an angle. 27 Oct 2023 - Version 1.0 posted to Printables. 3 Nov 2023 - Added a 'beta" magnetic version of the flat mounts.
With this file you will be able to print Friction Grip Mounting Brackets for Govee Permanent Outdoor Lights - Model H705 with your 3D printer. Click on the button and save the file on your computer to work, edit or customize your design. You can also find more 3D designs for printers on Friction Grip Mounting Brackets for Govee Permanent Outdoor Lights - Model H705.