Free Battery Laser Cat Toy
thingiverse
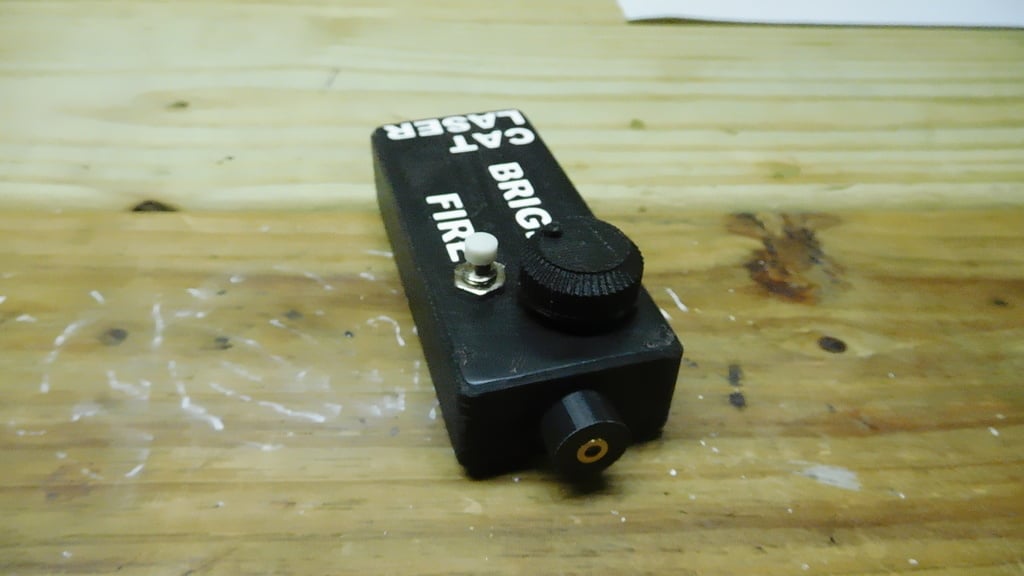
This was a fun build that achieved two things: figuring out what to do with a basket of almost perfect 9v batteries removed from smoke detectors, and testing an idea for labeling 3D prints by pouring high contrast paint into the recesses created by the type tool. The battery part worked fine and it was found that you can get a lot of useful life from a used 9v battery if you can make do with less than 9v. The 3v laser pointer diode and a 500 ohm potentiometer let you run that sucker down to almost nothing and still have lots of battery life left. The last photo is after testing with the other sucker run down. Labeling was another story, I've done the same technique engraving in metal and wood and it worked perfectly. You fill the type with paint and sand the top when it is dry, which cleans up any paint you may have smudged on the edges and polishes the top. For 3D printing, when you sand down the top layer, not only does it polish up a nice clean top layer but it also exposes rough imperfections that look like gaps along the length for the extrusion. The painted type I did looks alright for a toy or where you need some kind of safety marking, but it's far from perfect. At some future date, I plan to try this again and experiment with body fillers since I believe that the first step should be to have a smooth polished surface. For the paint, something like a disposable syringe could be used since I wouldn't want to get any paint on the newly filled and polished top. For complex jobs, an automated syringe painting attachment for a 3D printer might be developed. A clear top coat can then be applied to seal everything nicely. Compared to that last step, the electronic build of this project is super easy, and most well-equipped hobbyists will already have all the components. Make sure you check and adjust the laser for focus before pushing it into the lens holder; it's hard to see, but the laser is made from two copper pieces screwed together, with the diode on the back piece and the lens on the front, held in place by a spring. Find a target and carefully check that its focus is right for you. Always remember to turn the pot to minimum when installing a new old battery; a good 9v will destroy the 3v LED if set to full. Other than the above-mentioned painting and sanding, this is an easy project, and printing should not require any supports. https://youtu.be/7SAgLmJAioU
With this file you will be able to print Free Battery Laser Cat Toy with your 3D printer. Click on the button and save the file on your computer to work, edit or customize your design. You can also find more 3D designs for printers on Free Battery Laser Cat Toy.