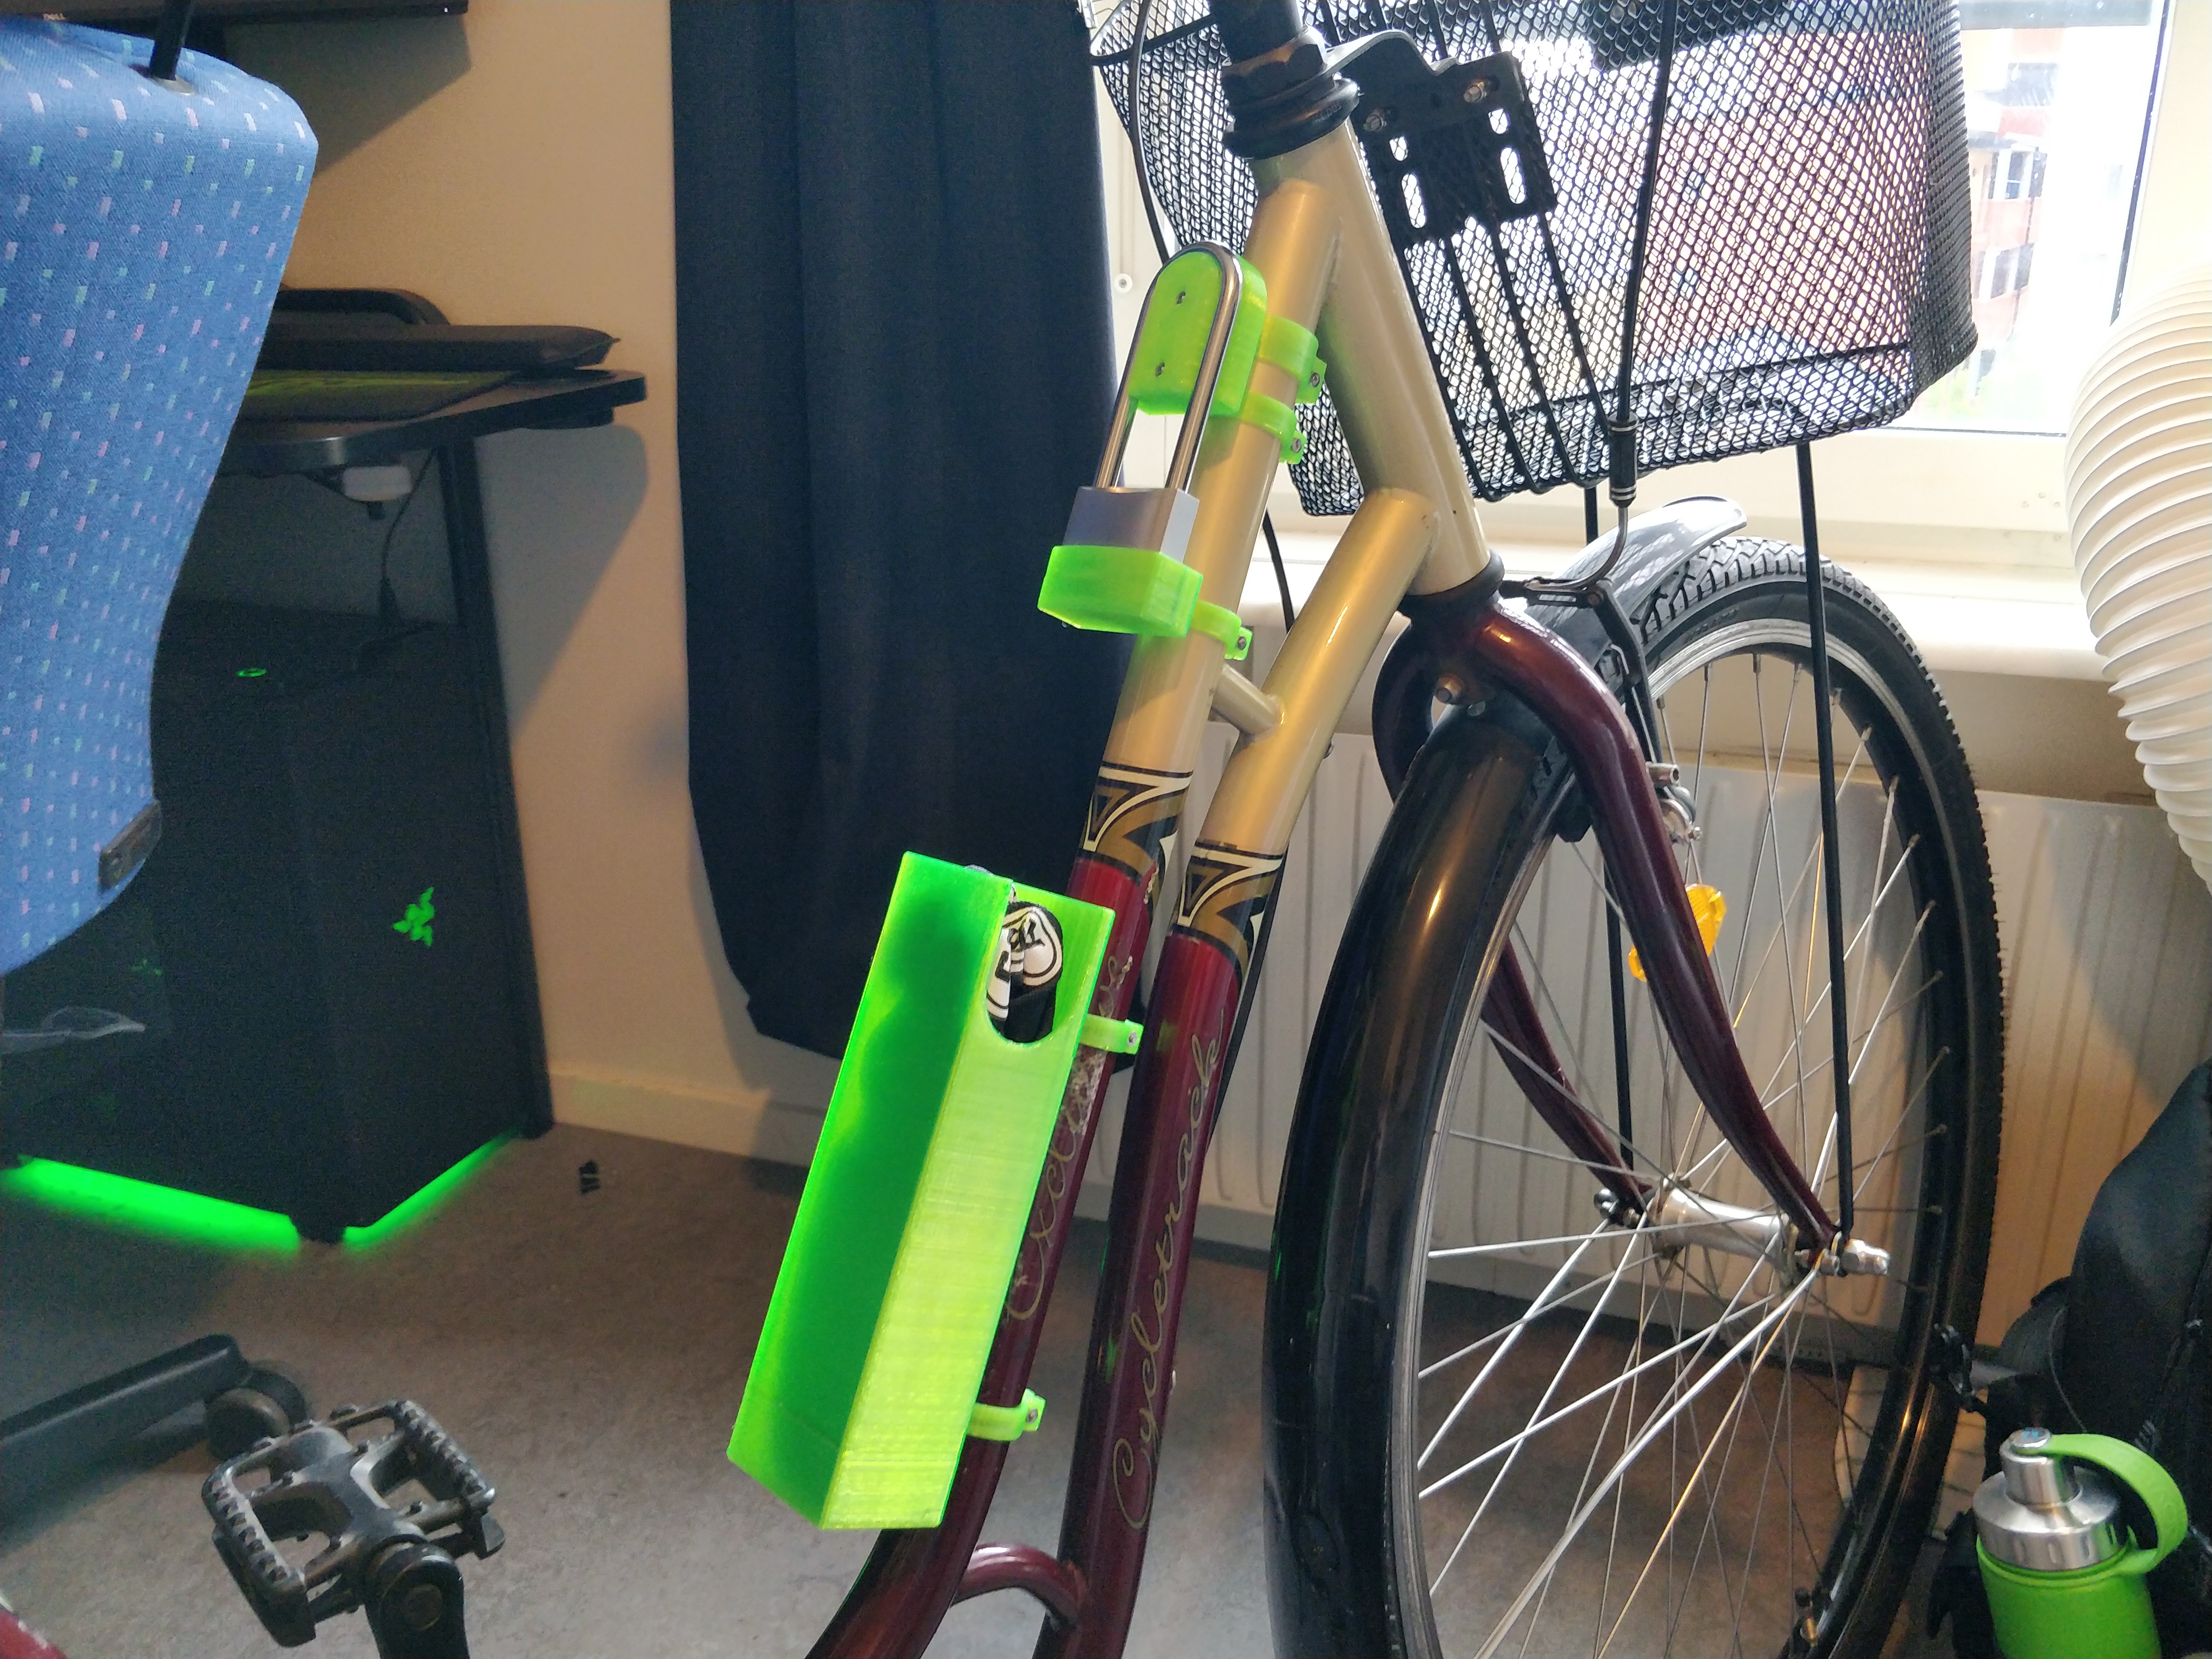
Frame clamps and chain + padlock mounts for bicycle
prusaprinters
<p>Recently, I got a bike and wanted somewhere to store my padlock and chain while riding. With the padlock having an extended shackle I had the opportunity to make a two-part slide-in mount for it. For a padlock with a normal shackle I suspect the body mount should be enough to hold it securely. The chain mount is a simple open box with two mounting points for frame clamps.</p> <p>This specific version is made to fit an ABUS 64TI/50HB80 padlock and a 6KS85 chain and the attachment clamps fit a 31 mm round frame.<br/> STEP files are available for those wanting to modify this design to fit their specific requirements. On request I can also provide the source SOLIDWORKS files or other formats via email.</p> <p>The hardware used for assembly consists of:<br/> • 2 M3x25 machine screws (shackle mount)<br/> • 8 M3x10 machine screws (everything else)<br/> • 10 M3 nuts</p> <h3>Print instructions</h3><h3>Pre-printing</h3><p>Before printing the full chain holder, make sure to print the chain test to ensure your chain will fit into the holder. You should be able to quite easily pull the folded chain through the test print.</p> <p>I also recommend printing a single clamp and making sure it fits your bike frame. You can use it as a spare or remove one clamp from the final print. It is important to use PETG for the clamps, as PLA is probably too stiff and/or brittle, although this has not been tested by me.</p> <h3>Printing</h3><p>Print five (5) clamps (or four (4) if you printed a test clamp) and one (1) each of the other parts except the for the chain test. This is all prepared in the "all-mounts.3mf" file.</p> <p>My print settings were as follows:<br/> <strong>Printer:</strong> MK3S<br/> <strong>Nozzle:</strong> 0.6 mm brass<br/> <strong>Layer height:</strong> 0.35 mm (SPEED preset)<br/> <strong>Filament:</strong> Prusament PETG (Neon Green)<br/> <strong>Infill:</strong> 25 % Rectilinear <em>(Top/Bottom: Concentric)</em><br/> <strong>Perimeters:</strong> 2<br/> <strong>Supports:</strong> None</p> <p><strong>Time:</strong> 6h 45m<br/> <strong>Material usage:</strong> 210 g (69 m)</p> <h3>Assembly</h3><p>Tolerances are very tight (0.10-0.15) mm for the nuts, as I prefer them to stay securely in place once seated. Inserting them will likely require the screw pulling technique described in <a href="https://help.prusa3d.com/en/guide/1-introduction_24976#25240">Step 8 (Ch. 1)</a> of the build guide for the MK3S kit.</p> <p>For the lower mount of the chain holder, the slot for the nut is quite difficult to access. You may need to insert a screw and slightly screw on the nut, then align the nut to the slot by turning the screw and finally pull the screw outwards using pliers in order to seat the nut. The normal screw pulling technique can work as well, but it can be difficult to hold the nut in alignment for it, unless you have some very long pliers.</p> <p>After all the nuts (including the ones in the clamps) are seated, attach the clamps to the mounts. Here you have two options; to align the clamps now and tighten them down or to have them a bit less tightly mounted and let them self-adjust when mounted on the frame. I personally went for the first option, but both techniques should work fine. The exception to this is the mount for the lock body, which needs to be aligned and tightened down firmly, as it only has a single clamp attached and we don't want it to rotate easily when mounted.</p> <p>When attaching the clamps to the mounts, make sure the nuts are all on the same side. This makes mounting everything to the bike a lot easier. If you are right handed, I recommend aligning the nuts with the left sides of the respective mounts, looking at the mounts from the front. If you're left handed, aligned them with the right side.</p> <p>If you are using a 0.6 mm nozzle or if you get even a slight layer shift, the tolerances may be a bit too tight for the lock body to slide into the mount. In this case, use some small files along the inner sides of the mount to widen it slightly until the lock body fits in nicely.</p> <h3>Mounting</h3><p>When tightening the clamps you will need to push the screw and nut together while turning the screw until it engages with the nut. This can require a bit of force, but as long as the clamp is the right size for your frame it shouldn't be too difficult.</p> <p>The two lock mounts should be mounted to the frame at the same time and with the padlock attached. This will ensure the correct distance and alignment between the two parts.</p> <p>For the chain holder, make sure you have ample space above the opening to get the chain in and out of the holder.</p>
With this file you will be able to print Frame clamps and chain + padlock mounts for bicycle with your 3D printer. Click on the button and save the file on your computer to work, edit or customize your design. You can also find more 3D designs for printers on Frame clamps and chain + padlock mounts for bicycle.
