FPV250 Landing Gear
thingiverse
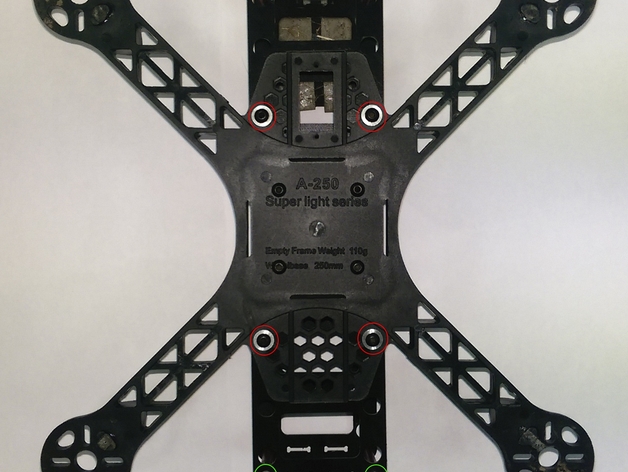
This is my maiden voyage into creating landing gear for the Diatone/Hobbyking/ 250 frame. As part of an ambitious project, I'm designing a set of legs that will enable the construction of an X8. There are two distinct sets of legs, each catering to specific mounting requirements. To mount the middle legs, identify the marked spots in red and drill your holes accordingly. In contrast, the front and rear legs should be attached at the designated green marks. Project Milestones: V1: Regrettably, it didn't lift off the ground as expected. V2.0: The first edition of our current design showcased considerable promise. v2.1: To further enhance stability, we added a support beam to where the legs intersect. v2.2: Following print-related concerns about weakness in certain areas, additional reinforcements were integrated. Note that future version v2.3 will address a critical detail: middle legs require precise corner trimming for seamless alignment with the frame's structure. Getting Started: To kick-start this process, you'll need access to two essential tools: a drill and a Dremel. Now, let's get rolling! 1) Commence by printing your set of legs. 2) Drill mounting holes as specified earlier in this manual. 3) Give special attention to trimming the middle leg corners flush with the frame – an upcoming v2.3 revision will detail the necessary modifications.
With this file you will be able to print FPV250 Landing Gear with your 3D printer. Click on the button and save the file on your computer to work, edit or customize your design. You can also find more 3D designs for printers on FPV250 Landing Gear.