FPV Pop Up Racing Gate
thingiverse
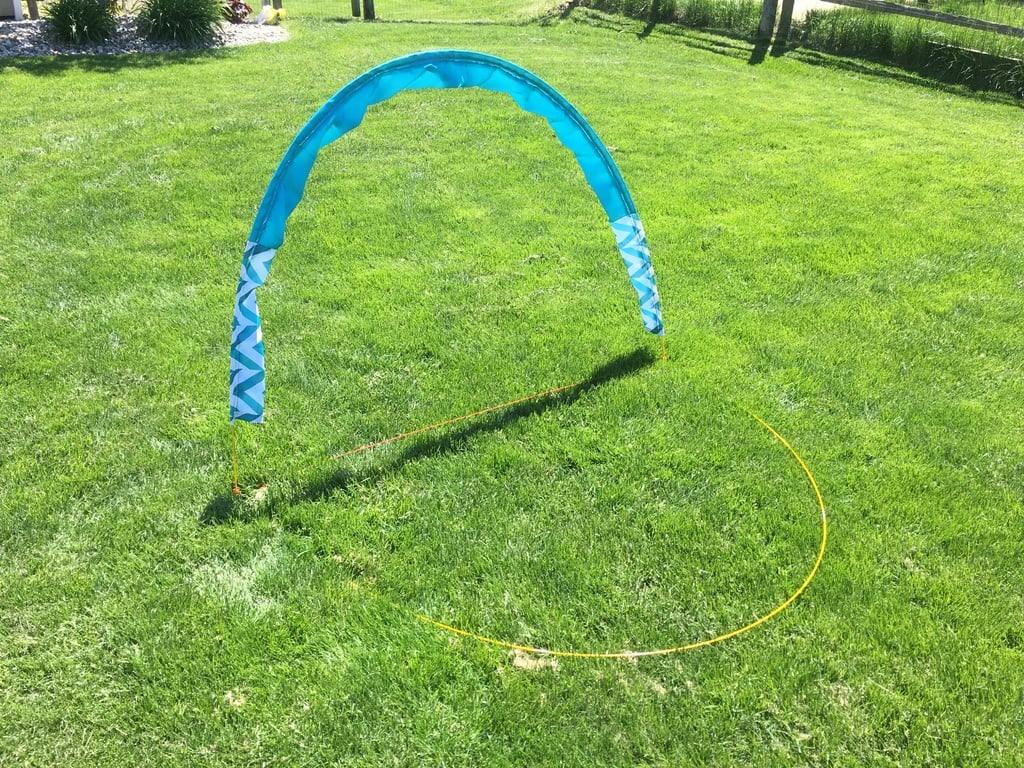
I was on a mission to create a simple yet affordable pop-up style FPV racing gate. The cheapest options I found were around $35 + shipping, with some costing over $60 each. After researching online, I stumbled upon a design by user "sekthree" here: http://imgur.com/a/23jRd and used his ideas to come up with this! I designed the 3D printed elbow myself and it holds the gate together very well. One of the best things about this gate design is that it's incredibly lightweight, easy to store and carry (you can easily twist it like a soccer pop-up goal), and holds up extremely well. The finished dimensions of the gate are approximately 5 feet wide by 3 feet 10 inches high. Update 6/14/2017: After using these gates for about a month, I made a few improvements! I added a small cutout / notch so you can more easily tie the string to it - it shouldn't slip around. Since I fly in an area with strong winds, I also added a hole to the back of the elbow that you can use to stake these gates down. I'm using a Coleman 10" stake, but any stake about that size or smaller should work. These improvements are included in the v2 file. I recommend printing this in PETG filament - on one of my gates, the PLA got a bit hot in the sun (90+ degree day) and bent. Update 5/15/2017: Check out these gates in action! Here's a YouTube video: https://www.youtube.com/watch?v=EseufUs_-Sg Cost Estimate- The total estimated cost for this project with the materials I list is about $15-$22 to make one initial gate. If you buy another set of fiberglass poles and cut the materials similar to what I did, you'll be able to make 3 gates for around $30-35. Rods: http://www.harborfreight.com/3-16-inch-x-33-ft-fiberglass-wire-running-kit-65326.html Parts needed: 1. For $10, you can buy the fiberglass rods linked above from Harbor Freight. You'll need to use 6 rods per gate - there are 10 rods in the container. If you buy two containers, you can make 3 gates (18 rods). Each rod is 33 inches long. **Very important**: I strongly recommend putting electrical tape around where the rods connect because the brass fittings will easily break if they're loose. 2. 3D print the elbows and assemble the gate. 3. Sew the middle section and end pieces together to create a continuous piece (creating a 105" total length, 8 inches width). 4. Fold the material in half - you should now have 105" x 4". 5. Sew a continuous seam for fiberglass rod at the top: between 1/2 to 5/8" at the top. 6. Sew a continuous seam where the pieces meet at the fold. Storing the gate: There are two options for storing the gate: Option 1. Simply "twist" and the gate will flatten down - it's small enough to fit in your trunk or on a wall when collapsed using the twist method. Option 2. Disassemble the gate by removing the 3D printed elbows, remove the fabric, unscrew the rods - this will only take a few minutes and you can collapse it down to something very small. You should be able to fit all 3 gates, material, and 3D printed parts in the original container that the fiberglass rods came in.
With this file you will be able to print FPV Pop Up Racing Gate with your 3D printer. Click on the button and save the file on your computer to work, edit or customize your design. You can also find more 3D designs for printers on FPV Pop Up Racing Gate.