Fox wall clock
prusaprinters
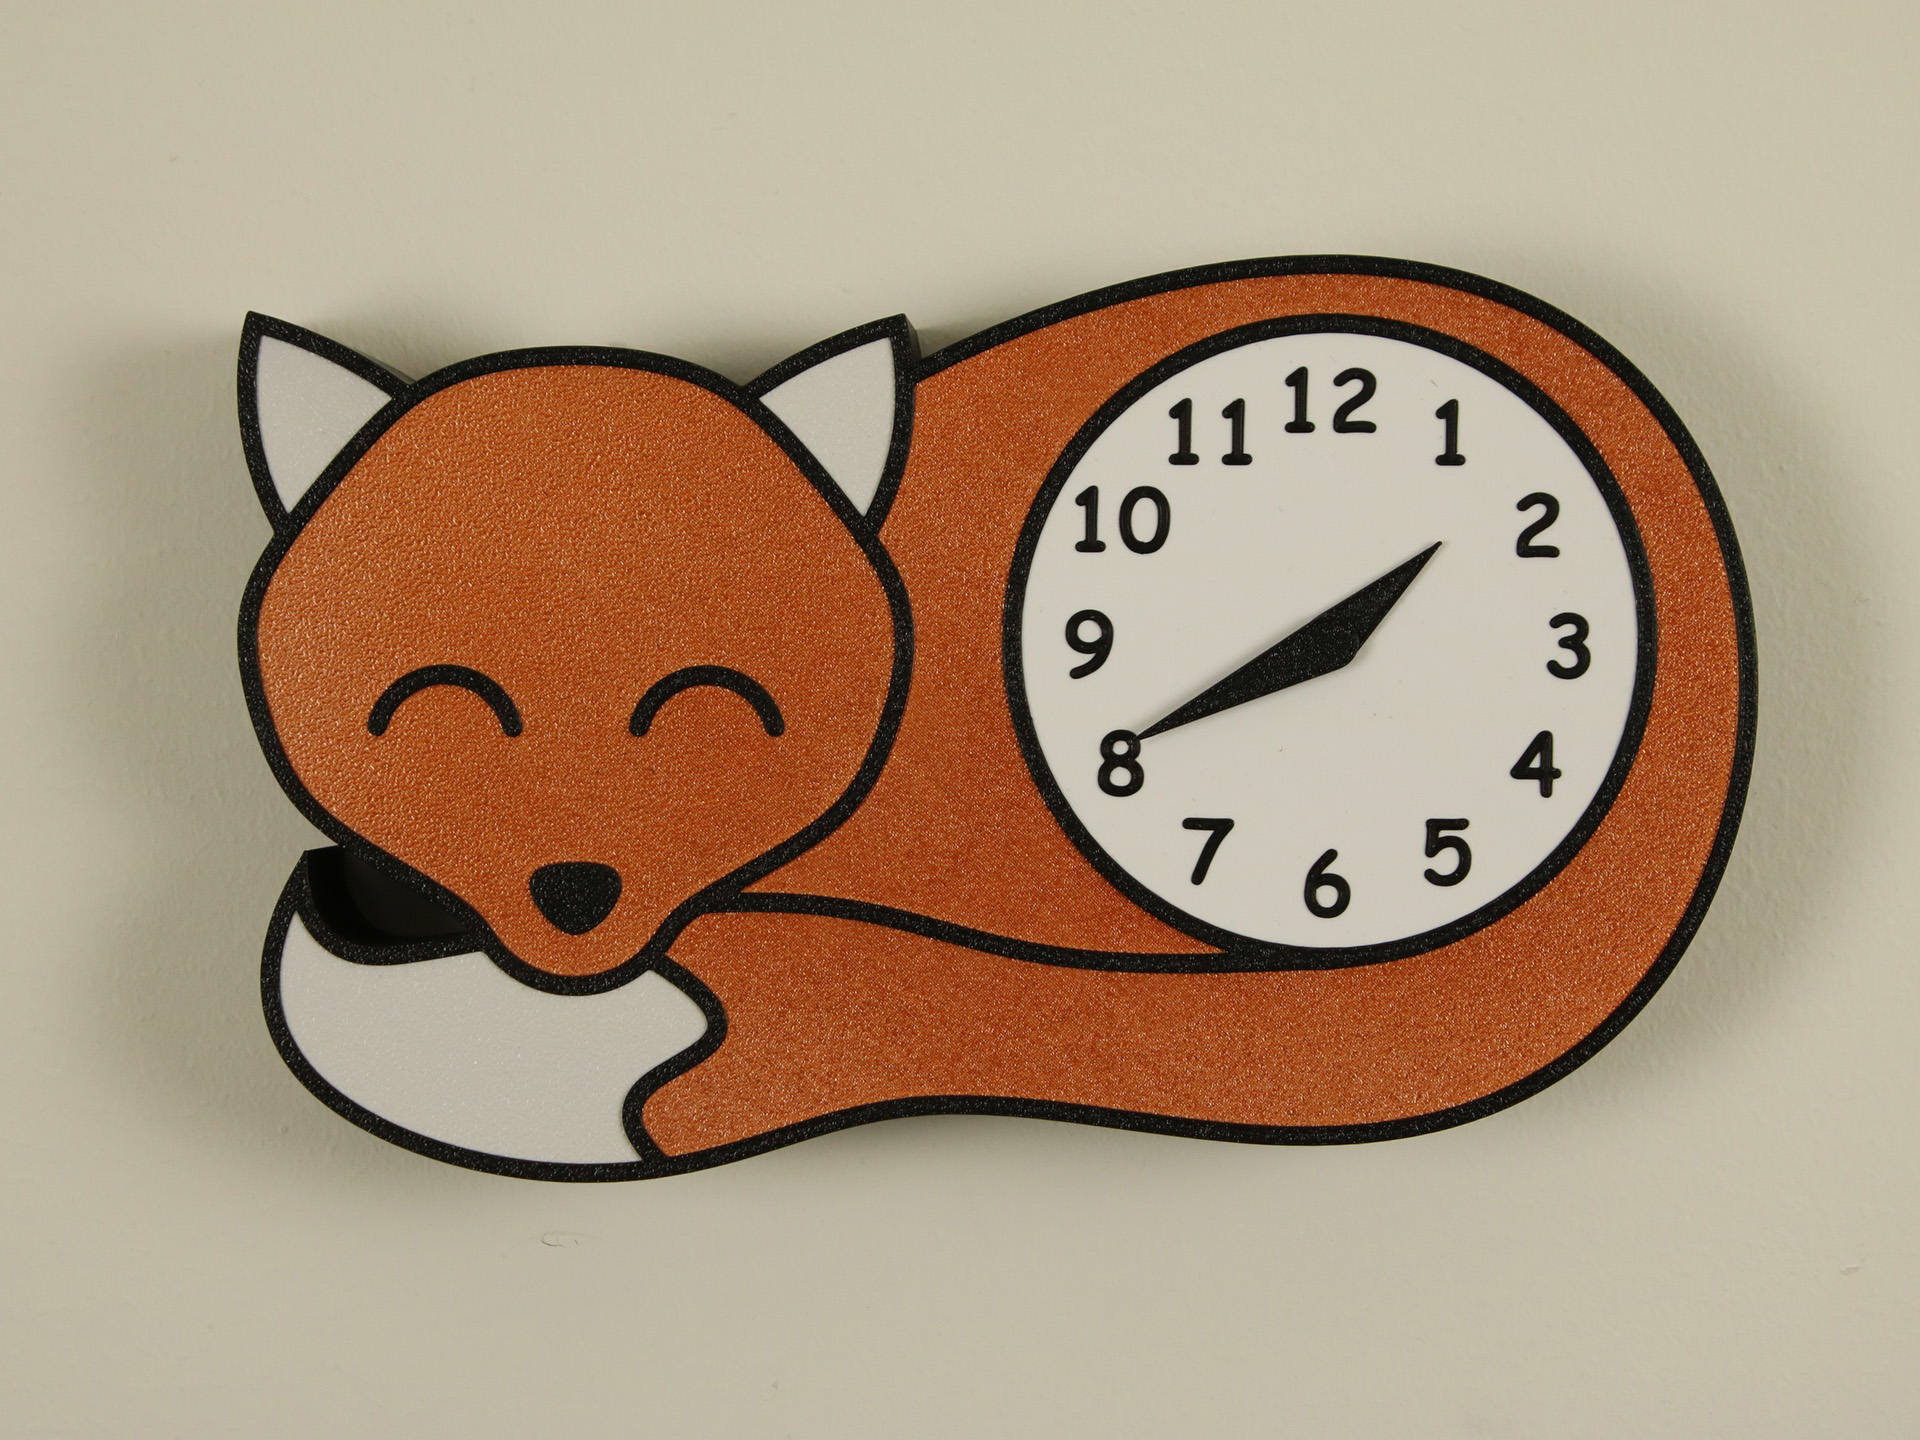
<p>This clock is modeled to work with the clockwork from an IKEA TROMMA clock (clockwork size 56x56mm). If you want to use another clockwork you might have to modify the hands and/or the clockwork plate.</p><h3>Versions and parts</h3><p>All parts have a suffix in the file name describing which version(s) it is made for.</p><h4>_All</h4><p>These parts are needed for all versions.</p><h4>_Normal</h4><p>These parts are needed for the normal version of the clock. This requires a build area of at least 250x150mm.</p><h4>_Split</h4><p>These parts are a split version of the Normal version which fits on smaller printers. Requires a build area of at least 170x170mm.</p><h4>_LED</h4><p>Parts for a thicker version of the clock which has room for an LED strip (max 14mm wide, 30cm long) behide the clock face.</p><h4>_Optional</h4><p>Optional part used to make it easier to mark nail positions in the wall to ensure the clock will be horizontal.</p><h3>Additional materials</h3><p>In addition to the printed parts you will need the following:</p><ul><li>A compatible clockwork, e.g. from an IKEA TROMMA clock</li><li>Glue</li></ul><h3>Printing</h3><p>Use a perimiter width of 0.8mm or lower if you want the overlap of teh outlines to hide the preimiters of the other parts.</p><h4>All versions</h4><p>Print all parts with suffix _All in the file name.</p><h5>Clock face</h5><p>Add a <a href="https://help.prusa3d.com/en/article/color-change_1687">color change</a> for the numbers.</p><p>For LED version, make sure the filament you are using is translucent enough.</p><h5>Clock hands</h5><p>These are modeled to fit the clockwork from an IKEA TROMMA clock and are modeled without any tolerance. If the fit is too tight you can either sand i down or scale it up a very small amount in your slicer.</p><h4>Normal version</h4><p>Print all parts with suffix _Normal.</p><h4>Split version</h4><p>Print all parts with suffix _Split.</p><p>The outlines models contain a segment with a 0.4mm wide perimiter which might be ignored by your slicer. In this case you need to enable the setting <a href="https://help.prusa3d.com/en/article/layers-and-perimeters_1748#detect-thin-walls">Detect thin walls</a> in PrusaSlicer (requires Advanced or Expoert mode enabled), or corresponding setting if you are using another slicer.</p><h4>LED version</h4><p>Print all parts with suffix _LED.</p><h5>LedRing</h5><p>This part is only 0.8mm thick and should be printed with a brim.</p><h3>Assembly</h3><p><i>Tip: Lay the pieces in place and apply a thin line of glue along the back side edge of each part. This reduces the risk of getting glue residue on the front.</i></p><h5>Step 1</h5><p>Lay the outlines on a flat surface and glue the following parts to them:</p><ul><li>Face</li><li>Body</li><li>Ears</li><li>Tail</li></ul><h5>Step 2 </h5><ol><li>Glue the clock face to the outlines</li><li>(LED version only)<ol><li>Attach the LED strip to the inside of the LED ring</li><li>Glue the LED ring to the outlines on the back of the clockface</li></ol></li><li>Glue the clockwork plate to the outlines on the back of the clockface/LED ring</li></ol><h5>Step 3</h5><p>Glue the eyes and nose to the face</p><h5>Step 4 (Split version only)</h5><p>Attach the two outline parts (body and face) with the outlines connector, use glue if necessary.</p><h5>Step 5</h5><p>Insert the clockwork and attach the hands.</p>
With this file you will be able to print Fox wall clock with your 3D printer. Click on the button and save the file on your computer to work, edit or customize your design. You can also find more 3D designs for printers on Fox wall clock.