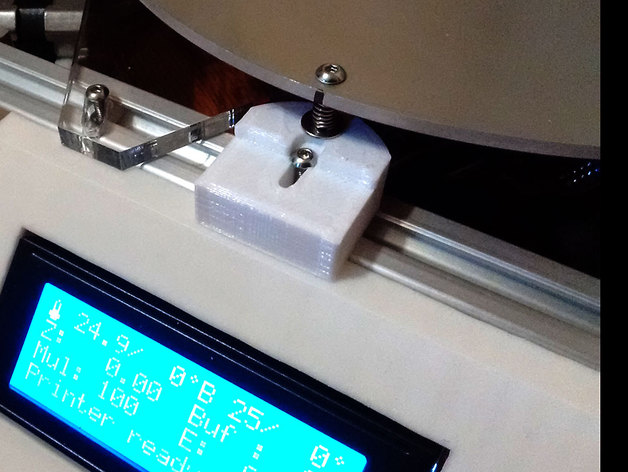
FolgerTech Kossel hotbed adjustable mount. Easy to calibrate.
thingiverse
I'm tired of tweaking my Folger Tech 2020 Kossel using z-probe, tested both - Marlin and Repetier. They calibrated properly, but I wasn't satisfied with the final results. The stock Z-probe is too far from the tip (X-Y offset) and even slight effector tilt yields very inaccurate values. So, I decided to make my own adjustable hotbed mount using spare screws from printer kit (3 M3x25, 3 M3x15, 3 Nylock M3 nuts, 3 washers and 3 M3 t-nuts for 2020 extruded profile), simple Sketchup-made mount (printed with PETG) and 3 springs I found in a $4 Homedepot spring kit. What a difference! It only took 15 minutes to calibrate the installed bed with high precision. Tip: Use small drill bit (1.5mm-3mm diameter) instead of paper for initial calibration - it gives some room between nozzle and bed and prevents head crash. Measure its opposite end (let's say it's 1.98mm), set Z height to 1.98mm, move the head as close to X calibration screw as possible and adjust so drill bit rolls slightly touching the tip. Repeat for Y and Z. Repeat the procedure if needed, then start adjusting delta radius. Repeat with paper test to fine-tune, if needed. Finally, I dismounted the probe (replaced with replacement mount that adds extra fan http://www.thingiverse.com/thing:1123295) and won't use it again... hardware calibration rules apply. PS: To avoid mess with slicer and make smooth transition during printing from hex-nut hole to M3, I designed a thin wall, so short bridges over hex-nut hole do the job pretty well. You need just puncture this thin wall using small screwdriver before inserting M3x25 screw.
With this file you will be able to print FolgerTech Kossel hotbed adjustable mount. Easy to calibrate. with your 3D printer. Click on the button and save the file on your computer to work, edit or customize your design. You can also find more 3D designs for printers on FolgerTech Kossel hotbed adjustable mount. Easy to calibrate..
