Focusing E-Mount For Ultrafast Lenses
thingiverse
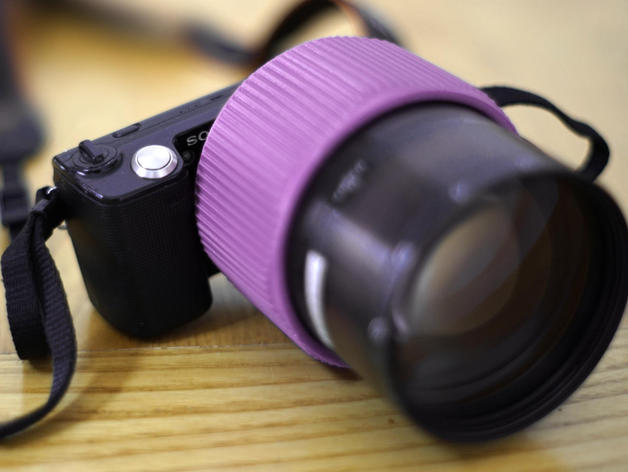
There are several types of old fast lenses available at a low cost. These lenses, usually marked between f/0.75 and f/1.6, often lack an aperture iris, focus mechanism, and a large external screw thread designed for mounting. They typically cannot focus to infinity even on mirrorless bodies, and image quality is extremely soft, but sometimes that's a feature. I originally attached these lenses using an M42-to-A-mount adapter glued onto the back (as described in my Instructable, http://www.instructables.com/id/Using-Fast-Lenses-on-Mirrorless-Cameras ). Instead, I've created 3D-printable focusing E-mount adapters where the lens screws in using the large external thread and can be focused by partially unscrewing. One mount has a 60mm thread that works with my Kowa 55mm f/1 and 42mm f/0.75; the other has an 80mm thread that works with my XR-Heligon 95mm f/1.3. The E-mount flange is a new design that should fit both older Sony E-mount bodies and the newer all-metal E-mounts (they have been tested on NEX-5 and A7II). In fact, the flange on the 80mm adapter has a different internal profile from the 60mm one because the rear element of the XR-Heligon is huge and a standard-thickness E-mount could cause vignetting. The last couple of photos were taken using purple PLA adapters on an A7II and NEX-5. The kiwi was shot using the Rodenstock XR-Heligon, and the princess ornament was captured with one of the Kowas. Note that the large flat on the adapters makes it difficult but not impossible to access the E-mount body lens release button, and the 80mm adapter just barely clears the grip on my NEX-5; however, mounting the lens farther away from the sensor would limit the focus range. Print Settings Printer Brand: MakerGear Printer: M2 Rafts: No Supports: No Resolution: 0.25mm Infill: 20% Notes: The adapters print with the E-mount side up, which means there is a huge unsupported flat under the E-mount flange and that needs supports when printing; I have designed-in a support that should be broken out of the center of the adapter after printing. Post-Printing Break-out the internal support - It should be easy to remove - I twisted it out with pliers. Work the screw threads - The screw threads should print directly usable, but working them back and forth a bit may help clean up any 3D-printing strings, etc. You might even need to file off a drip or two on the threads or the flat inside of the adapter. I recommend working the threads a bit to test fit, filing a little if needed, and then using water to clean off plastic dust. Paint inside black - I usually use opaque black filament for adapters, but here I used dark purple. To ensure no light leaks, paint the inside of the E-mount flange and the inside back of the E-mount flange with flat black latex paint. This isn't really needed, but the paint fills any pinholes nicely and it can't hurt. You don't need to paint the screw thread, etc. Paint the alignment dot - There is an alignment dot on the outside for aligning the adapter with the E-mount on the body for mounting. I put a dot of white paint in the cylindrical cavity printed for that purpose. It's the white dot visible in the 3rd photo. I use white because Sony uses white for the corresponding mark on the body.
With this file you will be able to print Focusing E-Mount For Ultrafast Lenses with your 3D printer. Click on the button and save the file on your computer to work, edit or customize your design. You can also find more 3D designs for printers on Focusing E-Mount For Ultrafast Lenses.
