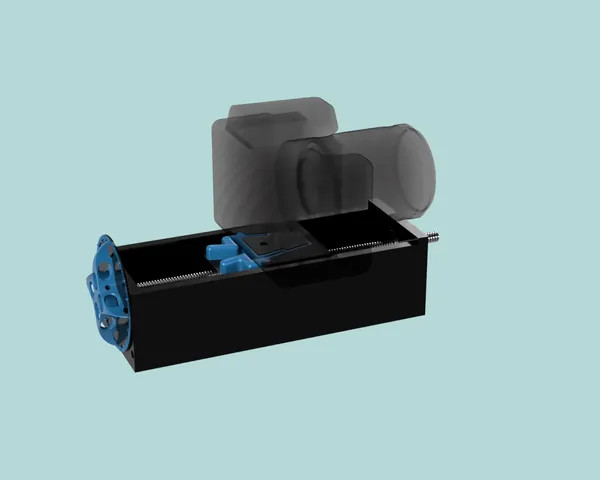
Focus Stack Rail
prusaprinters
Introduction:Previously I designed a series of adaptors that allow you to use standard kit lenses to create macro images. (reverse lens, coupled reverse lens, macro tubes). However, I soon realised that the most significant limitation wasn’t the lenses or my adaptors but restrictions set by optics. For example, the closer you are to your subject, the smaller the depth of field (the region in focus). Macro photography puts you just millimetres away from your subject, so the depth of field is minimal, sometimes less than a millimetre. Stopping the lens down, the usual way to solve this problem has limits in this situation.The only feasible solution is focus stacking, where you take many photos, each with a different part of the subject in focus, then stitch the sharp bits together. Dedicated software will do the stitching, but the image capture remains tedious since it involves taking many images at tiny distances apart. This focus rail is designed to address this problem. The;Rail ensures the camera only moves on one axisLead screw helps make tiny precise movements possible. (One complete turn moves the carriage 2mm)Distance Scale allows you to measure the distance to one-hundredth of a millimetre, or 10 microns Essential requirements for this project Knowledge and skill:3D Printing Skills: This project doesn't require a high degree of skill, but it's probably not a good first projectBasic photography skills.Materials and components2 x Filaments: petG would be best. Recommend that the main colour is black as this will minimise reflectance issues.1 x Leadscrew T8 x2 250mm (8mm diameter with a 2mm lead) You’ll need a hacksaw to cut to size.2 x 608Z bearings (Common skateboard bearings)8 x M3 25mm hex socket bolts (preferably black)8 x M3 Square nuts8 x Countersunk Socket head M3 12mm (preferably black)6 x 3x7x3mm -683 bearings (For rail wheels)1/4" camera screw with D-ring. (Easy to find on eBay)2mm Black silicone rubber sheet. From this sheet, you can cut the anti-twist pad for the top of the camera plate. Alternatively, you can print the anti-twist pad using flexible filament. Either way, use something like contact cement to attach.¼” square nutTwo short self-tapping wood screws3D PrintingPetG is preferable, but PLA will do. All can be printed at 3mm layer height, but the dial will look more pleasing if you use variable layer heights.The device needs to be as precise as possible, so I’ve deliberately made the tolerances tight to minimise unwanted movement. You need to be thorough with your post-printing cleanup, so all the parts fit together well but move smoothly where they need to.Focus Stacking SoftwareZerene and Helicon make dedicated focus-stacking software. I’ve been using Helicon Focus. Some alternatives include Photoshop, open-source software like CombineZ and online software likePhotopea. I’ve experimented with many of these and found none as satisfactory as Helicon Focus. Shooting Learning how to use a focus railMany websites will help you with macro photography. However, I’ve found Extreme Macro to be the all-around best as it has.Learning materials: Perhaps not the most simple, but very thoroughReference material: Covers all the different equipment and techniques used in macro photographyCalculators: Effective f-stop and optimal step size may mean little to you now but become invaluable each time you shoot.Using my focus railHalf turn is a 1mm stepLarge ticks are a one-tenth of a millimetreSmall ticks are one-hundredth of a millimetreThe following might save you from finding out the hard way.A solid base for your rig is essential. The slightest vibration can look like a major earthquake. I use a fluid head which usually is used in videography. It's heavy and pans smoothly.There is a ¼” nut built into the bottom of my focus rail, which is designed to allow you to secure it on a camera plate.Flashes are the best way to light your subject because they;Minimise camera shake. Due short duration of the flashHave a high volume of light (Most acro adaptors increase the effective f-stop)Easier to mount There is not much room around a macro subjectPortable: Throw them in your camera bagConsistent: Taking fifty a hundred photos takes time. Natural light can change during this time. Full automation coming soon I want a device that automatically captures focus stack images so I can concentrate on the creative elements. I’ve already fitted a stepper motor to the rail and can control it and the camera with an ESP32 microcontroller. I’ve also designed an intuitive interface. The next job is to connect the two and debug. Everything has been concept tested, so there should not be many significant hurdles to completion.However, experience tells me it will take longer than expected. So check back in a couple of months. Photographs Face of Miniature: 18-55mm kit lens reversed at 18mm end. Frame a few millimetres high.Man Reclining: 18-55mm kit lens reversed at 18mm end. . Frame a few about 12mm high.Seed pod: Face of Miniature: 18-55mm kit lens reversed at 18mm end. Frame a few millimetres high.Diamond Drill Bit: Microscope objective. Frame less than 1mm. (Steps 100th of a millimetre)
With this file you will be able to print Focus Stack Rail with your 3D printer. Click on the button and save the file on your computer to work, edit or customize your design. You can also find more 3D designs for printers on Focus Stack Rail.
