Flywheel cage for Nerf Rival
thingiverse
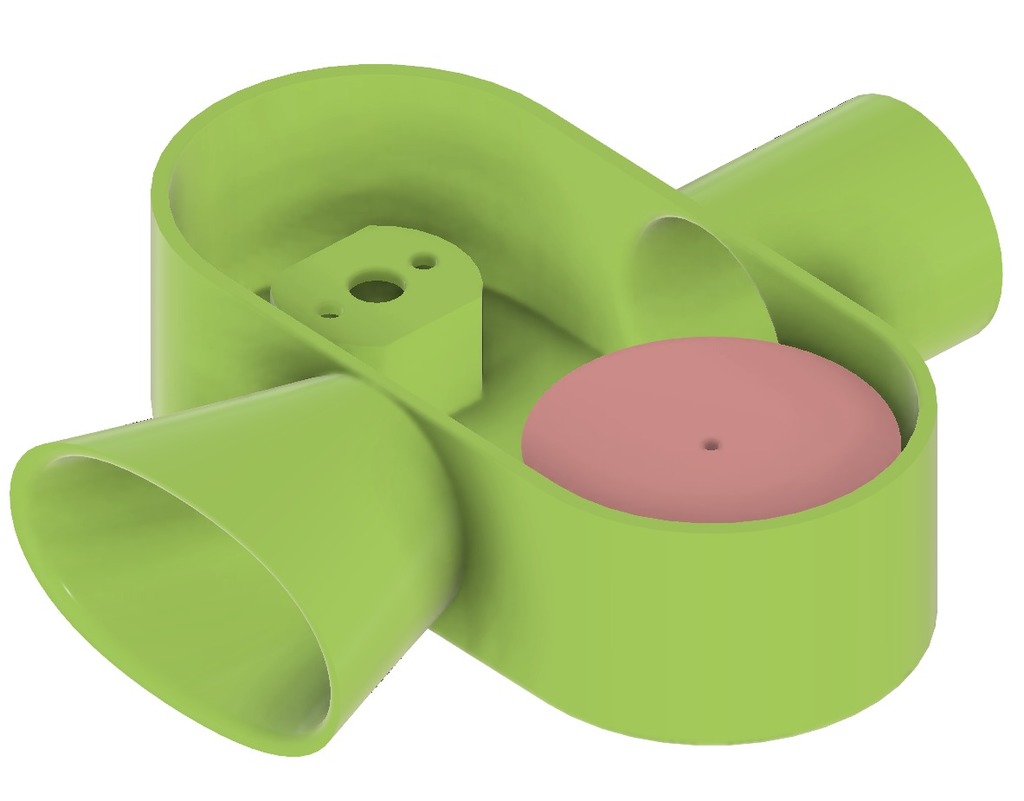
First Revision for Nerf Rival Flywheel Cage: High-Performance Foam Ball Launcher. This project is still in development and may not reach optimal performance levels yet. However, you can adjust motor mounts, flywheel size, and ball diameters using the provided Fusion 360 files. I sourced an old Nerf Hail-Fire and repurposed its motors, which run on 1.5V to 3V power, along with a high-quality driver board. The motors feature a 2mm diameter shaft that's 7mm long, with the top 5mm being knurled for added grip. The flywheels have a precisely machined 5mm deep hole to fit snugly on the shaft. The current setup utilizes PLA prints with relatively low quality settings (0.2 layer height, 0.4 wall thickness, 10% infill), but these seem to be working out okay for now. To assemble this high-performance Nerf Rival flywheel cage, follow these steps: print one cage and two flywheels, then carefully remove the supports from each piece. Smooth out the center channel by sanding if necessary. Next, insert the motors all the way into their housings - if they don't fit initially, use a Dremel with a sanding drum to slightly enlarge the mounting holes. Make sure the motors spin in opposite directions for optimal performance. Once the motors are securely inserted, place the assembly on a sturdy surface and carefully push the flywheel onto the shaft until it's flush with the top of the flywheel. The easiest way to achieve this is by using a coin or flat piece to gently guide the flywheel into place.
With this file you will be able to print Flywheel cage for Nerf Rival with your 3D printer. Click on the button and save the file on your computer to work, edit or customize your design. You can also find more 3D designs for printers on Flywheel cage for Nerf Rival.