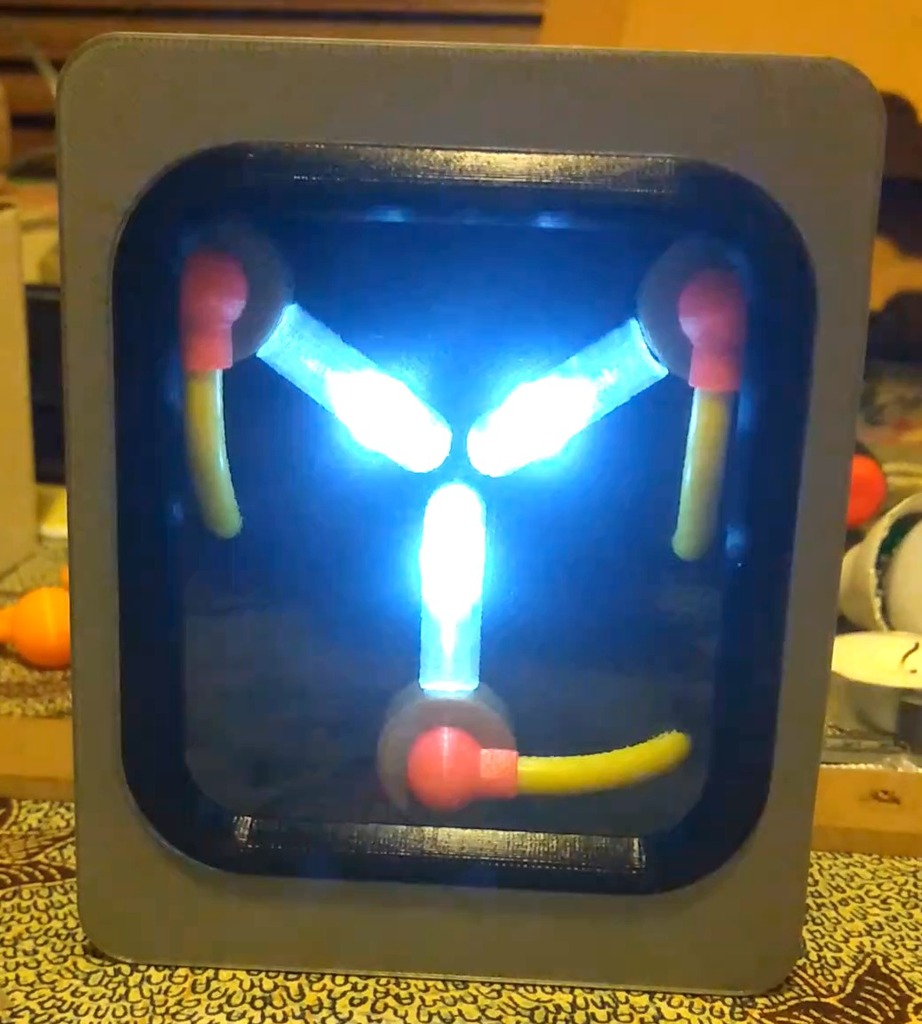
Flux capacitor - Back to the future
prusaprinters
<p>The Flux Capacitor, from Back to the Future</p> <p>Always useful to have on your desk, for those time where you make an unfortunate mistake.</p> <p>It's fully functional! It goes back in time exactly 1 hour. The only problem, you also go back in time and repeat the exact same mistake because you forgot about, since it didn't yet happen. I'm still working on this issue. It has a security feature to only work once per time frame, to avoid infinite loop, which would be a time paradox.</p> <p>See it in action: <a href="https://youtu.be/0u9_nsFNzjI">https://youtu.be/0u9_nsFNzjI</a></p> <p>I have included the KiCad schema. This is my first personal electronic project, I'm sure it could be improved. If you have suggestions, please leave me a comment.</p> <p>NOTE: I have tried to generate a PCB using KiCad but it didn't let me. I assume there are some errors with my schema.</p> <h3>Print Settings</h3> <p><strong>Printer Brand:</strong></p> <p>Prusa</p> <p><strong>Printer:</strong></p> <p>i3 MK3</p> <p><strong>Rafts:</strong></p> <p>No</p> <p><strong>Supports:</strong></p> <p>No</p> <p><strong>Resolution:</strong></p> <p>0.15 mm</p> <p><strong>Infill:</strong></p> <p>15%</p> <p><strong>Filament:</strong> X3D PLA</p> <p><strong>Notes:</strong></p> <p>The battery door is the only part which requires supports.</p> <h3>Custom Section</h3> <p><strong>Printing checklist</strong></p> <ul> <li>1x flux-capacitor_base.stl (sliver)</li> <li>1x flux-capacitor_battery-door.stl (silver)</li> <li>1x flux-capacitor_lid.stl (sliver)</li> <li>1x flux-capacitor_window-seal.stl (black)</li> <li>1x flux-capacitor_separator.stl (black)</li> <li>3x flux-capacitor_connector-base.stl (gold)</li> <li>3x flux-capacitor_connector-sleeve.stl (red)</li> <li>3x flux-capacitor_led-cover.stl (transparent)</li> </ul> <p><strong>Electronics checklist</strong></p> <ul> <li>1x 9v battery</li> <li>1x 9v battery connector</li> <li>1x On / Off switch</li> <li>1x 70mm x 30mm PCB</li> <li>1x 555 Timer</li> <li>1x 4017 CMOS counter chip</li> <li>12x white LEDs</li> <li>4x generic NPN transistors (I used 2N2222)</li> <li>1x 10Ω resistor (for the LEDs)</li> <li>4x 22kΩ resistors (for 4017 inputs)</li> <li>2x 2.2kΩ resistors (for the 555 timer)</li> <li>1x 10µF electrolytic capacitor (for the 555 timer)</li> <li>1x 10nF ceramic capacitor (for the 555 timer)</li> <li>2x 0.1µF ceramic capacitors (to protect the chips - optional)</li> <li>3x 50mm of 10AWG yellow cable (for the look)</li> </ul> <p>You will also need some screws:</p> <ul> <li>4 very small screws for the PCB:<ul> <li>Length: between 3 to 6mm</li> <li>Diameter: 1.75mm</li> </ul> </li> <li>4 small black screws for the separator and 1 silver screw for the battery lid:<ul> <li>Length: between 5 to 10mm</li> <li>Diameter: 3mm</li> </ul> </li> </ul> <p><strong>eBay purchases</strong></p> <p>This is where I bought my parts (not sponsored). Don't hesitate to purchase them elsewhere if you can find better price. Also, I like to purchase assortments of parts so I can experiment with different values.</p> <ul> <li>9v battery connectors: <a href="https://www.ebay.com.au/itm/10PCS-MN1604-9V-PP3-9volt-Battery-Holder-Clip-Snap-On-Connector-Cable-Lead/282606951665">https://www.ebay.com.au/itm/10PCS-MN1604-9V-PP3-9volt-Battery-Holder-Clip-Snap-On-Connector-Cable-Lead/282606951665</a></li> <li>On / Off switch: <a href="https://www.ebay.com.au/itm/10Pcs-Design-Auto-Car-Truck-Boat-Round-Rocker-ON-OFF-SPST-Switches-12V-16A/162739565416">https://www.ebay.com.au/itm/10Pcs-Design-Auto-Car-Truck-Boat-Round-Rocker-ON-OFF-SPST-Switches-12V-16A/162739565416</a></li> <li>PCB: <a href="https://www.ebay.com.au/itm/1X-40-pcs-Double-side-Breadboard-Circuit-Prototype-DIY-PCB-Board-2x8-3x7-4x-P3G2/292810326710">https://www.ebay.com.au/itm/1X-40-pcs-Double-side-Breadboard-Circuit-Prototype-DIY-PCB-Board-2x8-3x7-4x-P3G2/292810326710</a></li> <li>4017 CMOS chips: <a href="https://www.ebay.com.au/itm/10PCS-Texas-Instruments-CD4017-CD4017BE-Decade-Counter-IC/181847203407">https://www.ebay.com.au/itm/10PCS-Texas-Instruments-CD4017-CD4017BE-Decade-Counter-IC/181847203407</a></li> <li>555 Timer chips: <a href="https://www.ebay.com.au/itm/NE555-Timer-IC-TEXAS-INSTRUMENTS-10-or-20Pcs/292901852443">https://www.ebay.com.au/itm/NE555-Timer-IC-TEXAS-INSTRUMENTS-10-or-20Pcs/292901852443</a></li> <li>LEDs: <a href="https://www.ebay.com.au/itm/200pcs-5-Color-3mm-5mm-Round-Bright-Light-LED-Diode-Lamp-Assortment-Kit/162864181078">https://www.ebay.com.au/itm/200pcs-5-Color-3mm-5mm-Round-Bright-Light-LED-Diode-Lamp-Assortment-Kit/162864181078</a></li> <li>Assortment of resistors: <a href="https://www.ebay.com.au/itm/1500pcs-1-4W-75-Values-5-Carbon-Film-Resistors-Assorted-kit-1-ohm-10M-ohm/264312983229">https://www.ebay.com.au/itm/1500pcs-1-4W-75-Values-5-Carbon-Film-Resistors-Assorted-kit-1-ohm-10M-ohm/264312983229</a></li> <li>Assortment of electrolytic capacitors: <a href="https://www.ebay.com.au/itm/200pcs-15-Values-0-1uF-220uF-Assorted-Electrolytic-Capacitor-Assortment-Kit-Box/302761633619">https://www.ebay.com.au/itm/200pcs-15-Values-0-1uF-220uF-Assorted-Electrolytic-Capacitor-Assortment-Kit-Box/302761633619</a></li> <li>Assortment of low values ceramic capacitors: <a href="https://www.ebay.com.au/itm/300pcs-10Value-50V-10pF-100nF-Ceramic-Capacitors-Assortment-Assorted-Kit-Box/312357846304">https://www.ebay.com.au/itm/300pcs-10Value-50V-10pF-100nF-Ceramic-Capacitors-Assortment-Assorted-Kit-Box/312357846304</a></li> <li>Assortment of ceramic capacitors: <a href="https://www.ebay.com.au/itm/500PCS-10-Value-50V-0-1uF-10uF-Electronic-Ceramic-Capacitor-Assorted-Kit-w-Box/382853608499">https://www.ebay.com.au/itm/500PCS-10-Value-50V-0-1uF-10uF-Electronic-Ceramic-Capacitor-Assorted-Kit-w-Box/382853608499</a></li> <li>10AWG yellow cable (1m is plenty): <a href="https://www.ebay.com.au/itm/Flexible-Stranded-Silicone-Rubber-Wire-Cable-28-26-24-22-20-18-16-14-12-10-8AWG/143162105077">https://www.ebay.com.au/itm/Flexible-Stranded-Silicone-Rubber-Wire-Cable-28-26-24-22-20-18-16-14-12-10-8AWG/143162105077</a></li> </ul> <p><strong>Assembly</strong></p> <ol> <li>Assemble the electronics on a breadboard, to be sure everything works</li> <li>Solder the electronics on a generic PCB</li> <li>Screw the electronics in the base</li> <li>Put the switch in place</li> <li>Cut the positive cable of the 9v battery connector and solder it to the switch</li> <li>Put the LEDs on the separator (black printed part), bend the leads at the back and solder them. Optionally cover the whole thing with hot glue to prevent shortcuts.</li> <li>Glue the connector sleeve (red printed part) on the connector base (gold printed part). Repeat with all 3 connectors.</li> <li>Glue the connectors to the separator (black printed part), with the sleeve pointing at the corresponding hole on the separator (the yellow cable will go through those holes)</li> <li>Cut a 50mm segment of the yellow cable and put one end in the connector sleeve (red printed part) and the other in the corresponding hole on the separator (black printed part). Repeat with all 3 connectors.</li> <li>Glue the transparent LED cover (transparent printed part) over the LEDs. Repeat with all 3 LED covers.</li> <li>Either use a 5 pin Dupont connector for your LEDs cables, or solder them directly to the PCB</li> <li>Pass the cables of the 9v battery connector through the slight of the base.</li> <li>Put the separator in place. Be very careful to not crush cables between the separator and the base. Then screw it in place with 4 black screws.</li> <li>Glue the window to the lid, and glue the window seal on top.</li> <li>Close the lid.</li> <li>Put a 9v battery in and close the battery compartment with a sliver screw.</li> <li>Flick the switch, go back in time and start over...</li> </ol> Category: Props
With this file you will be able to print Flux capacitor - Back to the future with your 3D printer. Click on the button and save the file on your computer to work, edit or customize your design. You can also find more 3D designs for printers on Flux capacitor - Back to the future.
