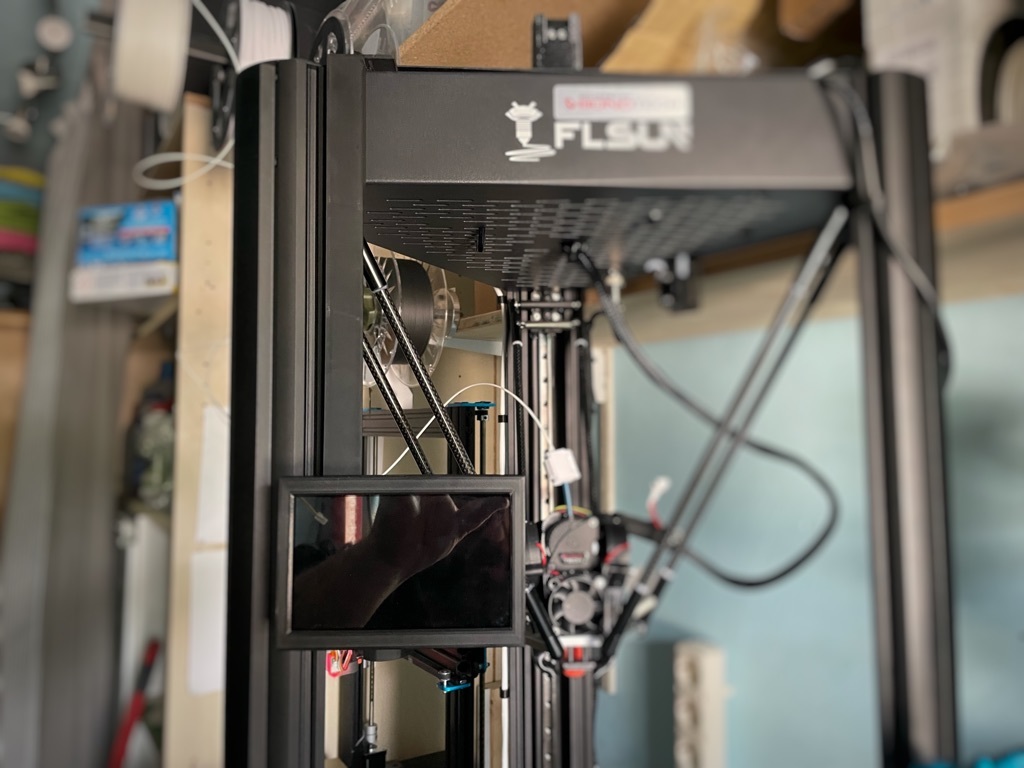
Flsun Super Racer 5" Klipper screen Display
thingiverse
This is a display case with cable management for the Flsun Super Racer running Klipperscreen. The display is the popular Osoyoo 5 inch https://www.amazon.de/gp/product/B07KJBCNS8?ie=UTF8&psc=1&linkCode=sl1&tag=renegade09-21&linkId=ff396d69500522b1cd21a8b2967ffacd&language=de_DE&ref_=as_li_ss_tl The matching cable from Osoyoo https://www.amazon.de/gp/product/B07KJBCNS8?ie=UTF8&psc=1&linkCode=sl1&tag=renegade09-21&linkId=ff396d69500522b1cd21a8b2967ffacd&language=de_DE&ref_=as_li_ss_tl all parts can be printed without support, only the cable guide needs support. The cable guide requires "support on build plate only" to catch the small snap-in lug. 0.2 layer height is ok, material preferably PETG or ASA, of course PLA also works also in this area. I used this thing to install the Raspberry: https://www.thingiverse.com/thing:4936100 The cable guide can simply be attached at the top by inserting it between the top housing plate and the chassis. The cable will be safe from damage. Then simply reinsert the screw and tighten it, that's enough. If you want, you can of course notch/cut out the metal at this area! Attention! flex cables are not resilient when it comes to kinking, so bends are allways better than kinks! :-) ################################################################### Das ist ein Displaygehäuse mit Kabelführung für den Flsun Super Racer. So kann man recht simpel einen Klipperscreen einsetzen Das Display ist das beliebte Osoyoo 5 Zoll https://www.amazon.de/gp/product/B07KJBCNS8?ie=UTF8&psc=1&linkCode=sl1&tag=renegade09-21&linkId=ff396d69500522b1cd21a8b2967ffacd&language=de_DE&ref_=as_li_ss_tl Dazu das passende Kabel von Osoyoo https://www.amazon.de/gp/product/B07KJBCNS8?ie=UTF8&psc=1&linkCode=sl1&tag=renegade09-21&linkId=ff396d69500522b1cd21a8b2967ffacd&language=de_DE&ref_=as_li_ss_tl Bis auf die Kabelführung sind alle Teile ohne Support druckbar. Die Kabelführung benötigt "support on build plate only", um die kleine Einrastnase abzufangen. 0.2 Layerhöhe genügt, Material vorzugsweise PETG oder ASA, natürlich geht auch PLA in diesem Bereich. Ich habe für den Einbau des Raspberrys dieses Thing genutzt: https://www.thingiverse.com/thing:4936100 Die Kabelführung kann man einfach oben mit einhängen in dem man ihn zwischen die Gehäuseplatte und das Chassis steckt. Das Kabel ist so sicher vor Beschädigungen. Schraube dann einfach wieder einsetzen und anlegen, das genügt. Wer möchte kann das Blech an dieser Stelle natürlich aus ausklinken/austrennen! Diese Videos von https://www.youtube.com/c/StoneTime kann ich zum Einrichten von Klipper und des Klipper-screens wärmstens empfehlen! Achtung! Die Flex-kabel sind nicht belastbar was abknicken angeht, daher lieber bögen statt Knicke!
With this file you will be able to print Flsun Super Racer 5" Klipper screen Display with your 3D printer. Click on the button and save the file on your computer to work, edit or customize your design. You can also find more 3D designs for printers on Flsun Super Racer 5" Klipper screen Display .
