FLSun QQ tool holder
thingiverse
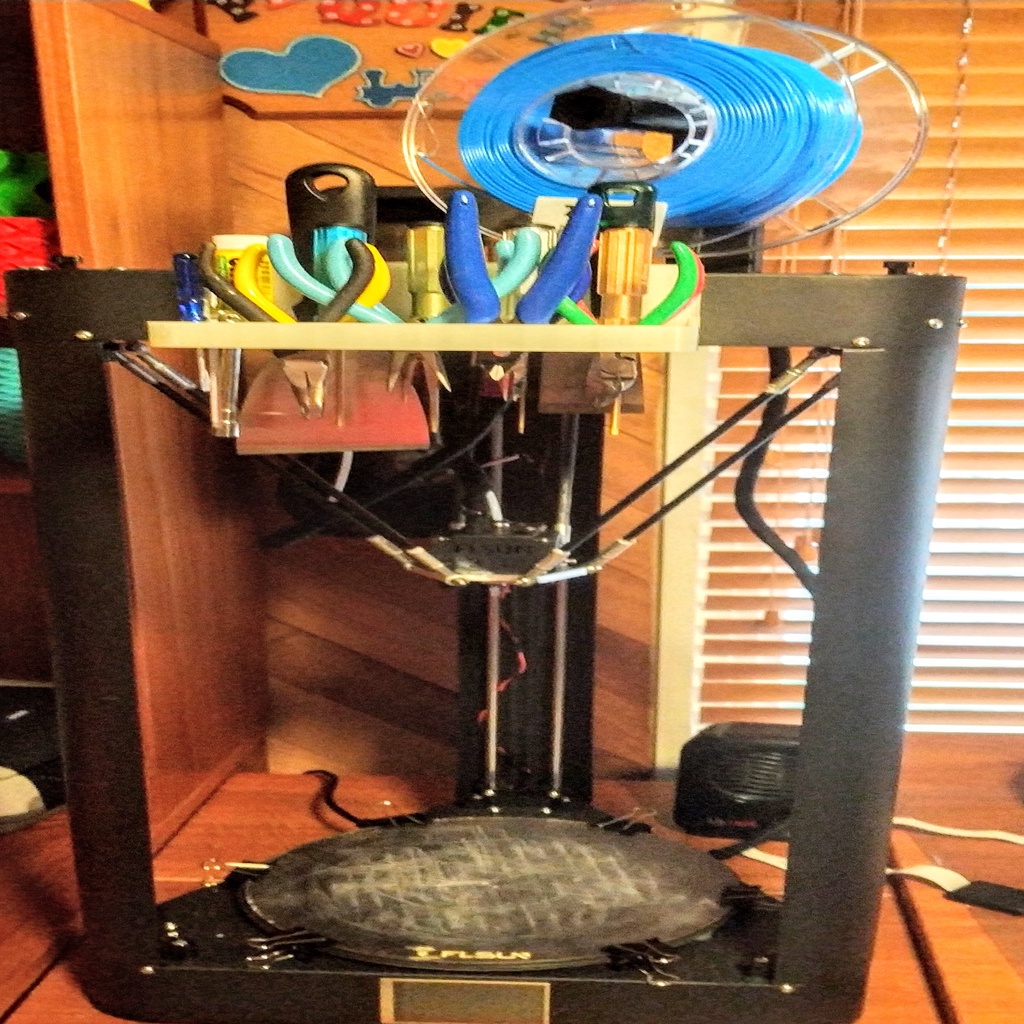
This is a tool holder I designed specifically for the FLSun's QQ series of printers. It holds all the tools I've been using over the past few years, including the ones that came with my QQ-S printer. The large part prints in about 13 hours, and the small one takes less than 3 hours to complete. My previous printer required three different sizes of M screws and nuts, which made it frustrating to use standard L-shaped Allen wrenches. I purchased a set of proper nut drivers that come in sets of four, so I decided to create space for all of them on the holder. The QQ-S printer seems to only require the largest one, but I included room for the smaller ones as well. I'm not sure what the tiny screwdriver is used for, but I made a place for it anyway. I use the glue stick primarily as a size comparison when photographing parts I upload, so I wanted a convenient spot to keep it handy. Because I don't print things that require supports, I designed the holder to be printed in two separate parts that get glued (actually welded) together. Another option is to print the entire thing on its edge, but this would have resulted in poorly formed holes and other details. If someone wants to try printing it on its edge to avoid gluing, I can easily provide an STL file for that. Here's a link to the material used to glue the two parts together: https://www.amazon.com/gp/product/B0096T6OQK/ref=ppx_yo_dt_b_asin_title_o05_s00?ie=UTF8&psc=1 This solvent dissolves PLA, effectively welding the two parts together. It's a highly volatile liquid that comes with an applicator bottle, which I actually use in place of the hypodermic syringe. To weld the parts together, simply put them in place and squirt a small amount of the solvent along the seams between the two pieces. Capillary action will draw it in between the adjacent surfaces and bond them together within 30 seconds. You'll have a short time window to properly align the parts before the PLA solidifies. It's essential to use this solvent in a well-ventilated area, as it can dry out your skin if any gets on you. To attach the holder to the printer, I used hot glue. A cheap hot glue gun (around $7.00) is an incredibly handy tool to have on hand. Simply apply two thin beads of hot glue to the printer and press the holder into place. You could also use nuts and bolts, but that would require drilling holes. Double-sided tape is another reasonable alternative to hot glue. Here's a link for the nut drivers: https://www.amazon.com/NEEWER%C2%AE-Titanium-Nitride-Driver-Wrench/dp/B00CP2GGBI/ref=sr_1_49?keywords=M+nut+driver&qid=1577029216&s=industrial&sr=1-49
With this file you will be able to print FLSun QQ tool holder with your 3D printer. Click on the button and save the file on your computer to work, edit or customize your design. You can also find more 3D designs for printers on FLSun QQ tool holder.
