Flower Iris Box
prusaprinters
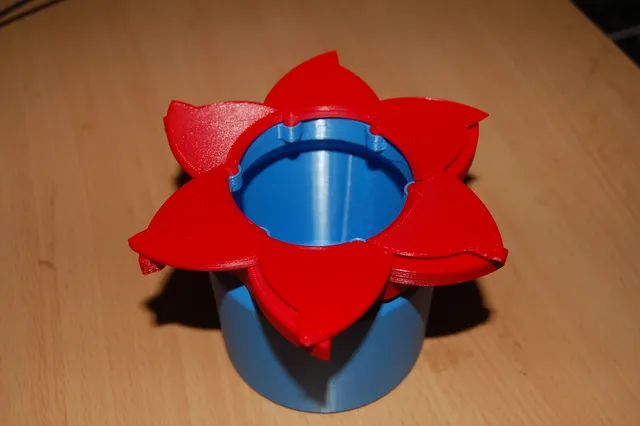
My first functional Iris Box with six rotating doors. This was first published on Thingiverse in 2017 and I have now moved it here. The box is opened and closed by turning the dimpled collar which moves the doors with connecting links. The box is printed in separate pieces which are then assembled and the hinges clip together. No supports are required for this print.Here's a print by marsgizmo:I have 15 other Iris boxes designs and I have an instructable describing them and how to print them.I have designed some improved versions of this box: Flower Iris Box V2 and Double Flower Iris Box.An interesting aspect of this box is that if the parts fit together well it can be opened with one hand. It is also strangely proficient at catching insects and spiders.Printing GuideThe unaltered STL files MUST be printed with a layer height of 0.3 mm for the hinges to work, as the hinges clip together using ridges which vary with 0.3mm layers. You can use variable layer heights in your slicer to print some of the part at a different layer height e.g. 0.2mm for higher print quality, while still printing the joint sections at 0.3mm.Some parts have two versions, 1 and 2 which correspond to 0.4mm and 0.3mm tolerances for the hinge parts. This is because the hinge dimensions can vary slightly depending on printer type, settings or filament used. You can also change the fit of the parts using extrusion flowrate adjustment and hole/contour xy compensation. InstructionsStep 1 Part TestingIt doesn't matter greatly if the link-to-door and link-to-collar hinges are a little loose, but it is important that the door-to-container hinges are a good fit, to hold the mechanism together.First print the container and door 1 and 2 and then test the door-to-container hinges by pressing them together slightly, but not fully. Take note of which door fits better (and change settings to adjustment the fit if necessary) , for me it was door 2. From experience it's better to have a part which is a little too tight than too loose, as it will loosen up over time.Step 2 PrintingThen go ahead and print all the parts required for the box:6x links6x doors1x collar1x containerPrint collar 1 if door 1 was a better fit for the hinges or collar 2 if door 2 was better.The bottom surface of the door while printing is the top of the box so make sure the first layer is very neat if you want a nice top finish for the box. You could use a raft for this which would also stop 'elephants foot' on the bottom of the door, making them fit together better during assembly. I would recommend a filament with good dimensional accuracy for printing such as PLA.Step 3 AssemblyTo assemble the box, firstly place the collar onto the container. Fit the non pointed end of the links to the collar, and pointing anti-clockwise around the box. This is important to get right otherwise the box won't open. Finally clip all the doors into place on the containers and links.Even within the same print, some of the hinges can vary. You may want to try different parts together to see which fit the best. Due to the overlapping nature of the mechanism, it helps hold the mechanism together if some parts are loose, it can also make adding the last door a bit tricky. The tolerances for the model assembly are 0.3mm.
With this file you will be able to print Flower Iris Box with your 3D printer. Click on the button and save the file on your computer to work, edit or customize your design. You can also find more 3D designs for printers on Flower Iris Box.